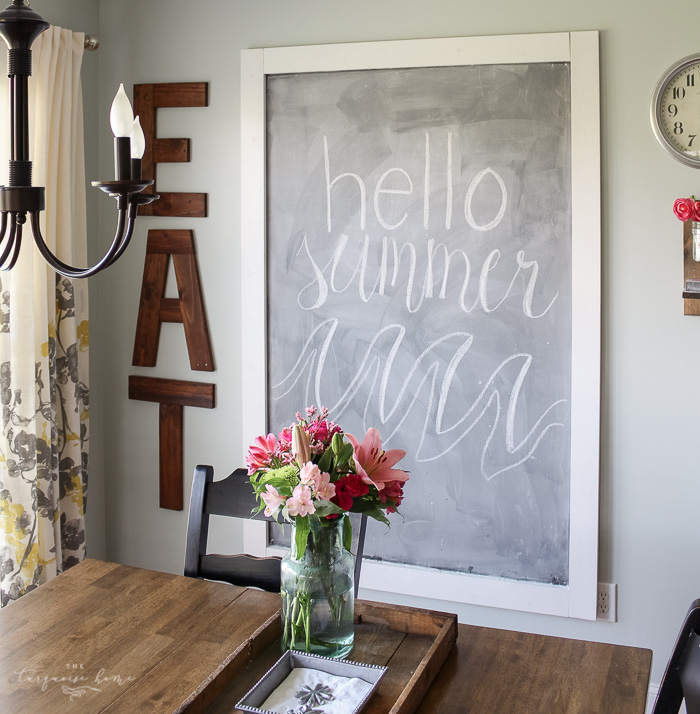
Make this easy DIY giant magnetic chalkboard with just a few tools and a bit of time. Perfect for inspirational or seasonal messages!
I'm so excited about this project, because I've been wanting one of these since I saw Jess's kitchen over on The Macs back in October. I adore her huge chalkboard. Isn't her house the cutest thing??
Then later in the fall, a friend and I were out shopping at the neighborhood-wide yard sale, and I bought a can of chalkboard paint for $2. Yay!
I got a bit more serious about the project and went hunting for a tutorial. I found this one.
If I hadn't read really carefully, I would have missed that Jess's chalkboard is actually magnetic, too! What an awesome idea. And did you know they sell magnetic primer at your local hardware store? They do, and you just paint it under the chalkboard paint and the surface becomes magnetic.
This was a great discovery for me, because I don't have a magnetic refrigerator. So I thought this would be the perfect home for Miss A's magnetic letters and numbers that have no place to live. It didn't quite work out as I'd planned, though. Keep reading...

Supplies to Make a DIY Giant Magnetic Chalkboard
OK, these are the supplies I used:
- 4 x 6 Masonite/hardboard in 1/8 inch thickness (I had them cut two feet off a 4 x 8 board. The hardware store did this for free.)
- Rustoleum magnetic primer paint (or any other primer if you don't want it to be magnetic)
- Chalkboard paint
- 1 – 1×4 at 8 feet long (I had the hardware store cut this into two 4-foot pieces so it would fit in my van more easily.)
- 2 – 1×4 at 6 feet long (or you can use any type of molding for the frame)
- Chalk
- 2 D-ring hangers
- 1/2 inch screws
- Nails
- Level
- Circular saw – This is the one I have. It's small and great for little projects!
- Paint for the frame
- Wall anchors
This is how I had the wall decorated before. It's just begging for a huge piece of art or a chalkboard, don't you think? I wouldn't want a wall that big to go to waste.
Steps for Making a Giant Magnetic Chalkboard
1. Paint the Masonite or Hardboard with Magnetic Primer
I brought the hardboard in and nailed it to the wall. I thought it would be easier to paint it on the wall than to crawl around on the floor.
I taped newspaper behind the board to protect the wall.
I was super excited about the magnetic primer. I'd read online reviews saying to stir it really well before and during painting. This makes sure the magnetic particles are mixed throughout the paint.
So I stirred it thoroughly and painted four thin coats. I used every last drop of this paint, hoping the magnets would stick well.
But once it was dry, my smaller magnets didn't stick at all. They just slid down the board. Boo. It does hold larger magnets, though. I'd have to buy some pretty big magnets if I want to hang anything on the board. Bummer. So unless you really, really want a somewhat magnetic board, I'd skip it and just use regular primer.
2. Paint the Board with Chalkboard Paint
Once the primer dried, I waited four hours and then painted two coats of chalkboard paint.
3. Season the Chalkboard
I had to wait 24 more hours before I could season the chalkboard.
To season or cure the chalkboard, rub the side of a piece of chalk all over the board the first time you use it. Otherwise, the first thing you write will stay there permanently. Trust me... it's a messy job. I think everything in my kitchen ended up with a fine layer of dust.
4. Cut the Boards for the Chalkboard Frame
Once I'd finished seasoning the chalkboard, I took it off the wall. I laid it on the garage floor to measure the trim. The 6-foot pieces worked perfectly for the long sides.
I just had to cut a few inches off the 4-foot pieces for the top and bottom using my circular saw. I didn't do miter cuts since my saw is still out of commission.
5. Paint or Stain the Frame Pieces
Once the frame was cut to size, I brought the four pieces inside and painted them with some old white trim paint I had on hand.
I used push pins to hold the boards a little off the table. That kept them from sticking to the paper while the paint dried.
6. Attach the Frame to the Chalkboard with Screws
Once the boards were dry, I placed the unpainted side up on the floor.
Then I set the chalkboard on top and screwed it into the frame.
7. Attach Hangers to the Back of the Chalkboard and Hang it Up
I screwed two D-ring hangers into the back so I could hang it on the wall.
I used these heavy-duty drywall anchors to hang the chalkboard on the wall!
And there you have it, folks! My very own giant magnetic chalkboard. I'm so glad it's finally done.
It cost me about $50 for everything. (The magnetic primer was $20, so if you skip that, the price drops quite a bit. And I only paid $2 for the chalkboard paint at a yard sale.)
I quickly wrote one of my favorite verses on the board. I need to work on my handwriting, and I plan to change it up quite a bit with some prettier lettering.
I'll have to spend some time learning chalkboard calligraphy. :) The possibilities are endless, and I can't wait to use it in so many different ways.
More Posts You Will Love: