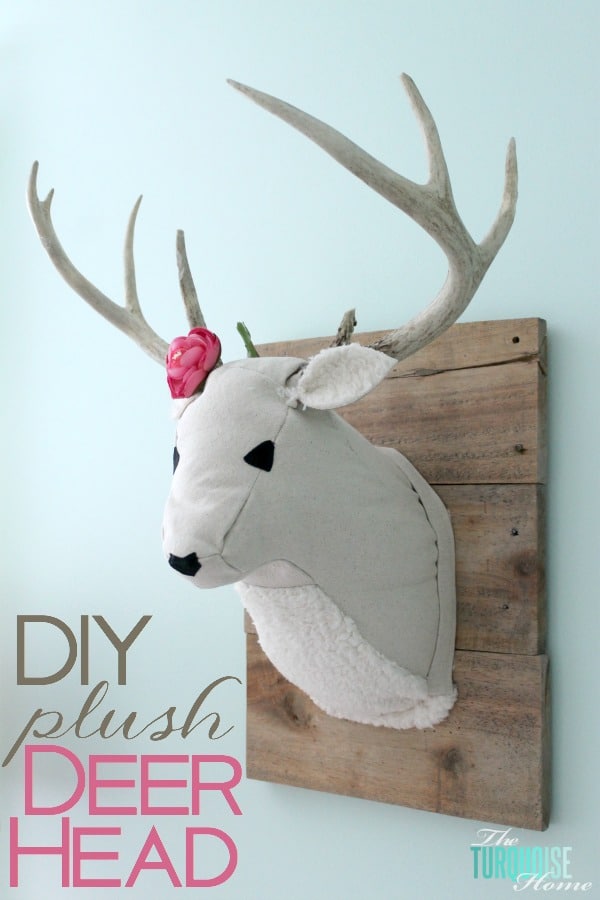
When I first started dreaming up sweet Baby G's woodland nursery, I fell in love with the idea of a plush faux deer head in her room. I saw several online that I liked, but they were either sold out or too expensive.
I spent several weeks searching for just the right deer head. I even considered buying a plush deer, cutting off the head (morbid, I know), and mounting it myself. After a while I kind of gave up on the idea, until one day I found an awesome DIY tutorial at Liz Marie Blog!
I kept this idea in the back of my mind, knowing that someday I'd make one for my sweet girl's nursery. And I finally finished it this weekend! Yay!! And let me tell you... this was a labor of love.
I figured having the free template and tutorial would make this project a walk in the park. Not so much. I thought making the plaque and attaching the antlers would be the hardest part! Ha!! Getting pieces of fabric to look like a deer was by far the toughest. But now that I can step back and look at it, the extra special handmade touch is all worth it!
What you'll need:
1. Set of real deer antlers
2. Drill and screws
3. Wood for the plaque and stand (I used 1×4 reclaimed barn wood for the plaque, lattice trim to hold the plaque together, and scrap 1×2 and 1×3 pieces for the stand)
4. Wood glue
5. Brown fabric (I used drop cloth canvas.)
6. Faux white fur fabric (I found mine at Hobby Lobby.)
7. Black fabric (I cut up an unused black bag, because I only needed a little.)
8. Poly-fill stuffing
9. Staple gun
10. Needle and thread
11. Hot glue gun
12. Optional: wood stain for the plaque
13. Template from Liz Marie Blog
Let's start with the most important element: the real deer antlers. My hubby is a hunter, and he took this buck when Miss A was a baby. He cut off the antlers and had them sitting out in the garage. So when I asked if I could use them for a project, he was happy to see them put to good use. If you don't have a pair of antlers lying around, maybe they're sold online somewhere? Not sure, but hopefully you can snag a set.
Then I used some reclaimed old barn wood for the plaque. My brother-in-law gave me this wood a few years ago, and I've been holding onto it for just the right project. I stained it with a little weathered oak stain by Minwax. It gives the project a bit of an old, weathered look.
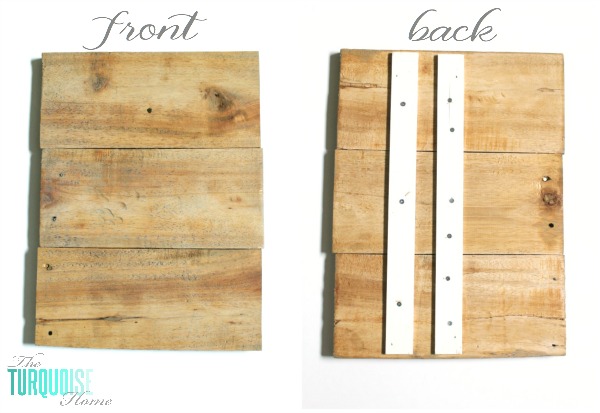
I attached the boards together with some lattice I had lying around. I didn't buy any new wood for this project. I just searched my wood scrap pile and found what would work. I love it when that happens!
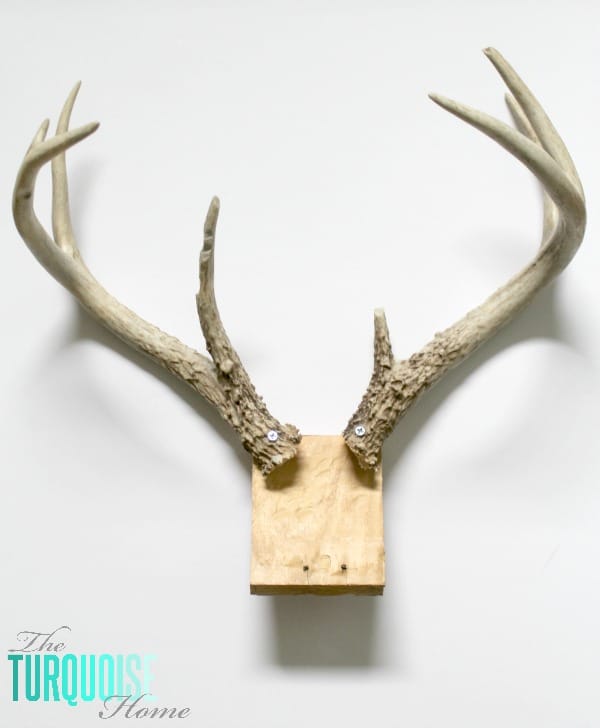
I grabbed a 4″ x 3″ piece of 1×3 and used it to screw in my antlers. Since antlers are bone and very hard, you have to drill a pilot hole through them before screwing them into the block. I can say the smell of drilling into bone is one I hope never to smell again. Yuck! It took me a while to figure out which direction to place the antlers, because I wanted them anatomically correct once I finished. I think they turned out pretty close.
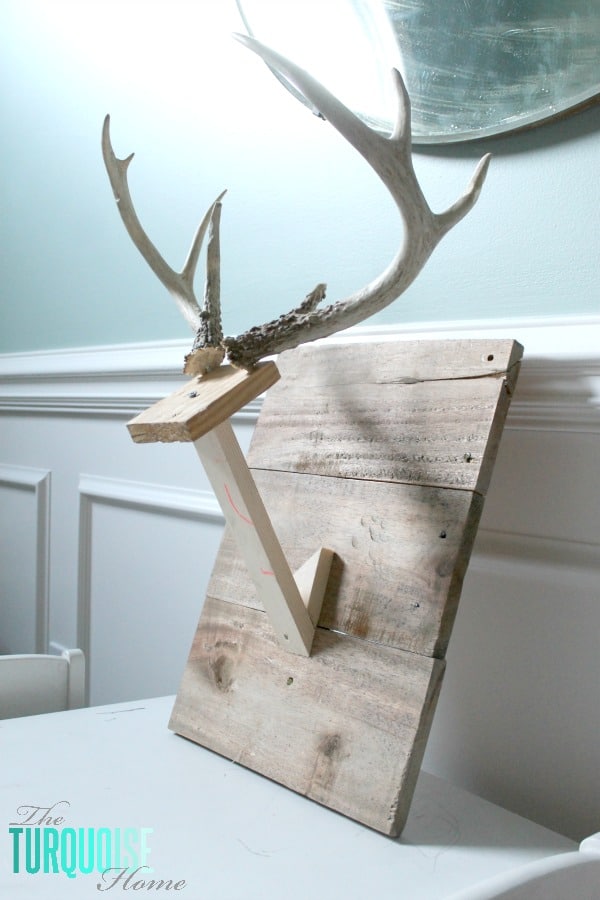
Then I cut my 1×2 board at a 45-degree angle. It's about 10 inches long from one end to the other. I cut another scrap piece of wood at a 45-degree angle to prop up the longer piece. I used generous amounts of wood glue under both pieces and then screwed them in. When they were dry, I screwed on the block with the antlers attached. I'll admit it sat like this for a few weeks. I was a little nervous about the next part…
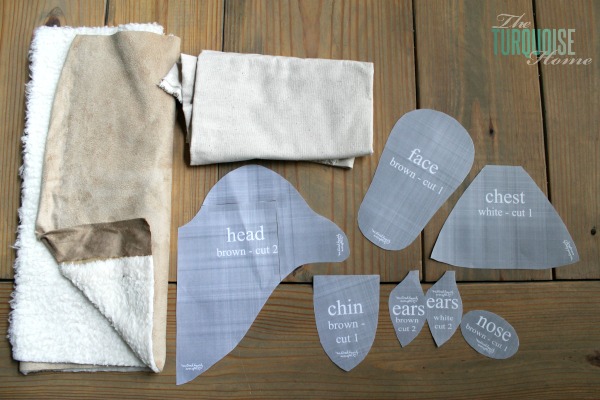
Finally, I mustered up my courage, pulled out my fabrics, and printed the template (found at Liz Marie Blog). I cut out my pieces and started sewing them together. You'll have to follow all the sewing steps at Liz Marie Blog, because I didn't document them here.
I will say I had to do this step twice. Either my stand was too big, or the template is a little off, because the head pieces and chest piece were too small. I had to make them longer so they would reach the stand for me to staple them down. You'll see what I mean in the next few pictures.
I also had to change my fabrics. The first fabric I tried is the light-colored one in the picture above. It was too thin and unraveled at the seams. So I tried drop cloth I had on hand. It was thicker but was also unraveling at the edges. I found a way to fix that and posted about it HERE.
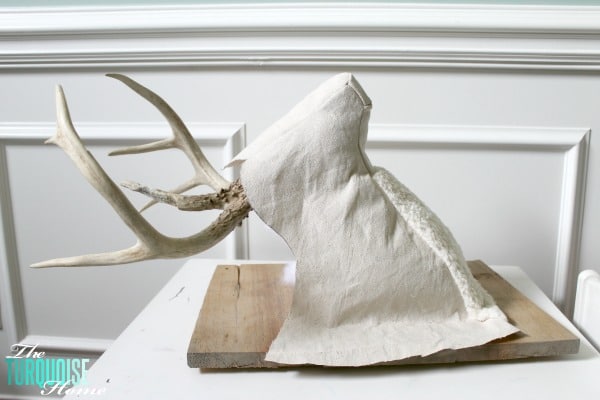
Once I had the face all sewn together, which was no simple feat (it took me several nights of sewing to get it right), I placed the head on the stand and stuffed it with some poly-fill. You can see in the picture above that I had to extend the fabric a little (or a lot) longer than the template for the face and chest pieces, so they'd give me enough room to staple them down onto the plaque.
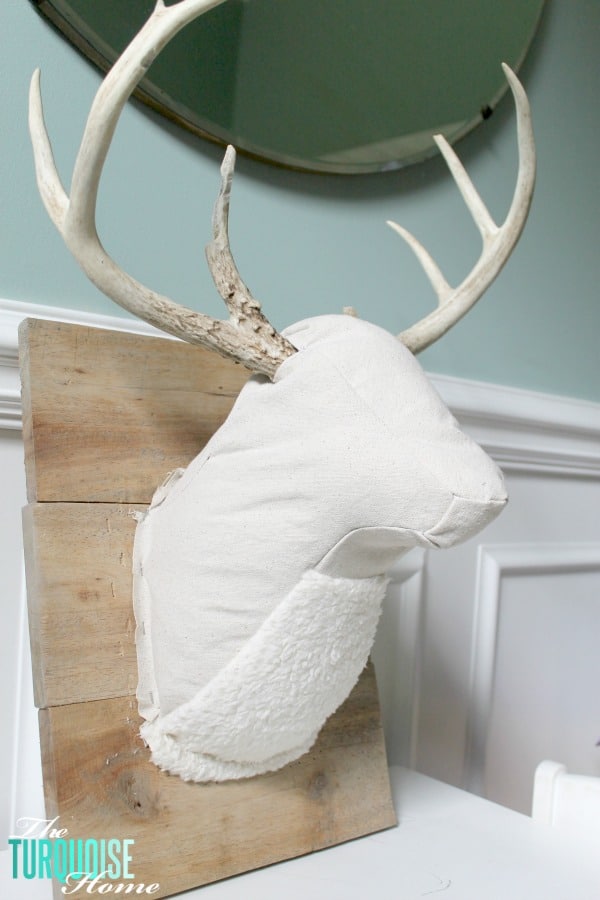
I stapled the sides down first, then cut a piece to go over the back of the head and sewed it on. There's no template for this piece, because the size depends on how much you stuff your deer head and a few other factors. Then I stapled the back piece down, too. It's getting close to finished!
The last three steps are to cut a long strip of fabric and cover the stapled edges. I folded the strip over three times, ironed it to hold it in place, and then hot glued it around the edges. Then I cut pieces for the nose and mouth and glued them on with craft glue. Finally, I attached the ears. I started to sew them on, but by then I was ready to be done, so I hot glued them on. Haha!
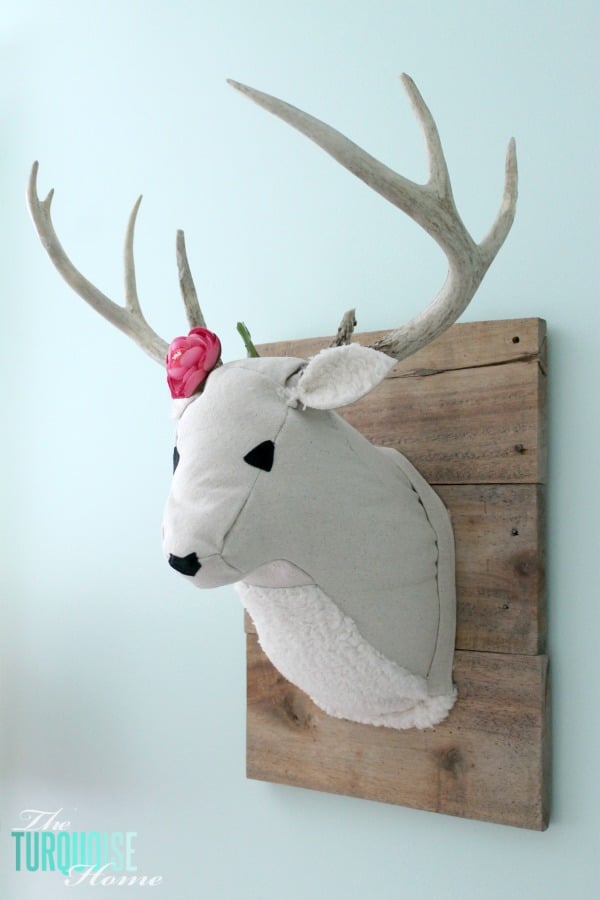
Add a cute little flower for a girl's room, or leave it blank for a boy's. Isn't she so cute??
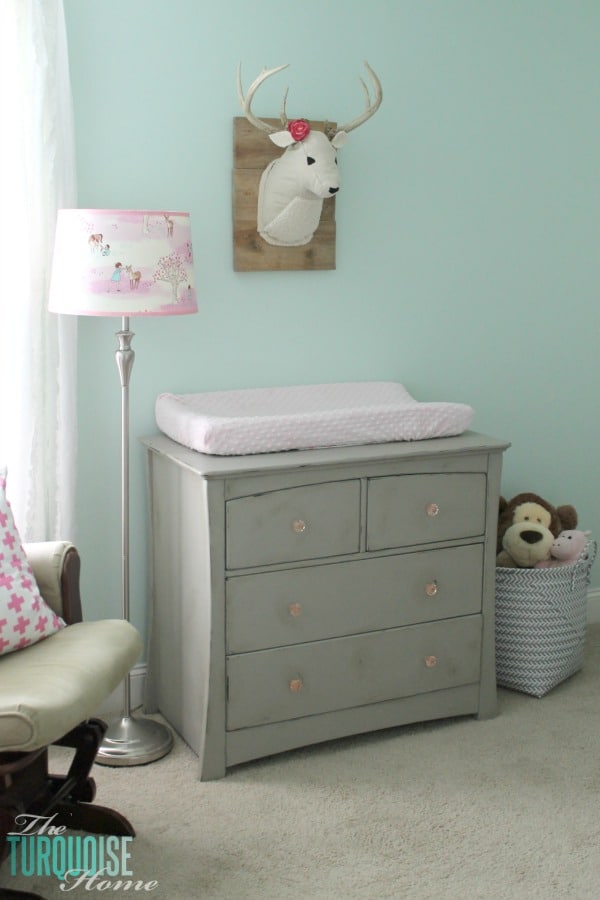
I just love it over the changing table, where Baby G can look up at her while she's getting a fresh diaper.
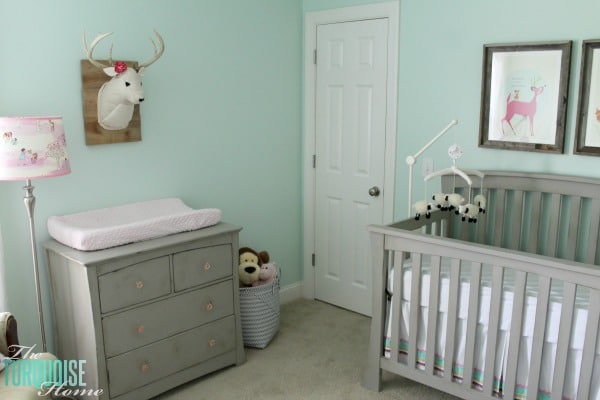
You can peek at this corner of the room, which is mostly done. I still need to hang some art on the other walls and finish one more small DIY project, and then we'll call this room complete! Maybe it'll be finished by the time she's 6 months old.
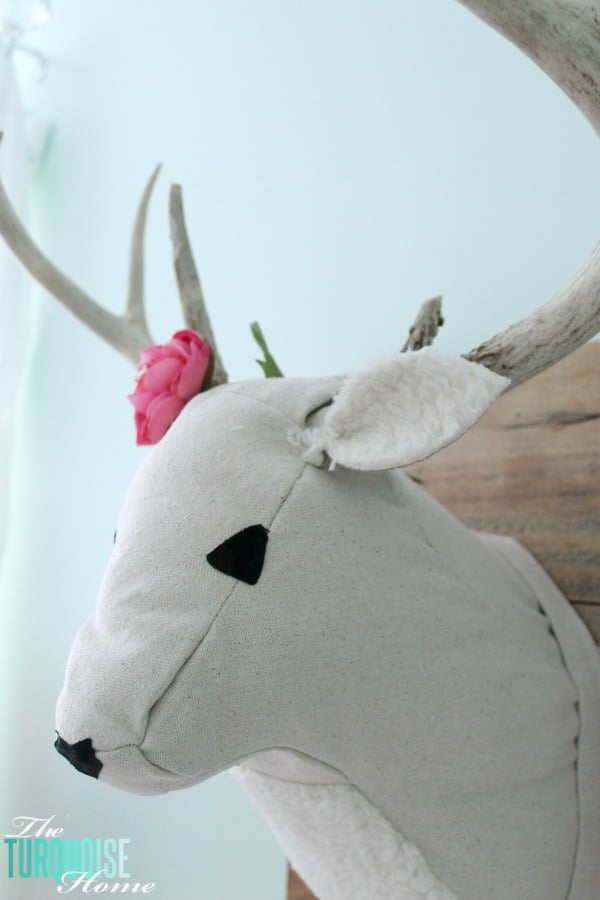
As you can see in this close-up, Miss Deer isn't perfect, but she's lovingly handmade. And I think those little touches are the best kind. (At least that's what I kept telling myself when I got frustrated during the process.)
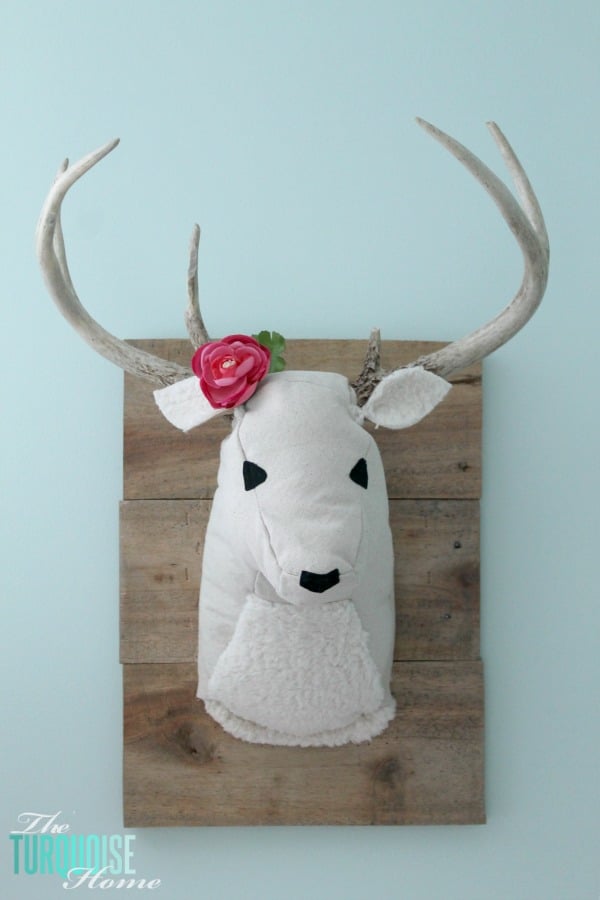
What do you think? I think I'm in love.
Find more projects from Baby G's nursery HERE. See the original vision board HERE.
More Posts You Might Like: