Find out how we turned a narrow closet with wire shelves into plenty of storage using the IKEA Pax closet system. I share my honest take on our delivery and DIY installation.
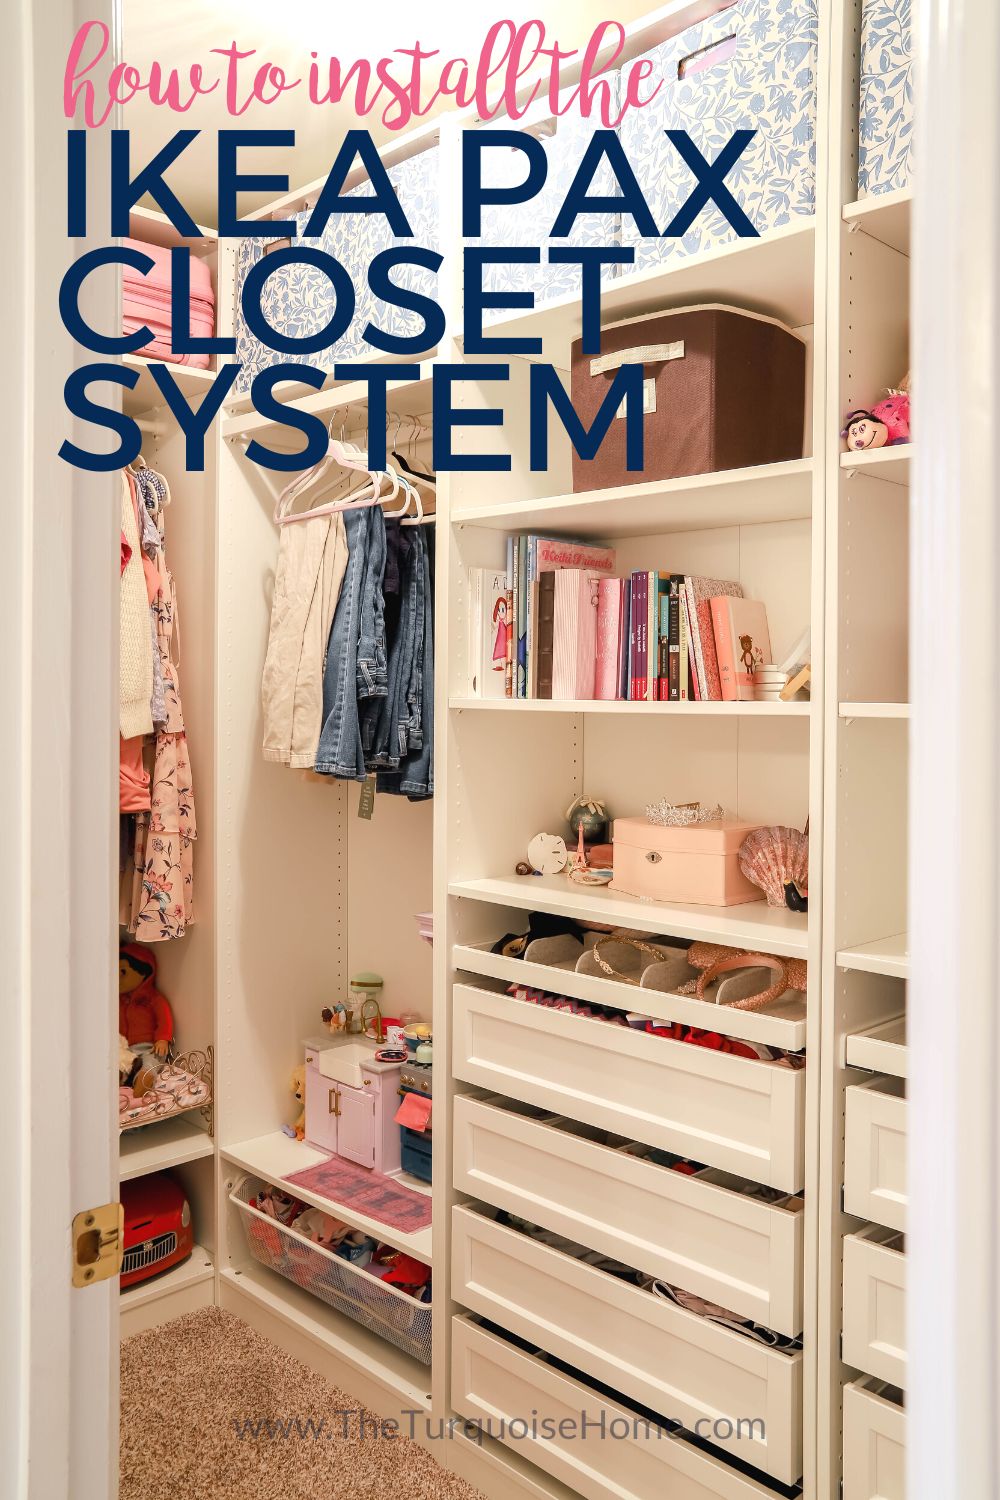
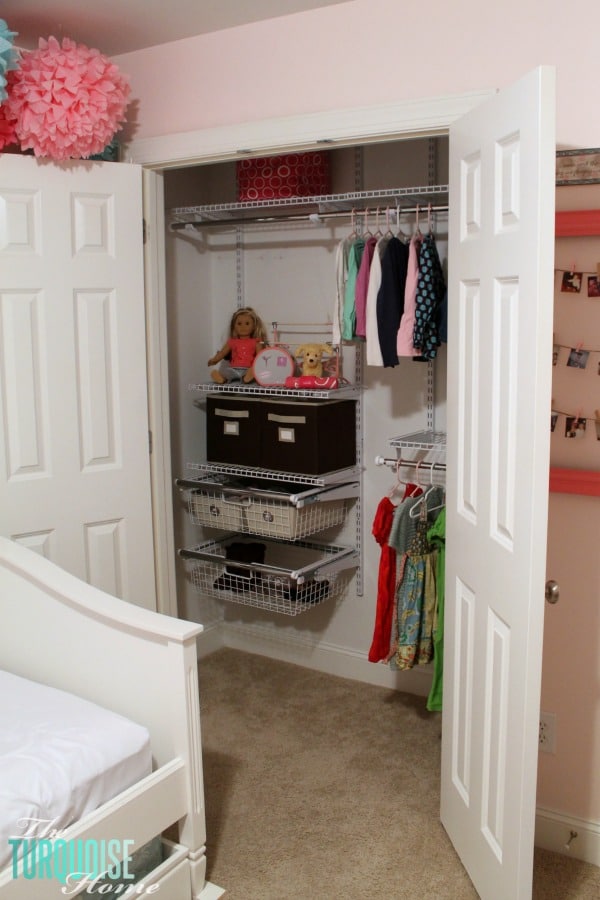
Our daughter has one of the best closets in our home. It measures 10 feet deep and nearly 5 feet wide, so there is plenty of room for storage! The trouble was that it had two flimsy wire shelves and hanging rods along the long wall, plus a single wire shelf with a hanging rod on the short wall. It was always messy and never held much.
Wire shelving has its place, but in my view it should be skipped in almost every bedroom closet. Sadly, we have it in every closet in our home, so we plan to redo them over the next few years.
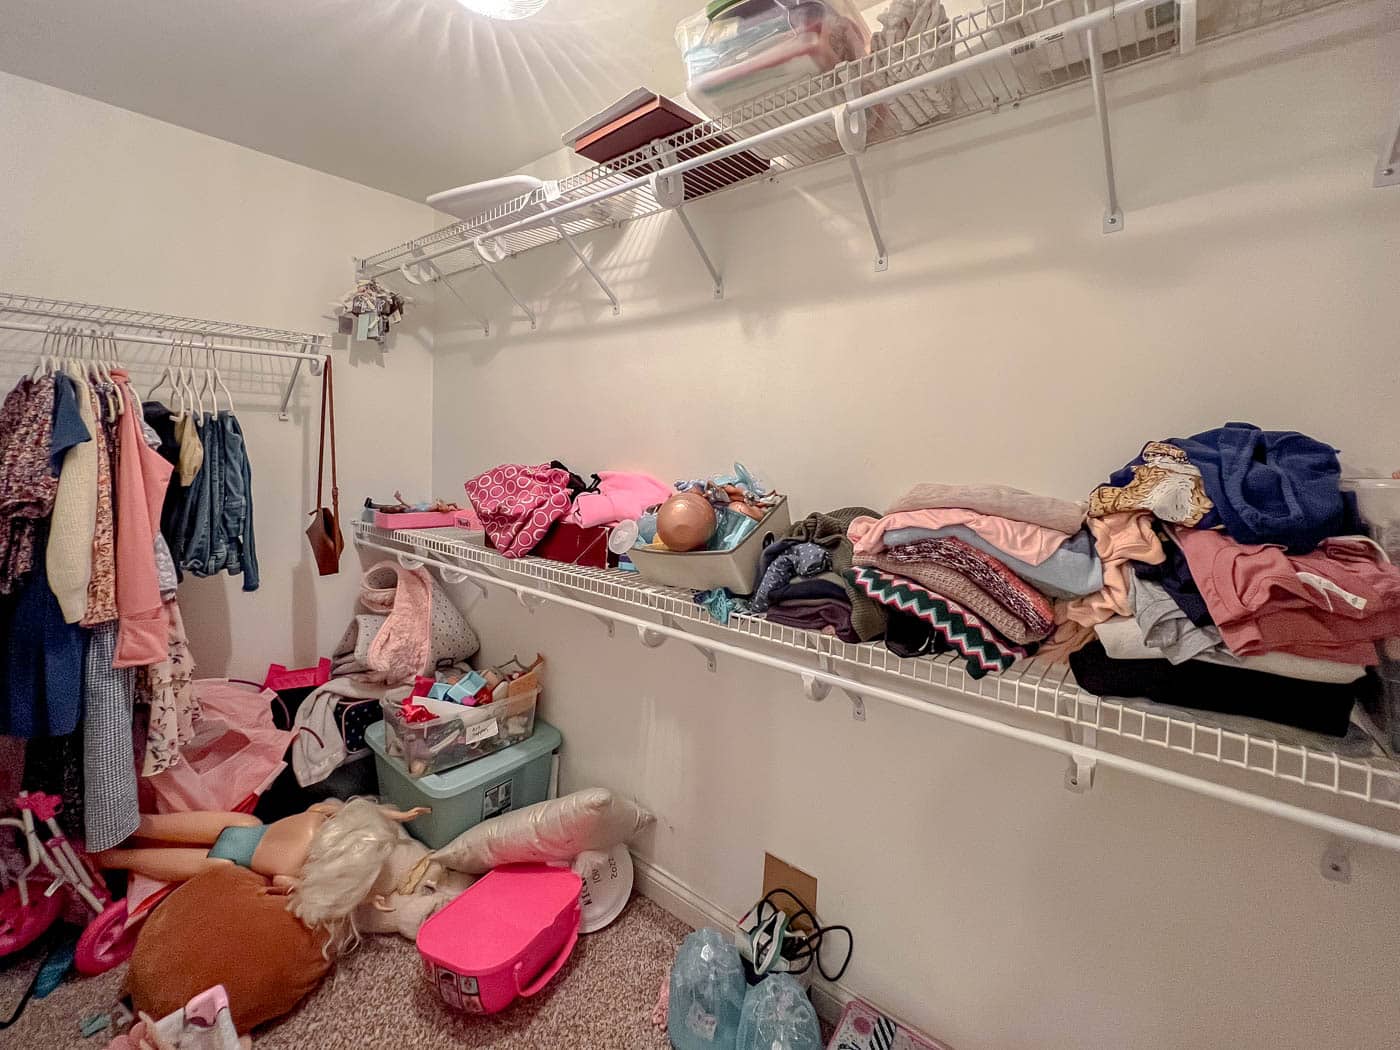
This is how it looked originally with her things inside. You can see how underused her walk-in closet was. All that hanging space wasn't needed. She needed drawers and shelves!
Her closet came first mainly because I needed her dresser for her sister. I knew her closet was big enough to hold all of her clothes and then some. I just needed to get the right system in place.
My idea was that if all of her clothes fit in her closet, it would free up floor space in her room, and her sister could have a free dresser. Ahh, yes, hand-me-downs are wonderful!

Choosing the Right Closet System
My goal in choosing a closet system was twofold: I needed something that made good use of the space and left no dead corners. My second priority was to find the best value for our budget. We wanted something inexpensive but well made.
There were no odd corners, windows, or multiple doors to work around, so I didn't think we needed anything highly customizable. The IKEA Pax closet system fits that bill nicely!
When it came to budget, the Pax closet system won out there, too.
I had seen some amazing transformations with the IKEA Pax closet system, so it went onto my shortlist. Pax is a fully customizable system with great storage options, yet it costs far less than the custom closets I priced from The Container Store, Easy Closets, or California Closets.
I have used the Elfa closet system from The Container Store in my garage, so I know that product well. This time, though, I wanted a more economical solution.
In the end, if your closet doesn't need major customization and you want a less expensive option, this could be the right choice for you too!
Before You Start
There is some groundwork to do before you even begin designing your closet organizer.
The biggest job is measuring the wall space once, twice, or even three times. You really don't want to get the measurements wrong.
Also, make a note of any fixed features such as lights, light switches, windows, electrical outlets, and doorways. Some of these can be moved if you need them to be. If you'd rather avoid a major project, you can usually plan around them.
I nearly made a costly mistake by ordering the wrong depth of closet. The set I first picked would have run into the light fixture. Thankfully, I measured again before ordering and chose the shallower depth, and it was perfect!
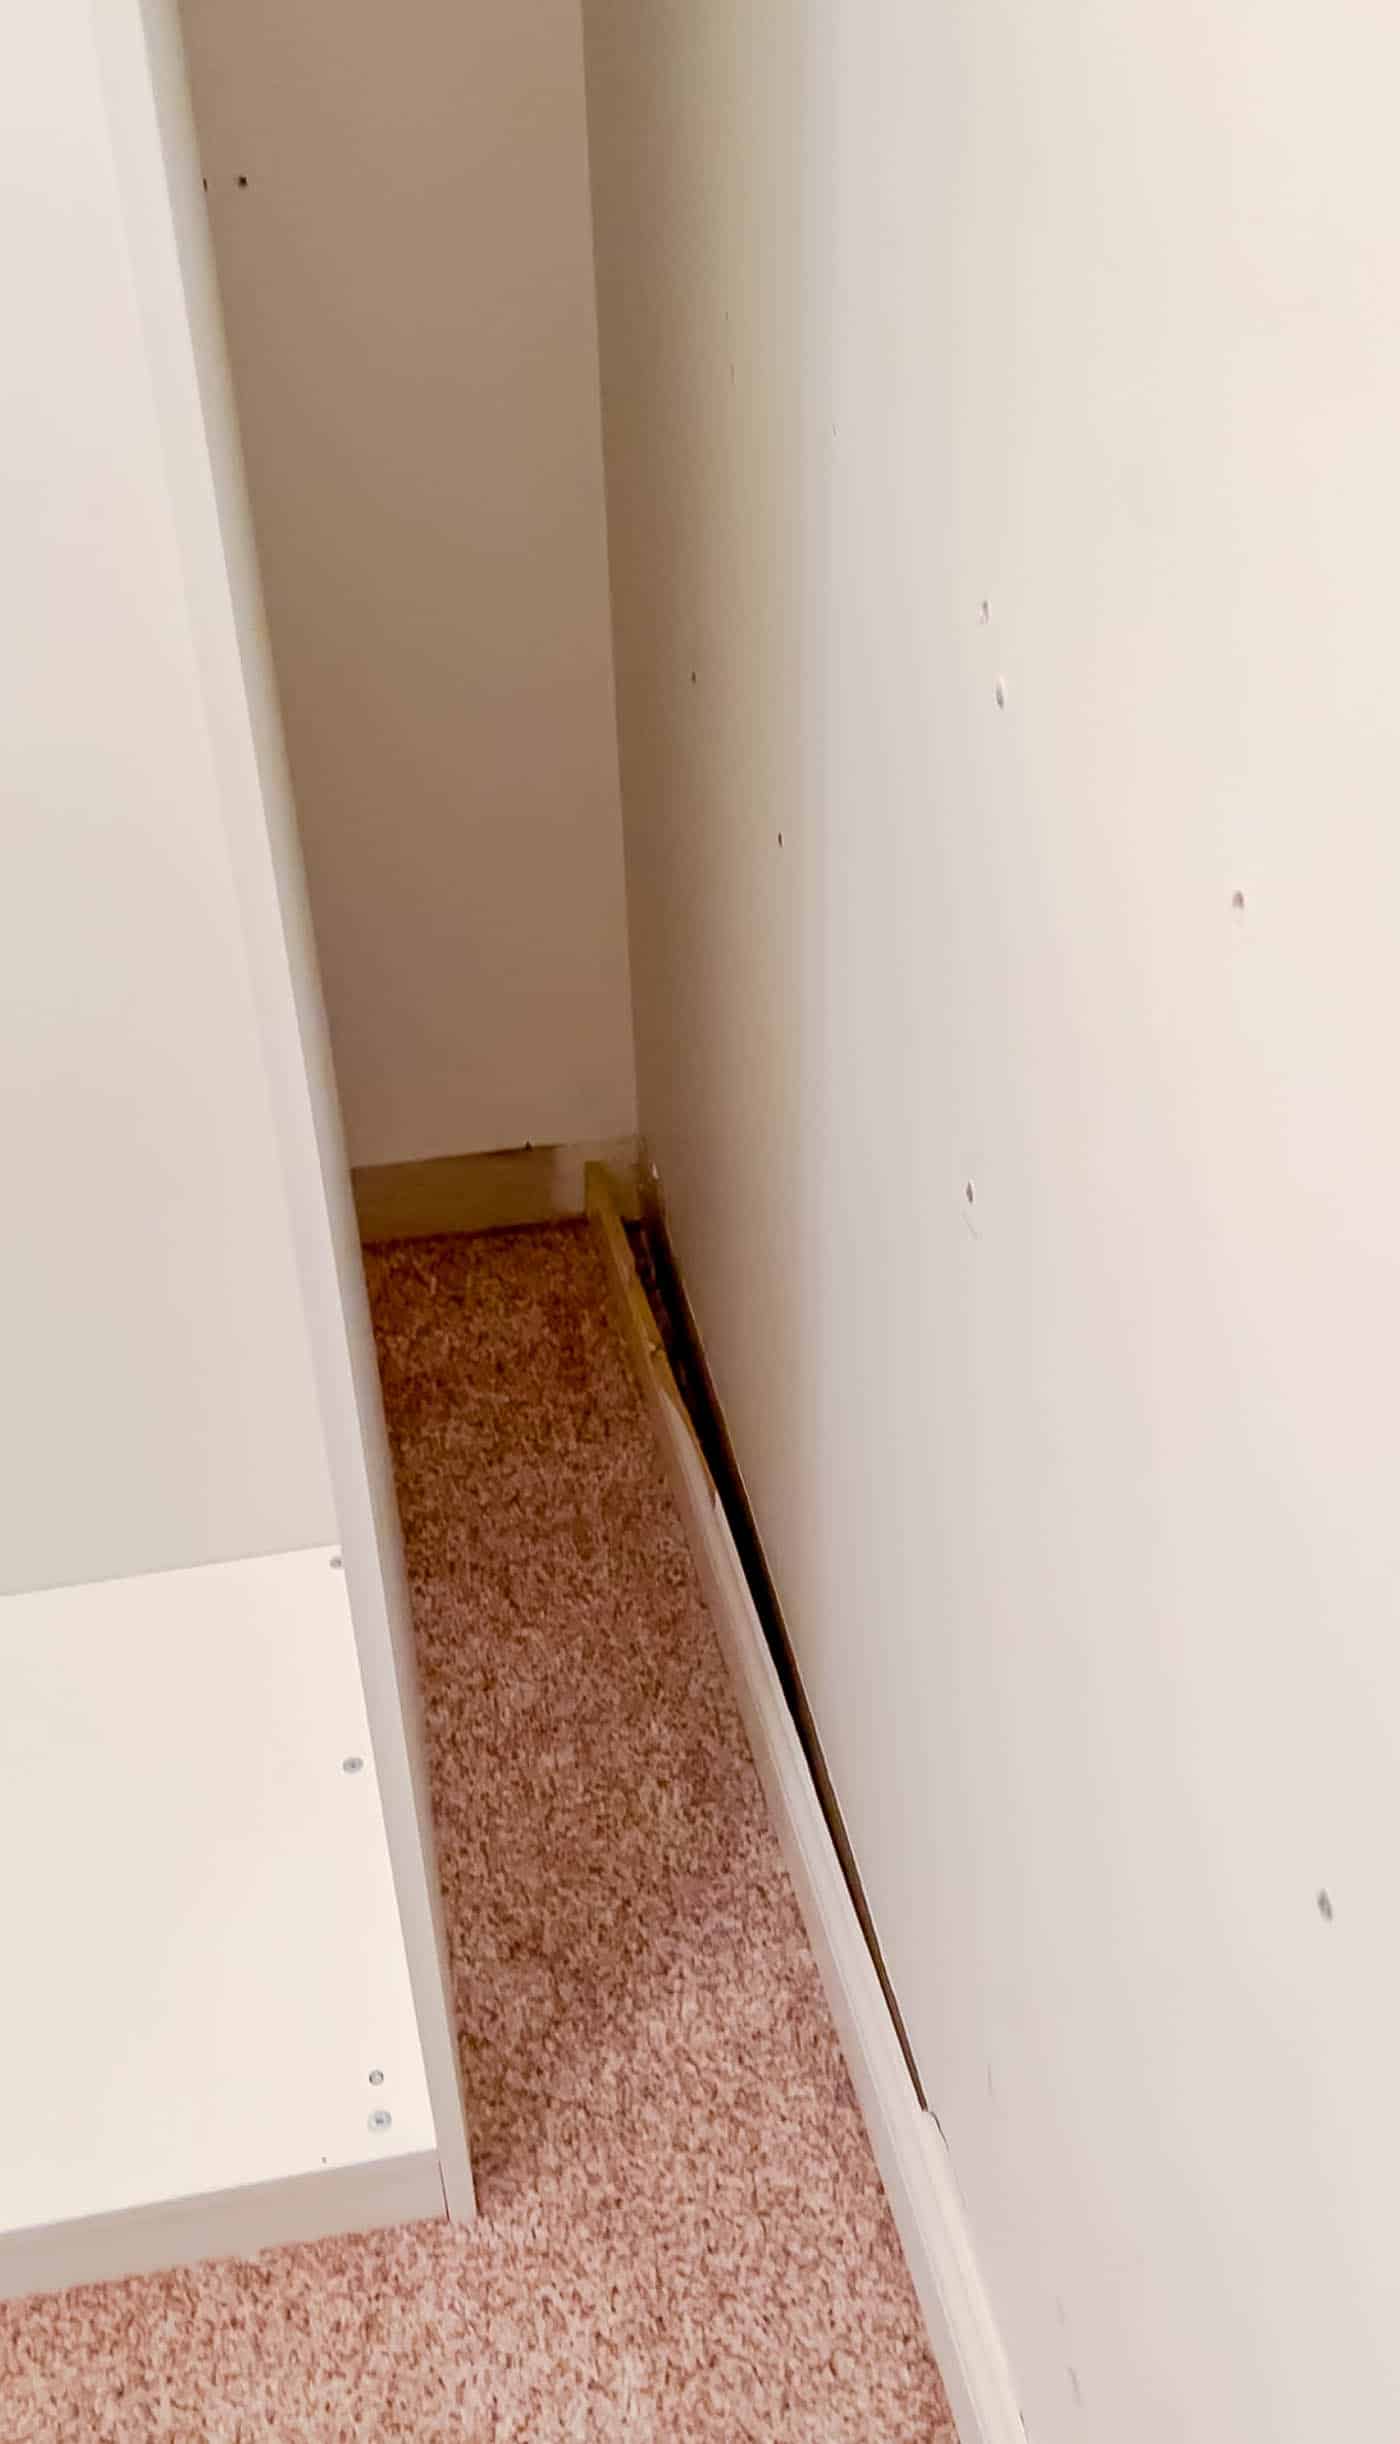
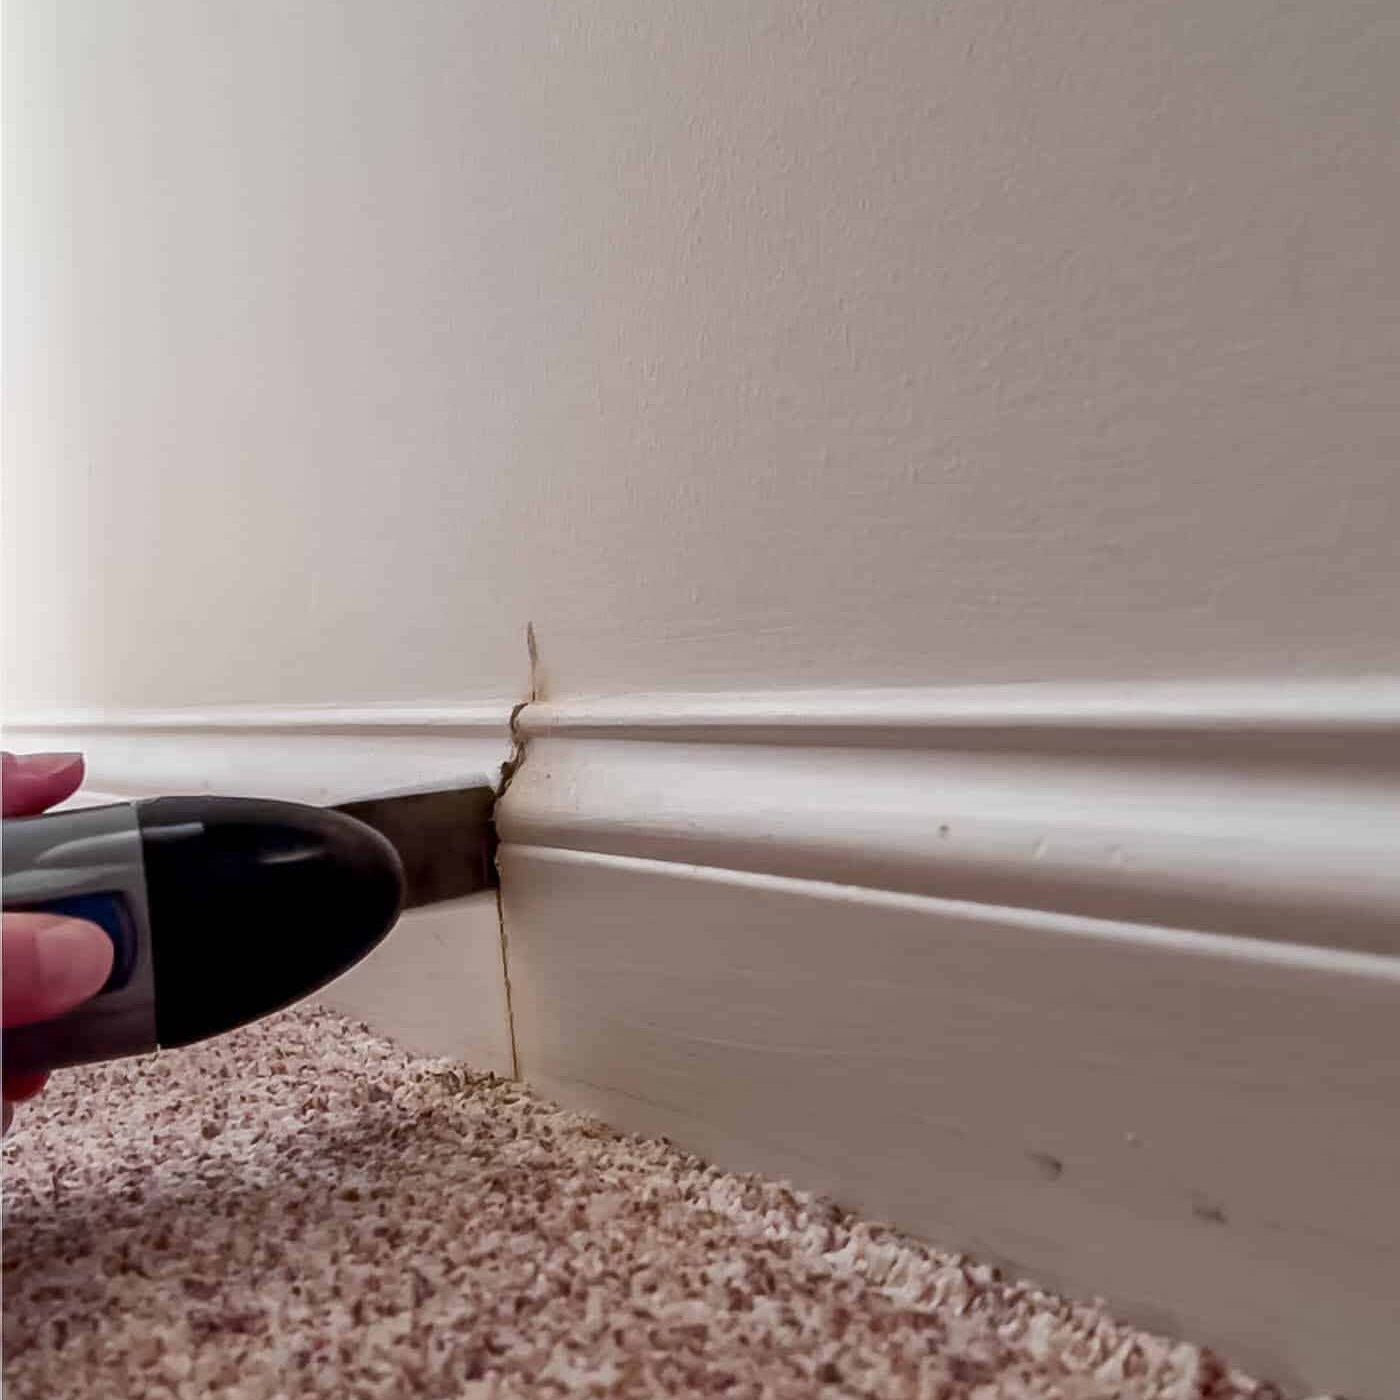
I also removed the baseboards behind the spots where the PAX wardrobe frames would go. I built the frames first, though, so I could mark the baseboards at exactly the right spot before cutting them.
The PAX Closet Planning Tool
IKEA offers a helpful PAX closet planning tool that lets you "see" the closet before you order it. I went through several versions before I settled on a final design.
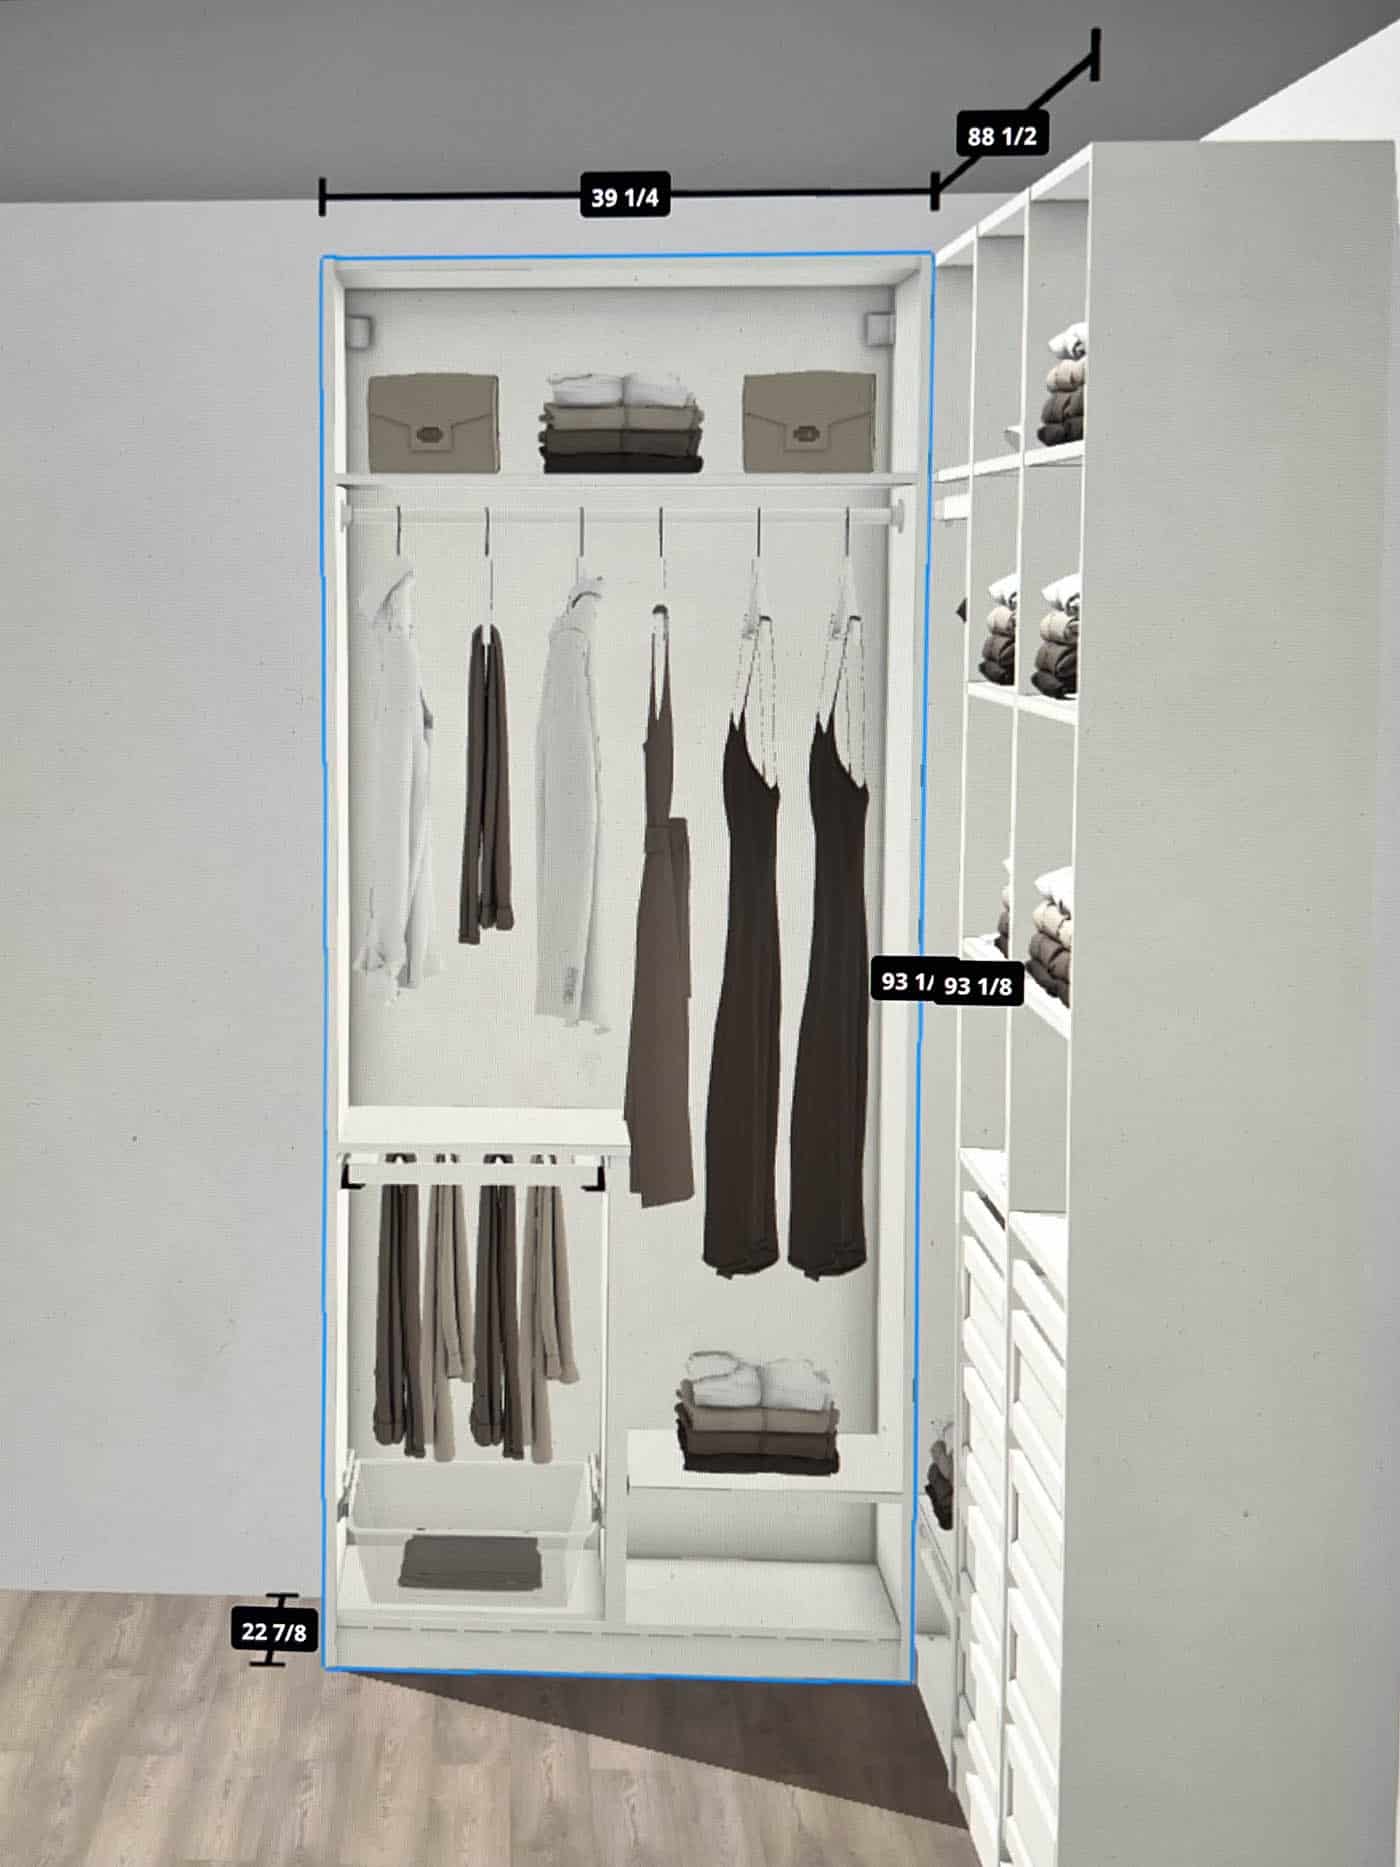
The closets are built on IKEA's PAX wardrobe frames, which come in 3 widths, 2 depths, and 2 heights. We have 8-foot ceilings upstairs, so we chose the 93 1/8-inch height frames.
For the back wall of the closet, we picked the 22 7/8-inch deep frame, while on the long wall we chose the 13-inch deep frames. With only 5 feet of width in the long closet, the shallower frames just made more sense. We wouldn't have had enough room to move around if we'd gone with the deeper frames on that wall.
Once you're in the PAX planner, you can enter the room measurements and it will suggest layouts. When I was making my plans, there wasn't a corner option, but there is one now. It helps you figure out the most efficient way to handle a corner.
This is the final design for the back wall of her closet. I wanted room for hanging longer dresses and a pull-out for pants.
The long wall design came out like this, with more hanging storage, lots of shelves, and plenty of drawers. It's fairly simple, but it has tons of storage space!
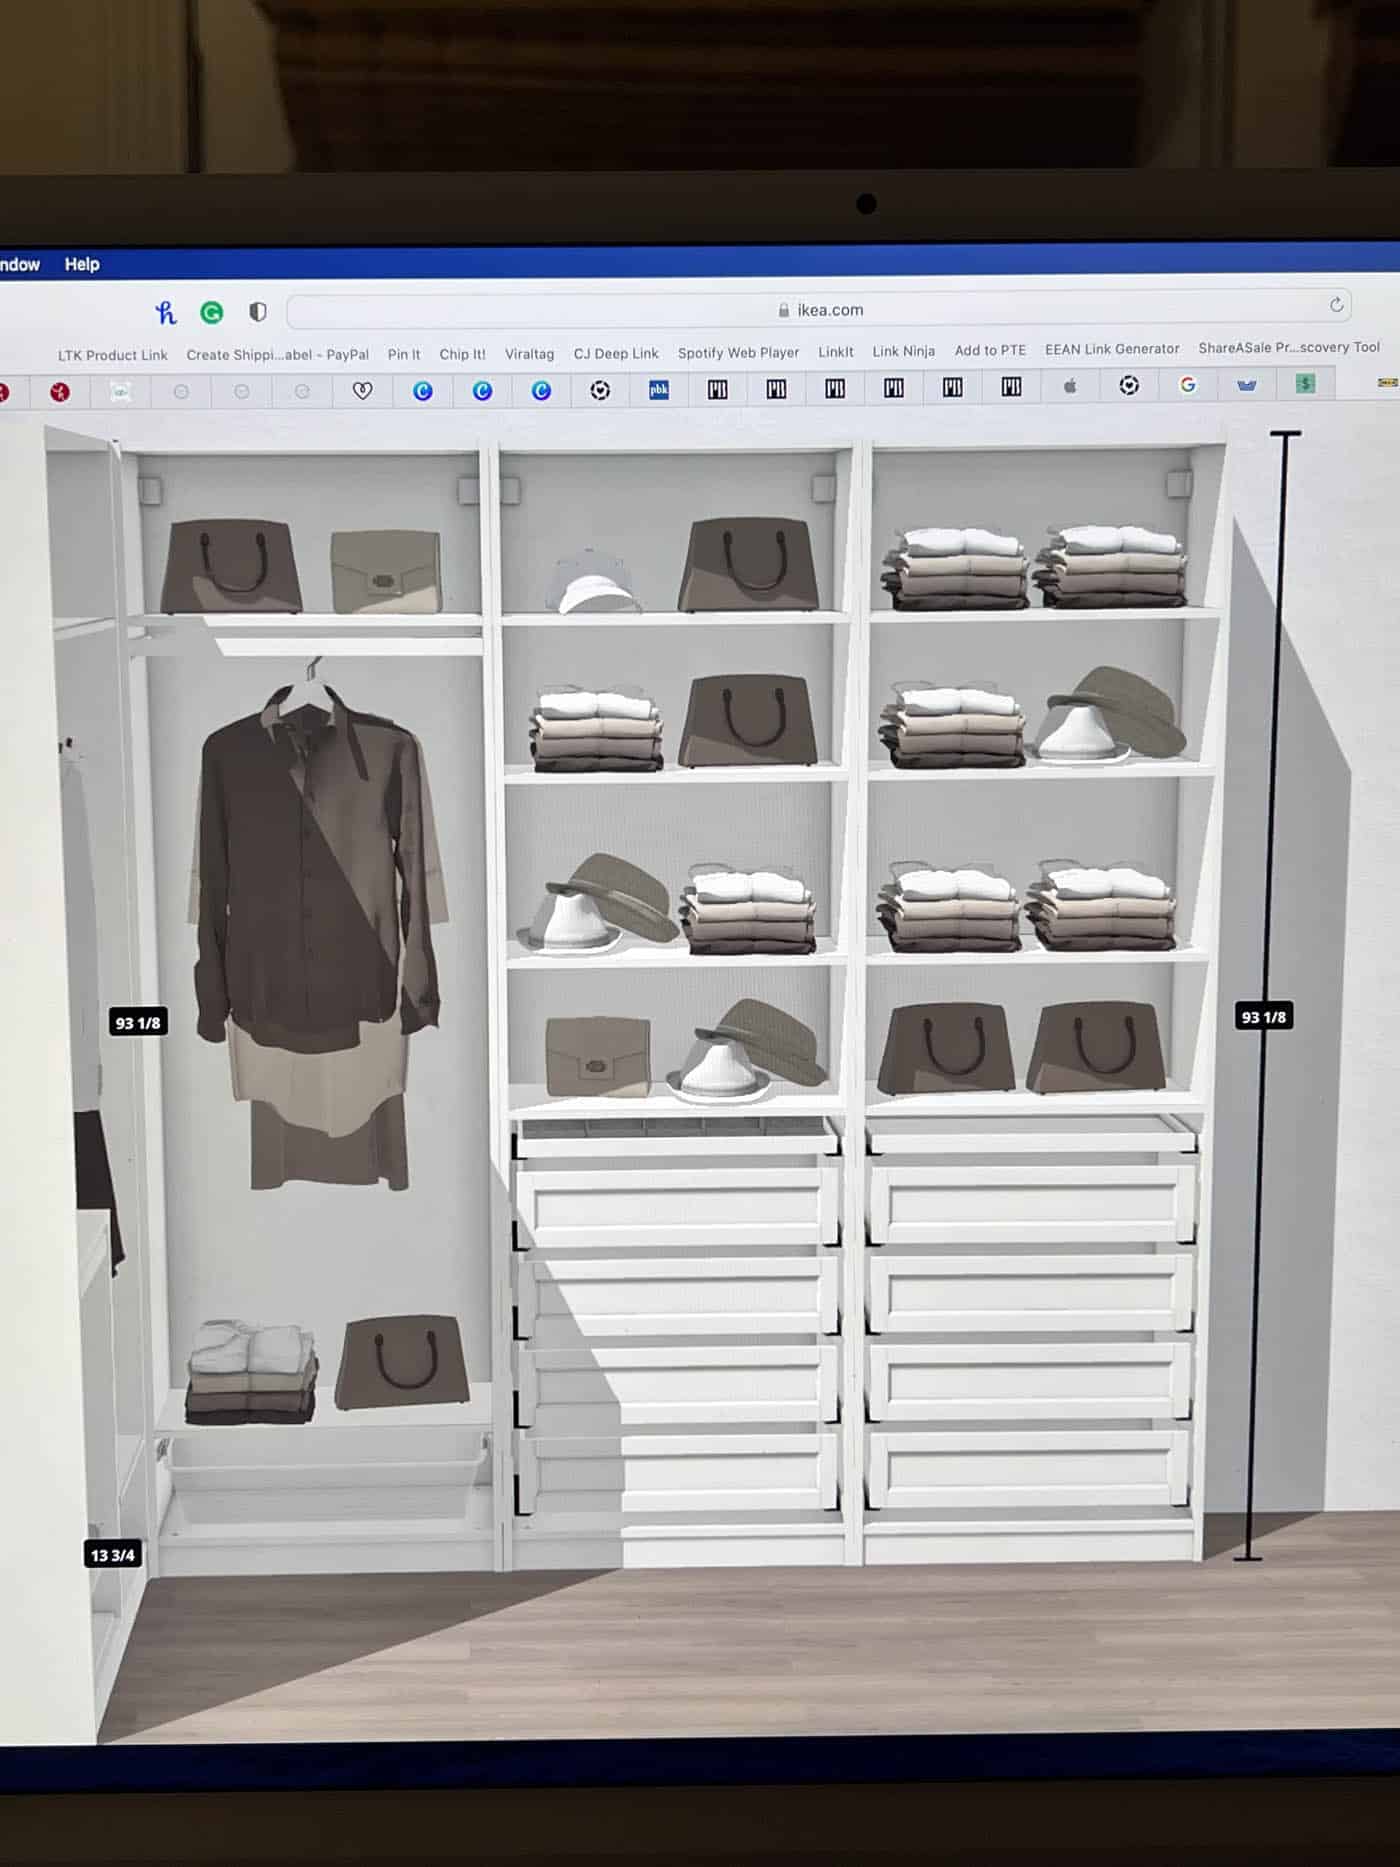
As you can see, we used one 39 1/4-inch wide frame on the short wall and three 29 1/2-inch wide frames on the long wall. I could have filled the whole space, but I wanted a little room at one end for a clothes hamper. No regrets!
Building the Closet Frames
I've put together a lot of IKEA furniture over the years, and it's usually pretty self-explanatory. But if you haven't built IKEA pieces before, be warned that the instructions are all pictures, with no words. Read through every step before you start.
Take it slowly with the first frame until you get into the groove. I started out too fast and installed the back panel backward on the third frame. I wasted time undoing it and starting over.
Grab a helper and it will go even faster!
Tools You Will Need:
- Hammer
- Drill
- Level
Pay close attention to your ceiling height and whether you can build the frames flat on the floor or stand them up. I had enough ceiling clearance to build them on the floor, but I ran out of floor space after the first two were built.
So the last two had to be built standing up. We also had to build them all inside the closet, since we couldn't have moved them in fully assembled.
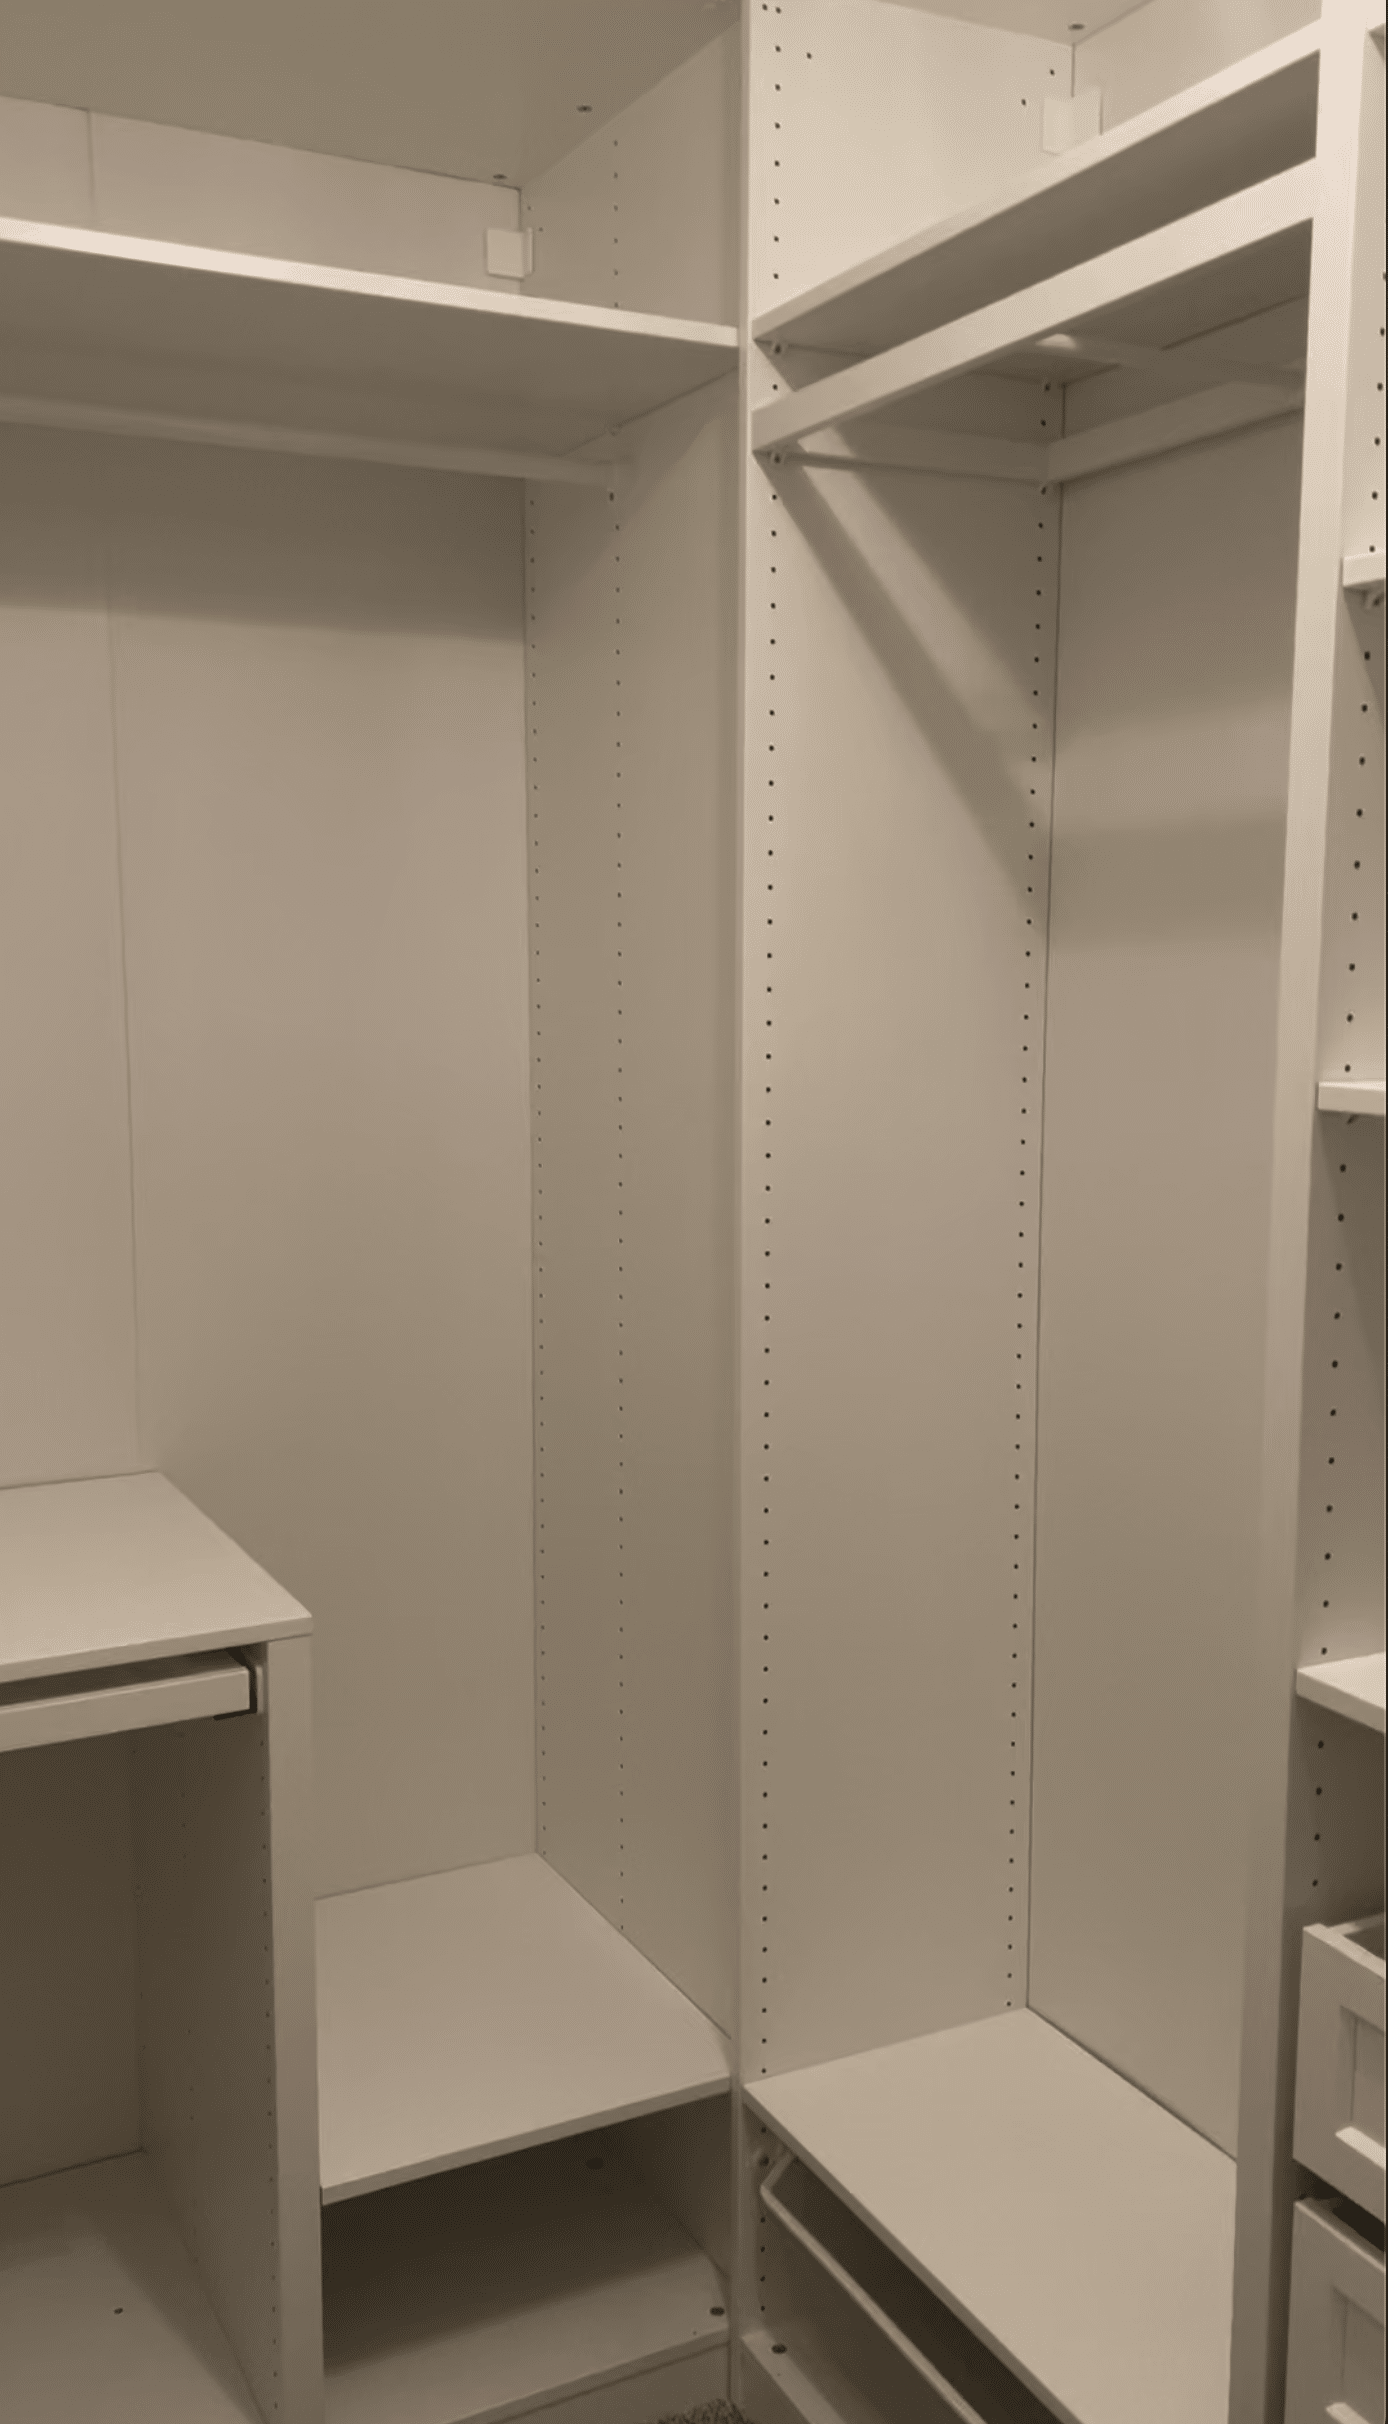
Be sure to secure these frames to the wall with the attachment system that comes with them.
The kit also includes a simple screw to fasten the frames to each other. Just be sure to use the holes you won't need for your interior accessories. I installed all of my interior accessories first, then secured the frames to each other.
Now that the frames are built, you'll feel like you're almost finished, but you're not! It's time to add the interior accessories to the frames!
PAX Interior Accessories
Why is choosing drawers, shelving, and organizers so much fun?! Let's talk about the pieces we picked.
We chose a lot of standard white shelves and basic drawers, but I'll share some of the more fun things we bought as well.
Note: You'll spot a lot of American Girl dolls and accessories in these photos. This closet belongs to my pre-teen daughter. She doesn't play with her American Girl dolls much anymore, but she loves having them nearby. I love that it's almost like an apartment for her dolls. I also love that the closet will grow with her as the toys are put away and she accumulates more clothes over the years.
KOMPLEMENT Pull-Out Pants Hanger
I love the cleverness of this pull-out pants hanger and how easy it will be to store her pants and jeans one day. For now it won't get much use, but I know it will later. It sits inside a divider frame, which is super helpful for making the most of a larger wardrobe frame.
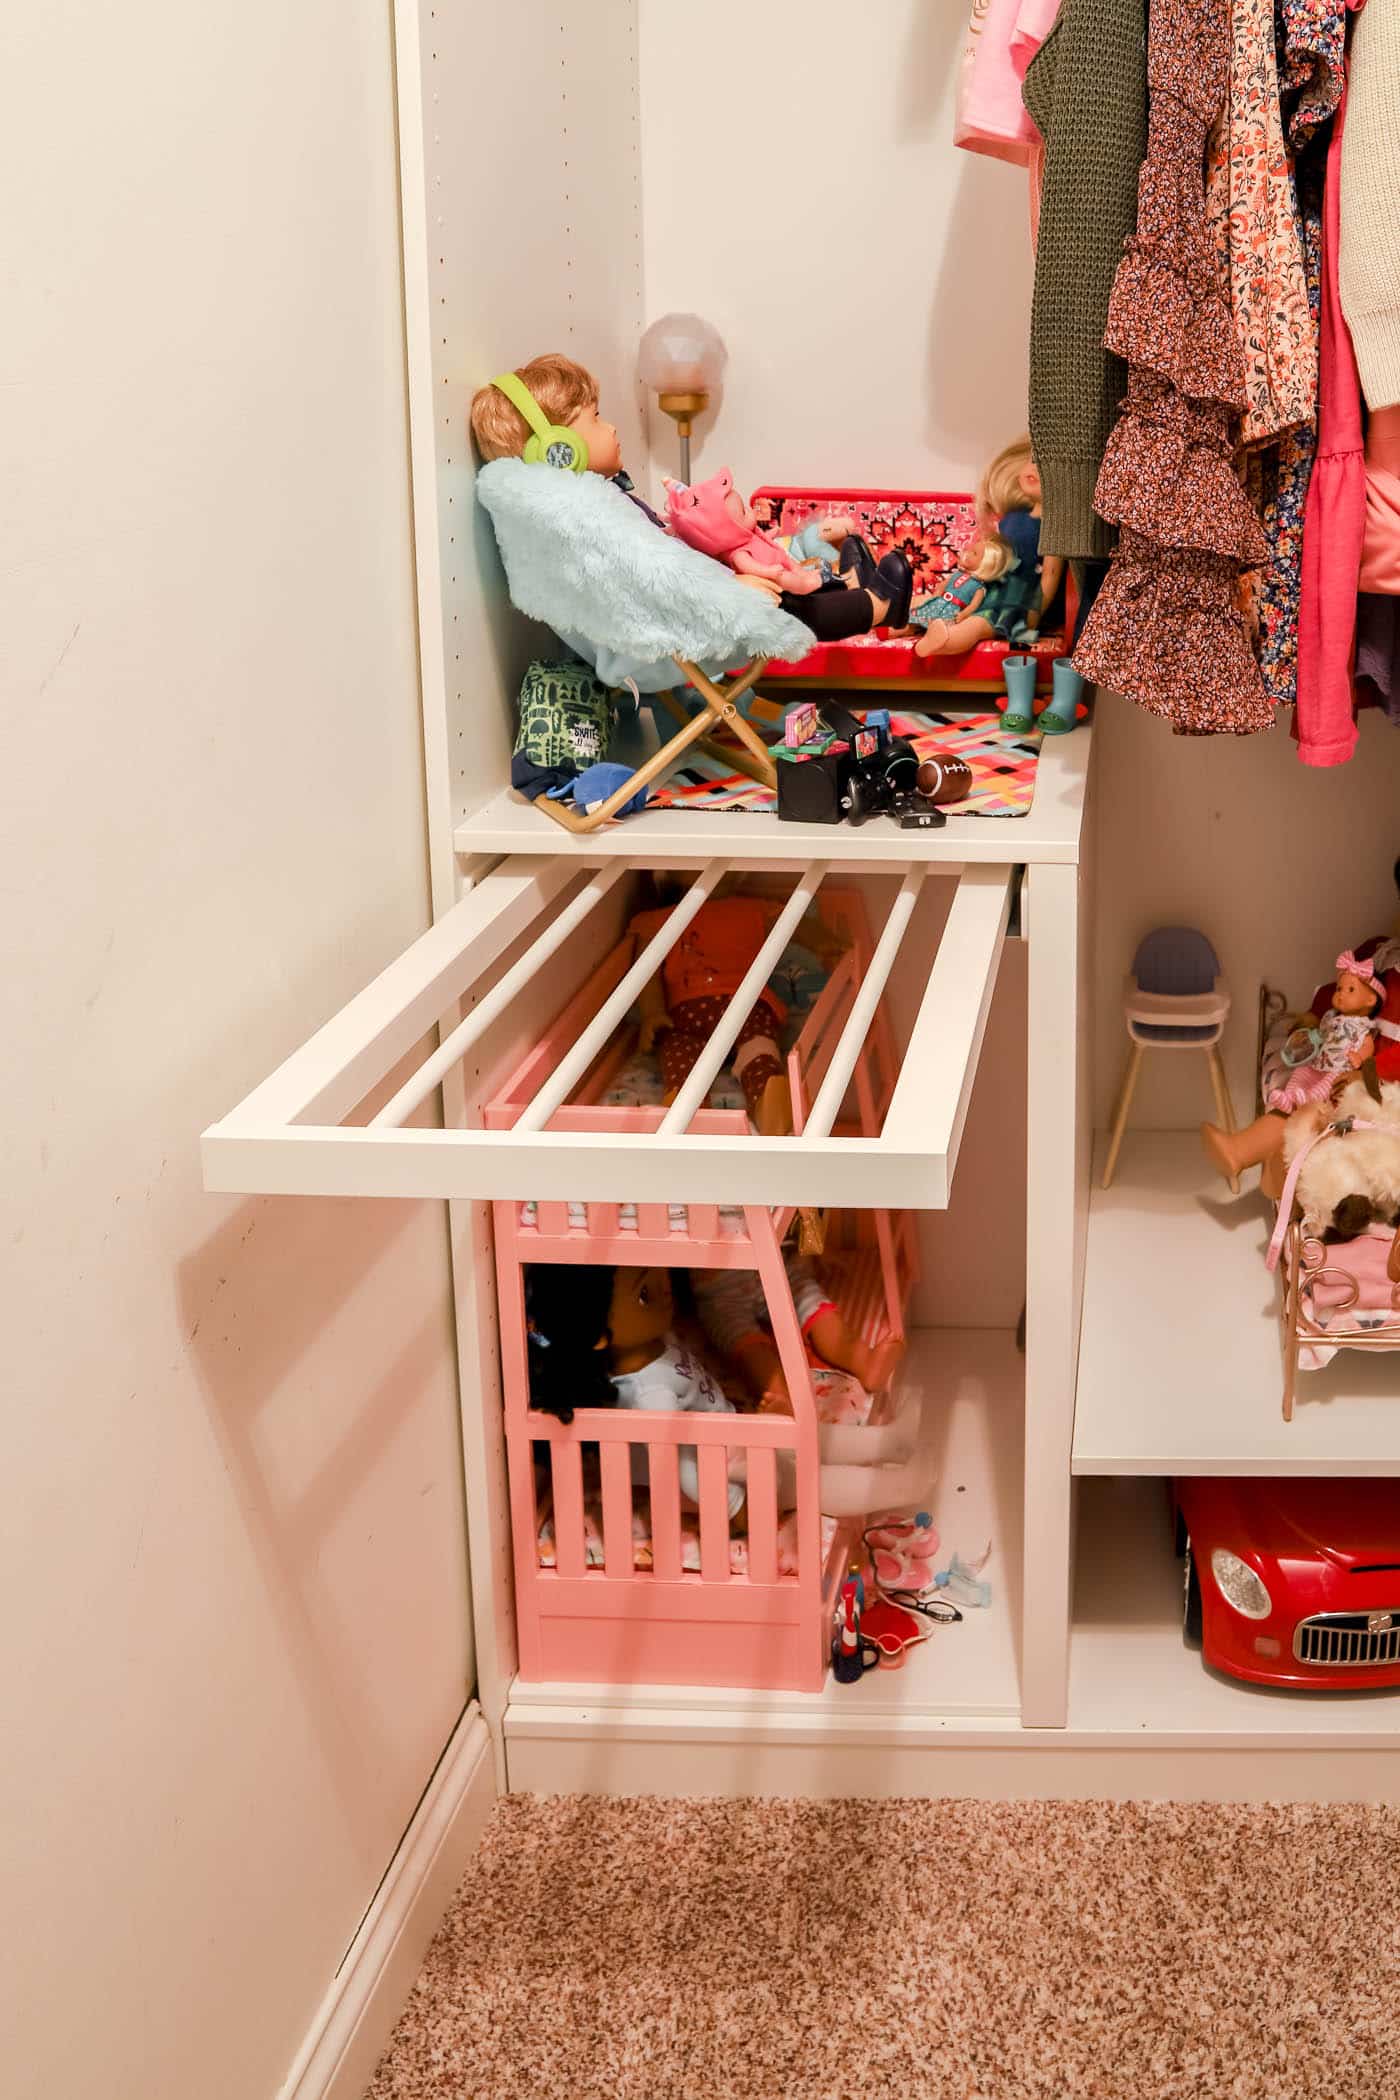
This 22-inch deep pull-out pants hanger fits two pairs of pants on each rail with a little overlap. If you use it in a 13-inch deep frame, you can fit one pair of pants on each rail.
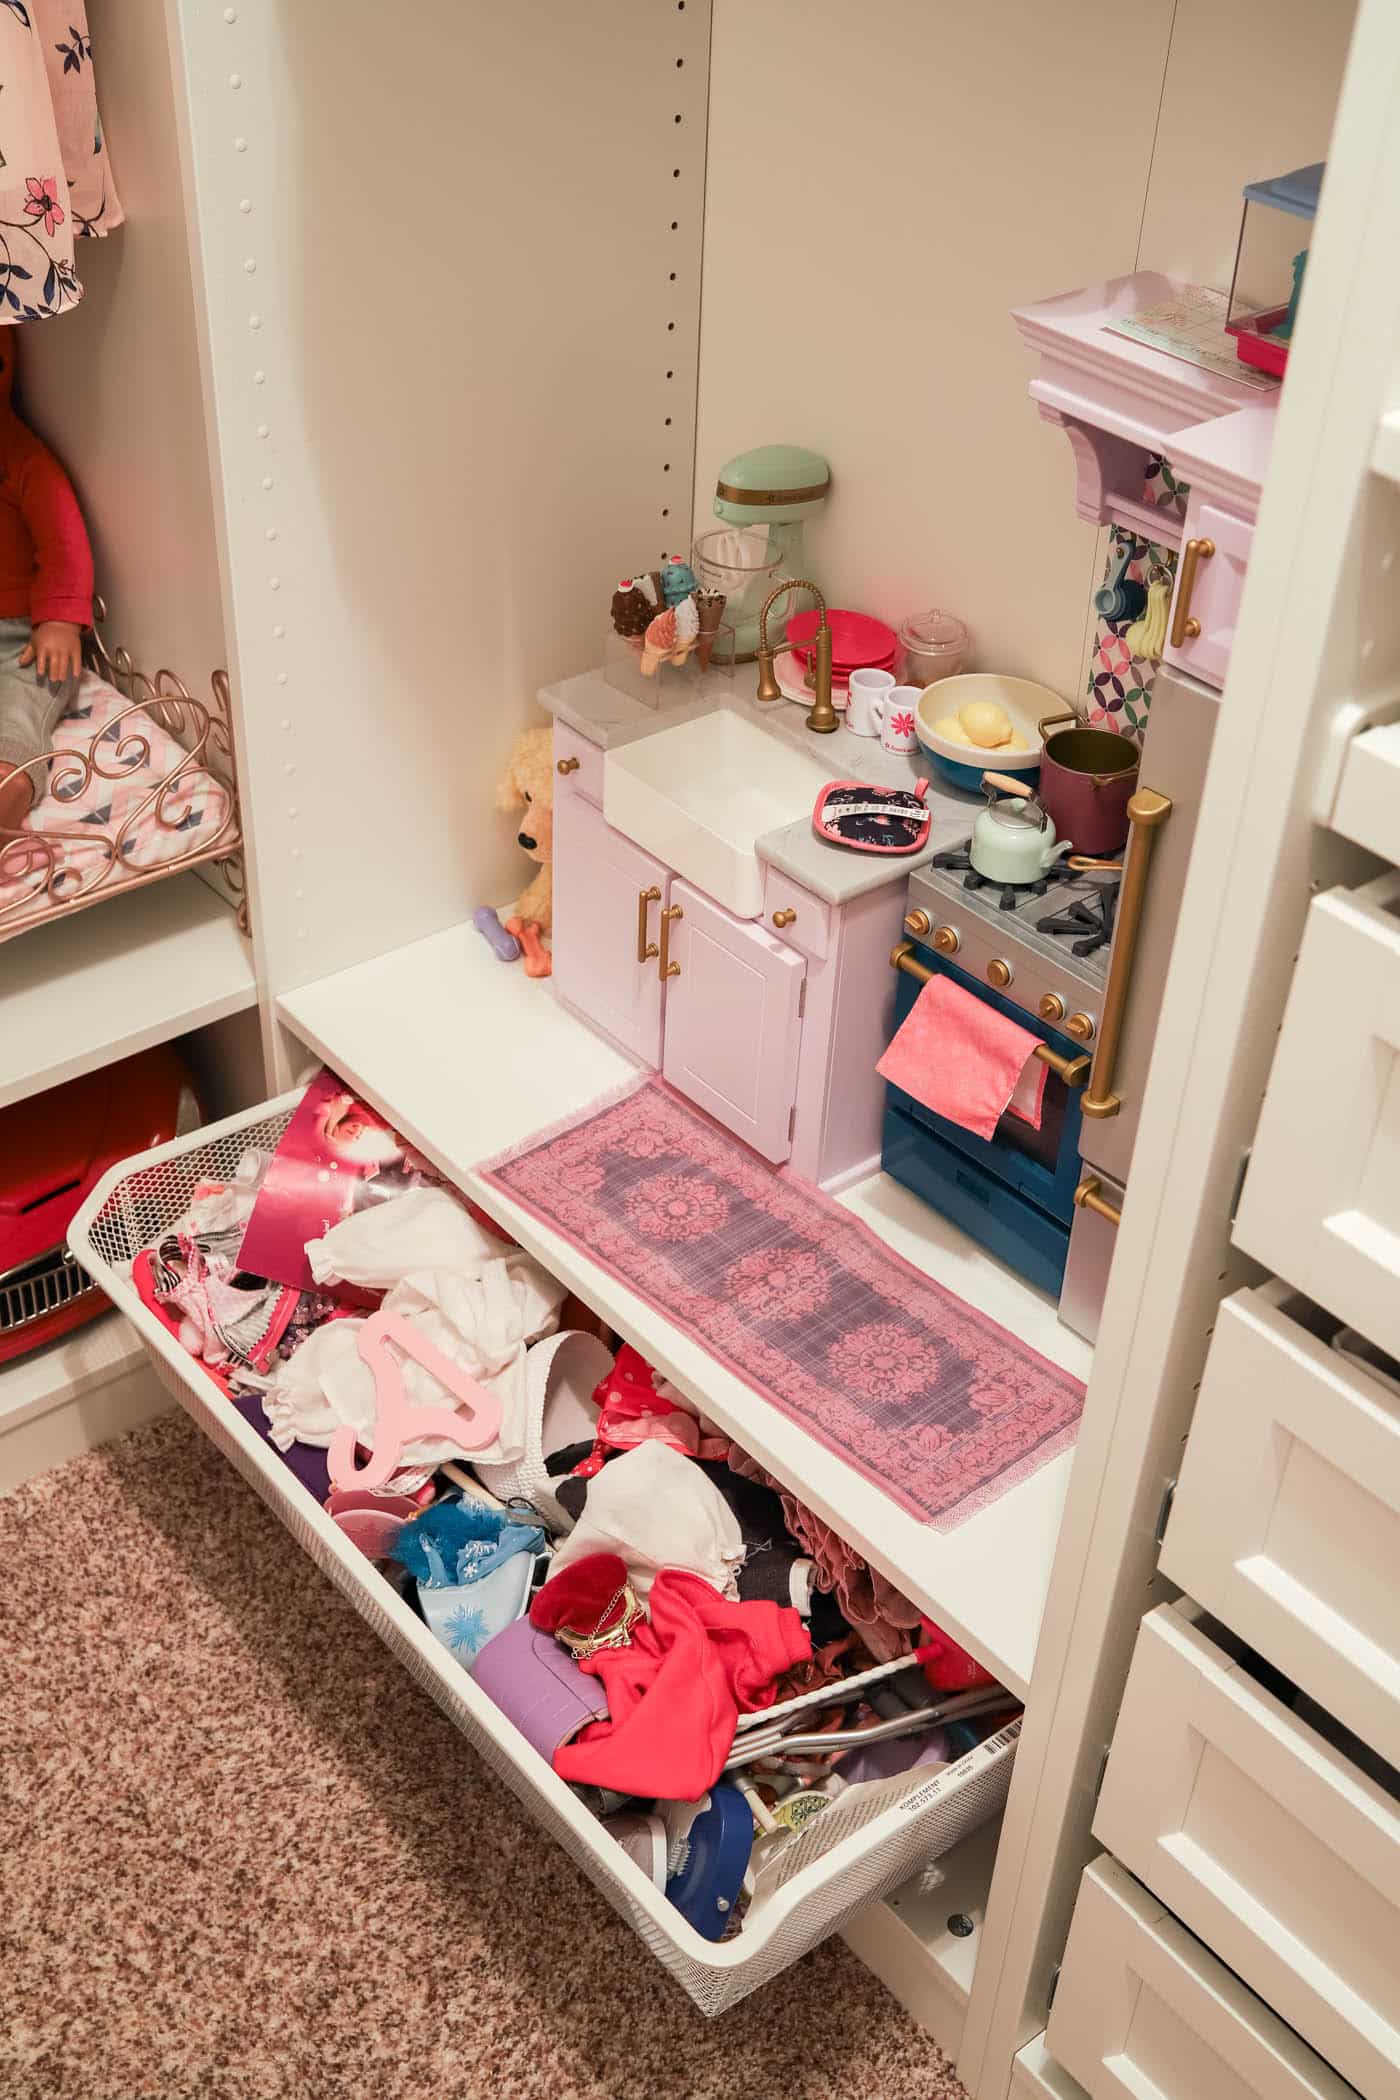
KOMPLEMENT Mesh Pull-Out Basket
This basket is great for storing shoes, clothes, or anything that can simply be tossed into a drawer. It's good for shoes because it has plenty of airflow. In our case, we use it for American Girl toy storage, which is perfect!
Basic Clothes Rail vs. KOMPLEMENT Clothes Rod
We have two options for hanging clothes, and they depend on the depth of the frame base. In the 22-inch deep frame, you can use a basic clothes rail and hang clothes side by side.
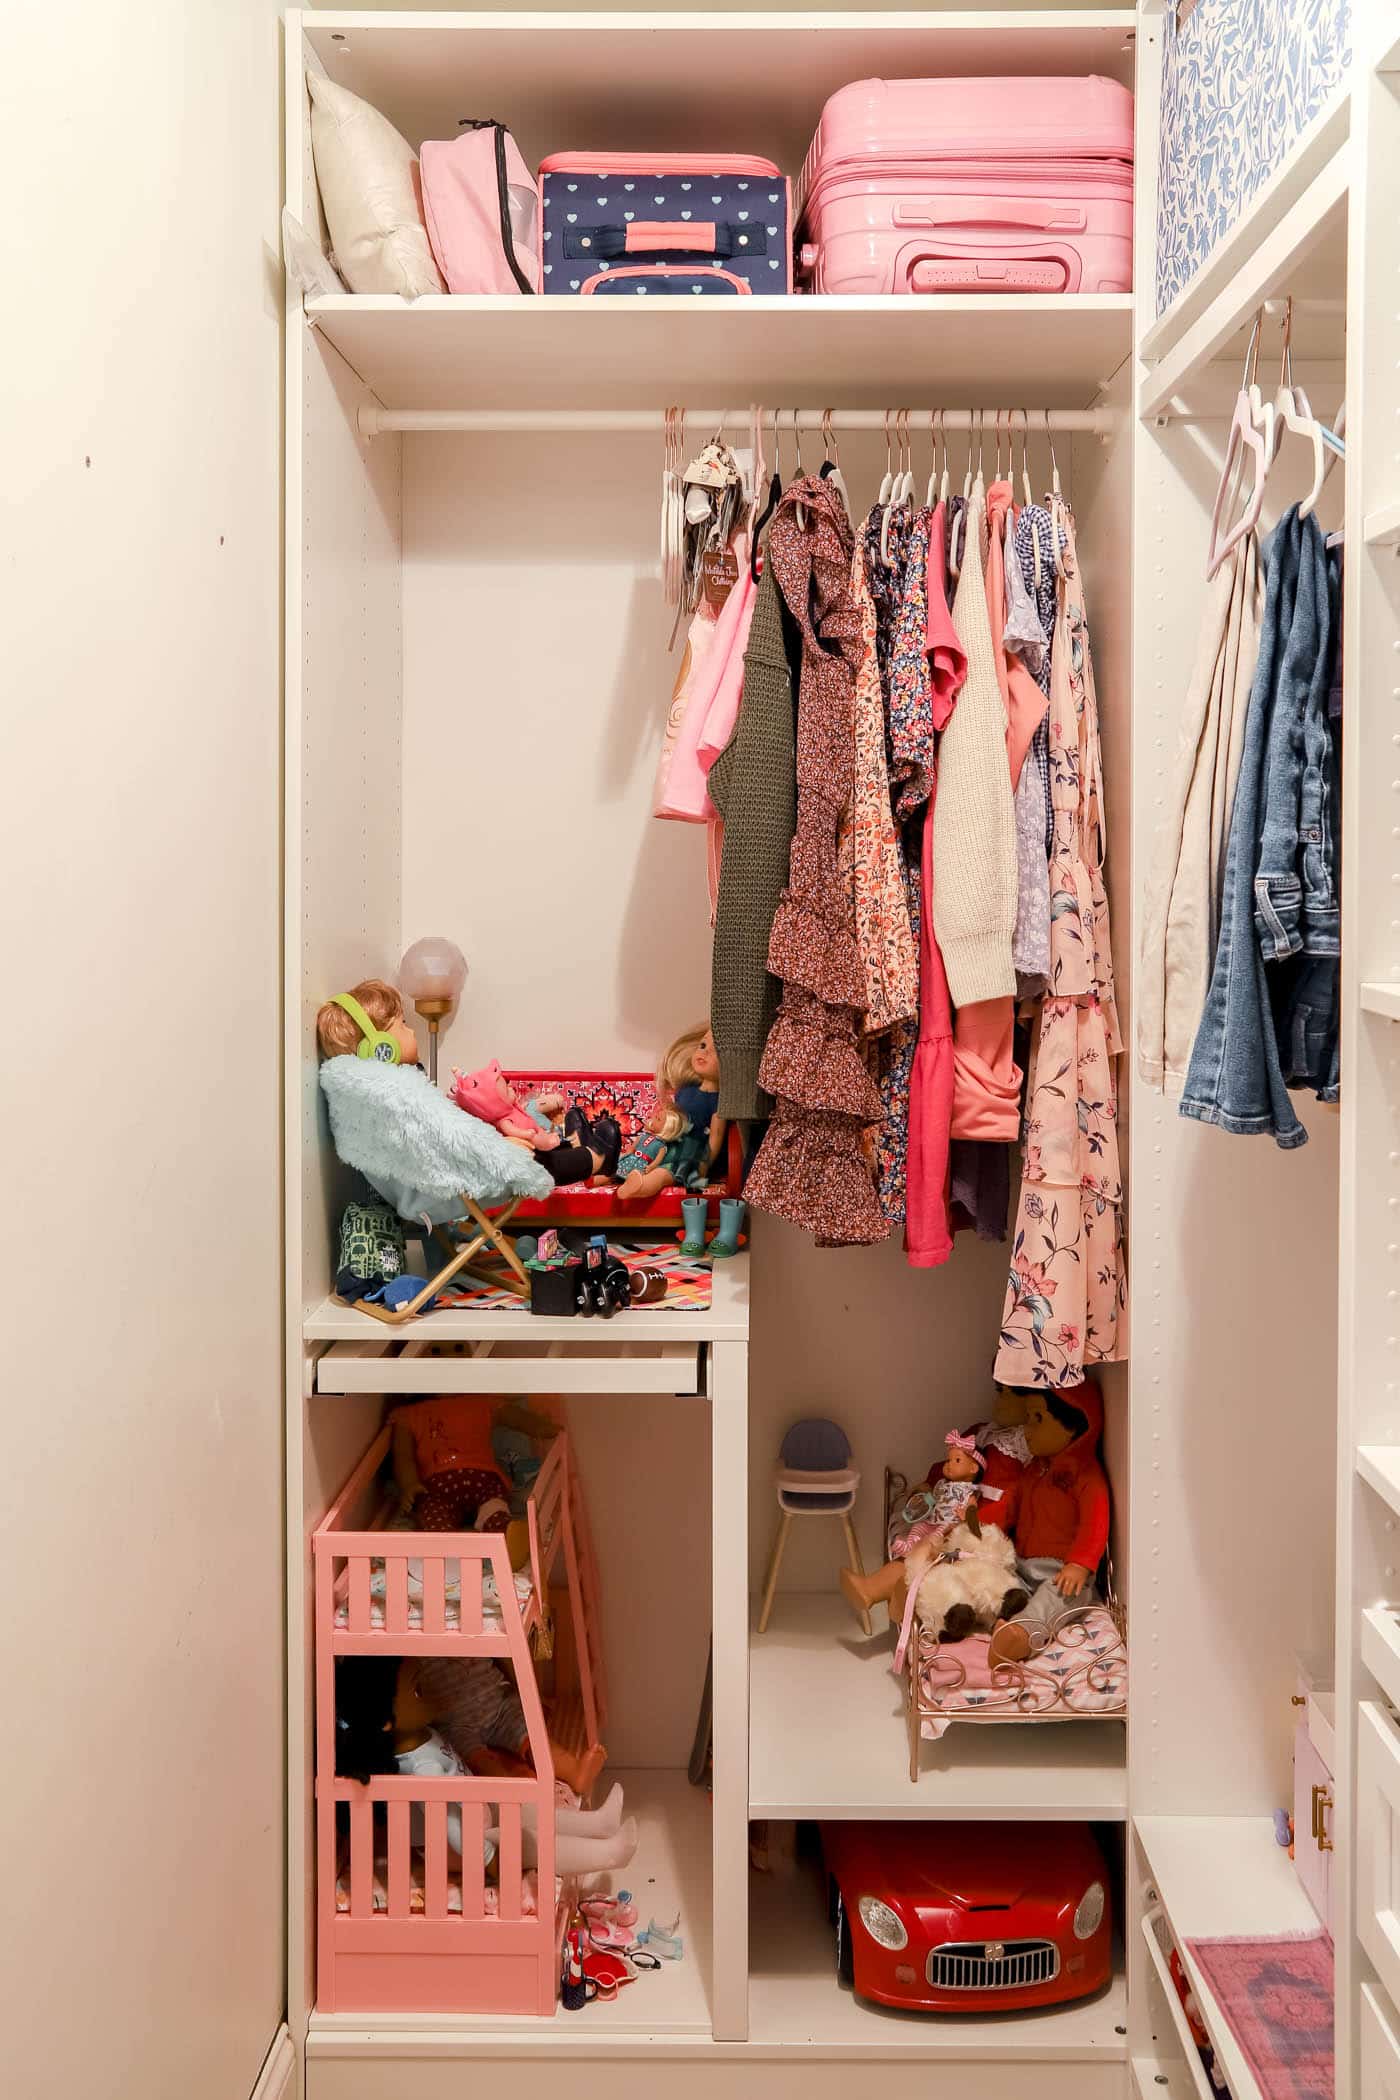
In the 13-inch deep frame, you'll need a KOMPLEMENT clothes rod, so the clothes hang facing out. For now it's holding her pants, while the pants hanger has been taken over by toys. One day, I imagine she'll use every inch of that hanging space!
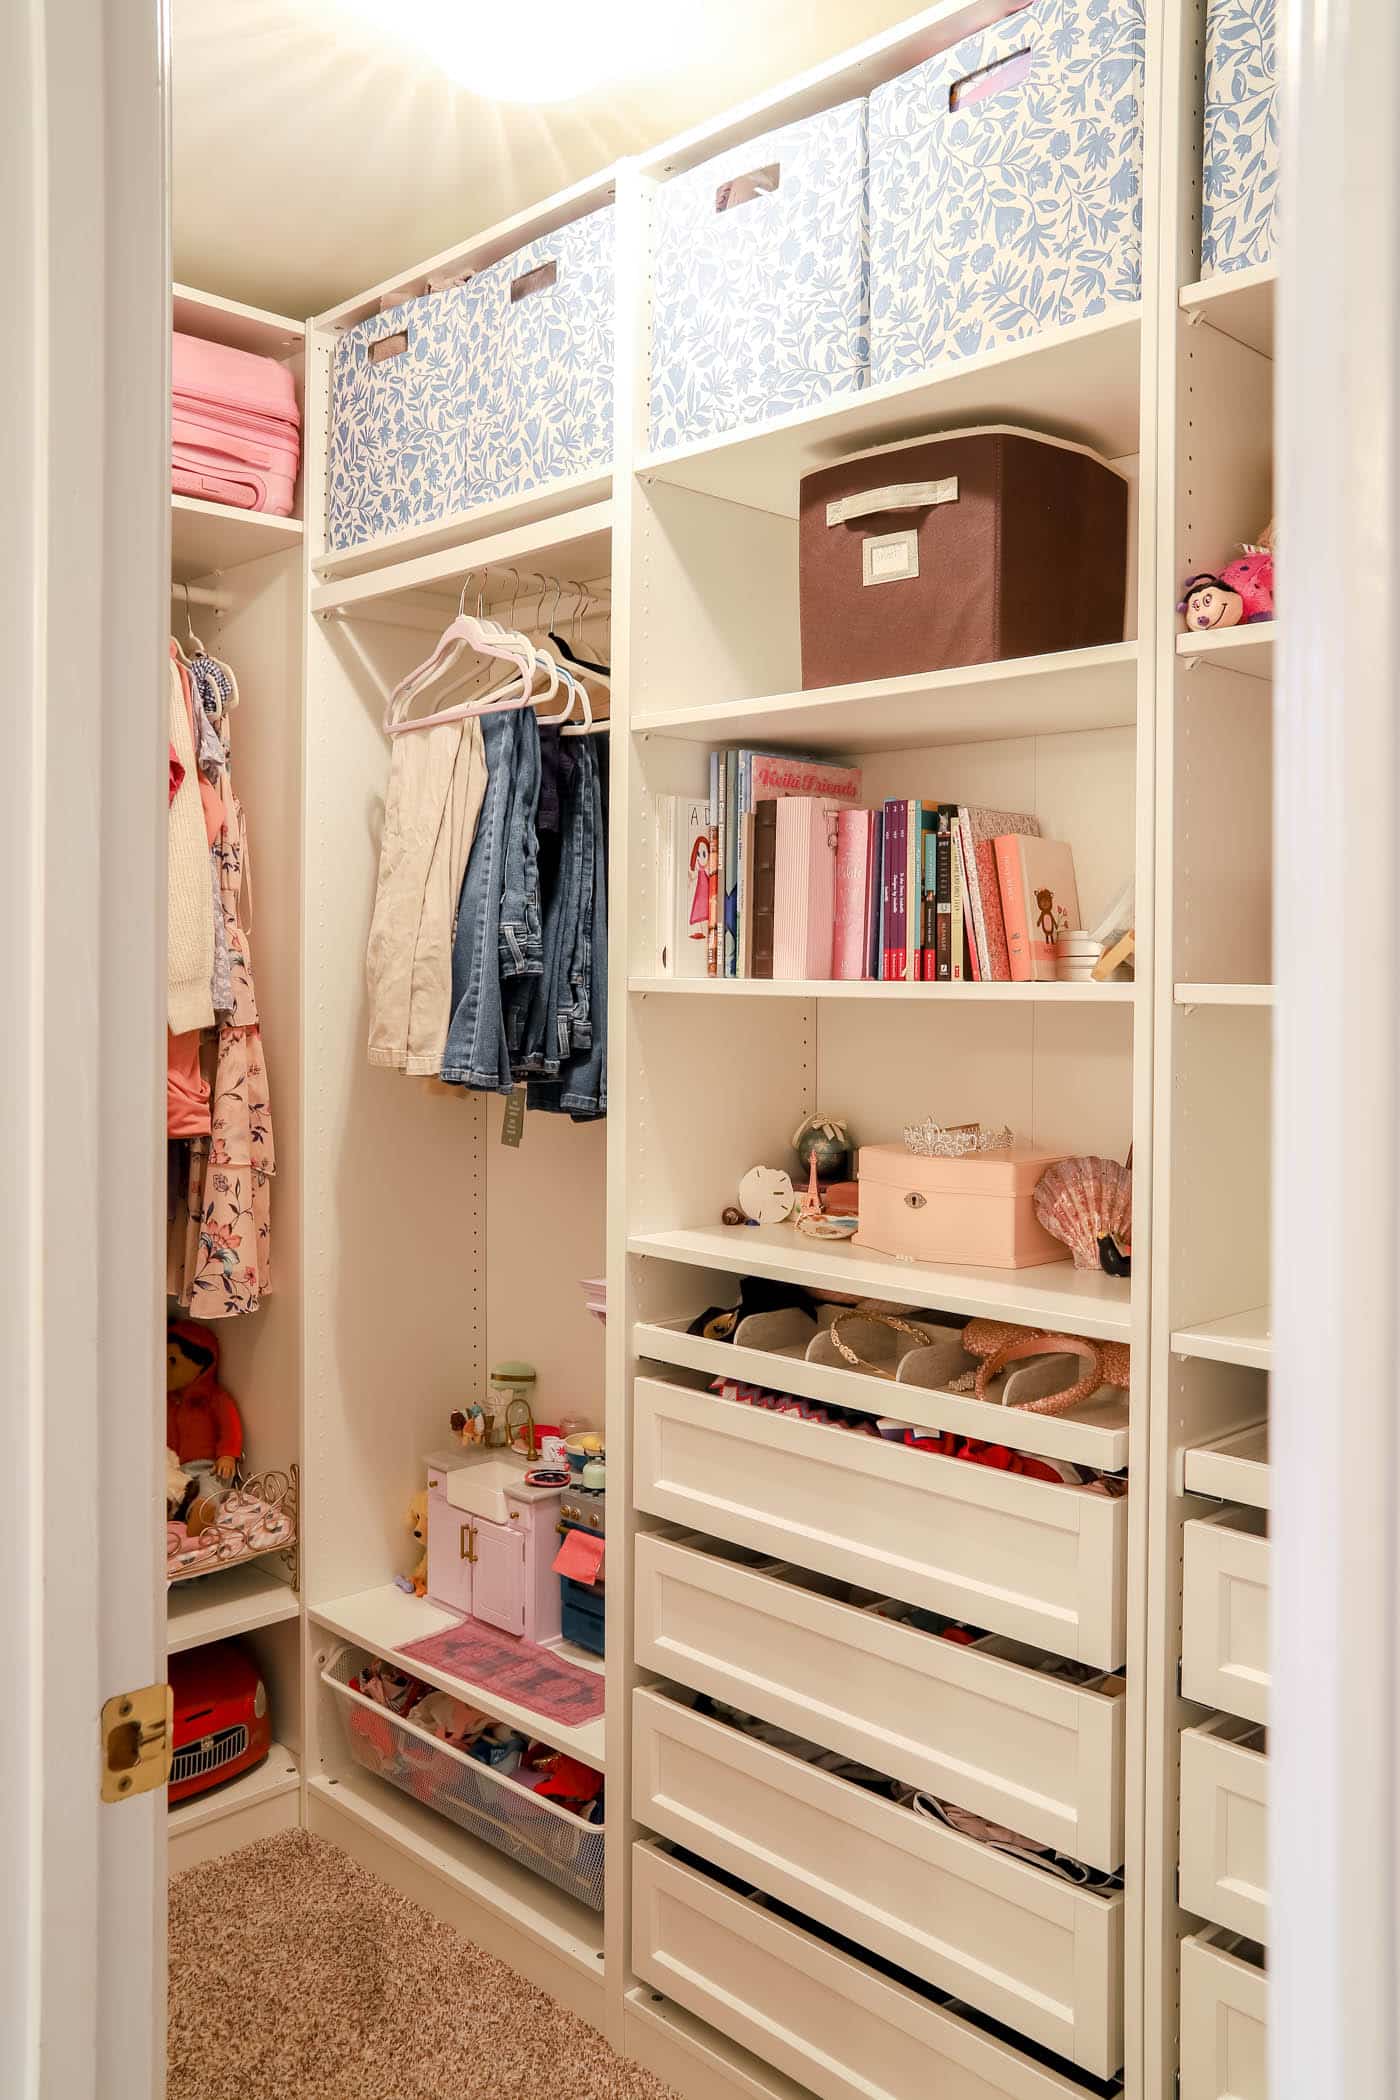
This is the main reason I went with the 22-inch deep frame at the back of the closet. I didn't want every piece of clothing facing out. For a few special pieces, though, facing out is fine.
IKEA KOMPLEMENT Shelves
We used lots of standard KOMPLEMENT shelving because it's so versatile. It's a good idea to add a shelf above any drawers, since it lets you use that space and keeps dust out of the drawers.
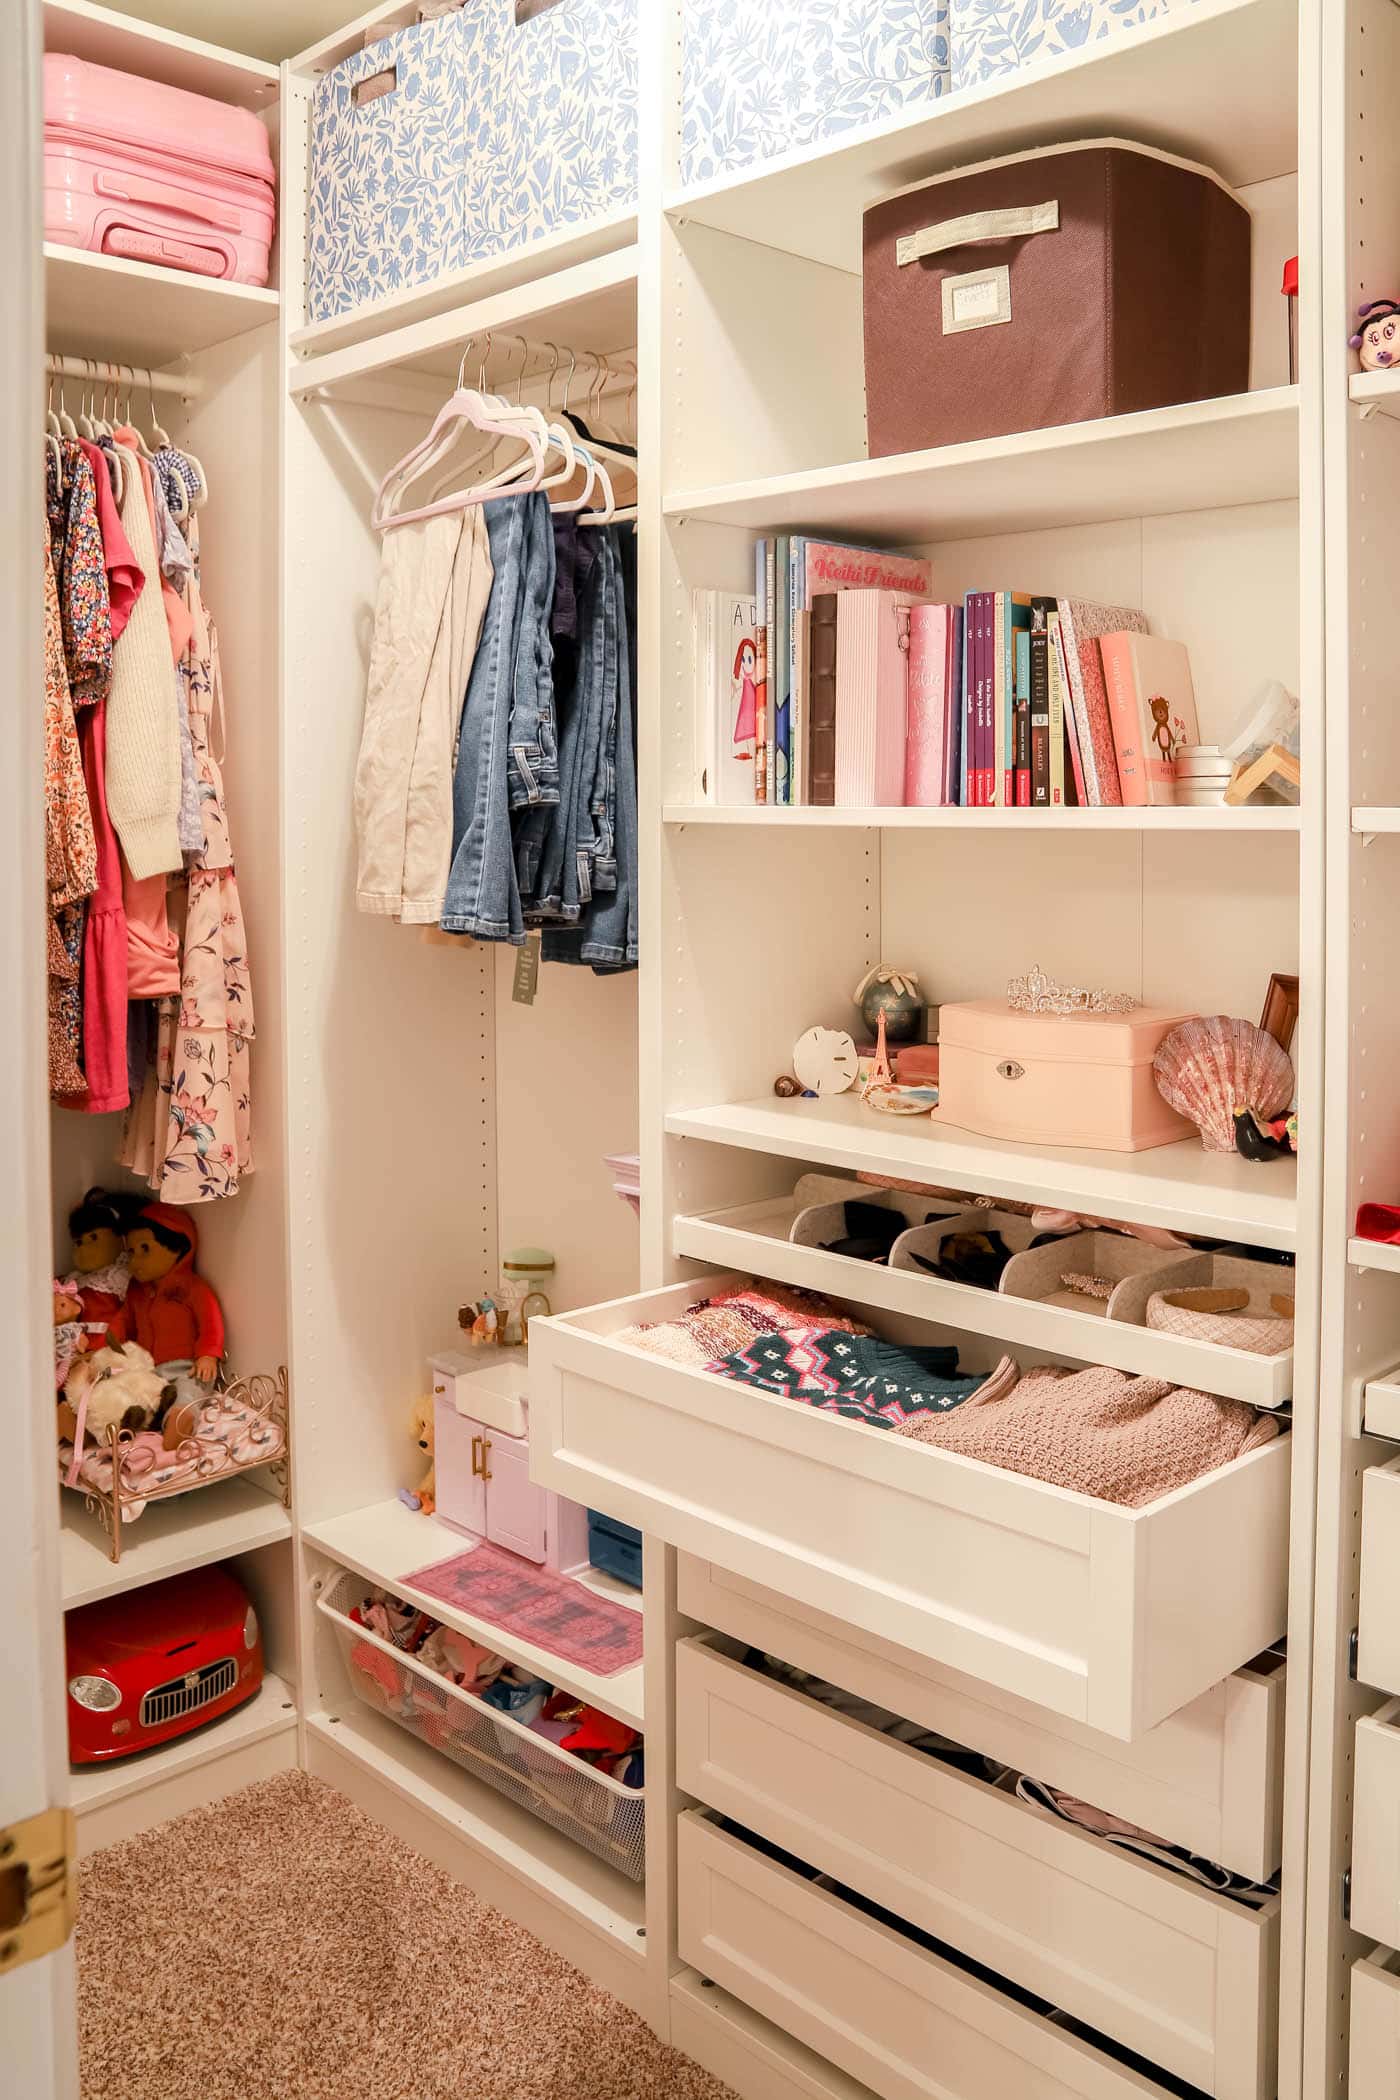
We bought some storage bins for the top of the closet, so we made sure to install the shelves at just the right height for the bins to fit.
I love that my daughter now has a jewelry drop zone for getting ready in her closet. It keeps the clutter off her bathroom counter and out of her bedroom.
KOMPLEMENT Drawers with Framed Fronts
IKEA offers several drawer front styles, including plain and glass fronts. I chose the framed fronts because they felt the most classic and suited my style. You can add a drawer handle if you're comfortable with a little DIY, and I'll probably add some later on.
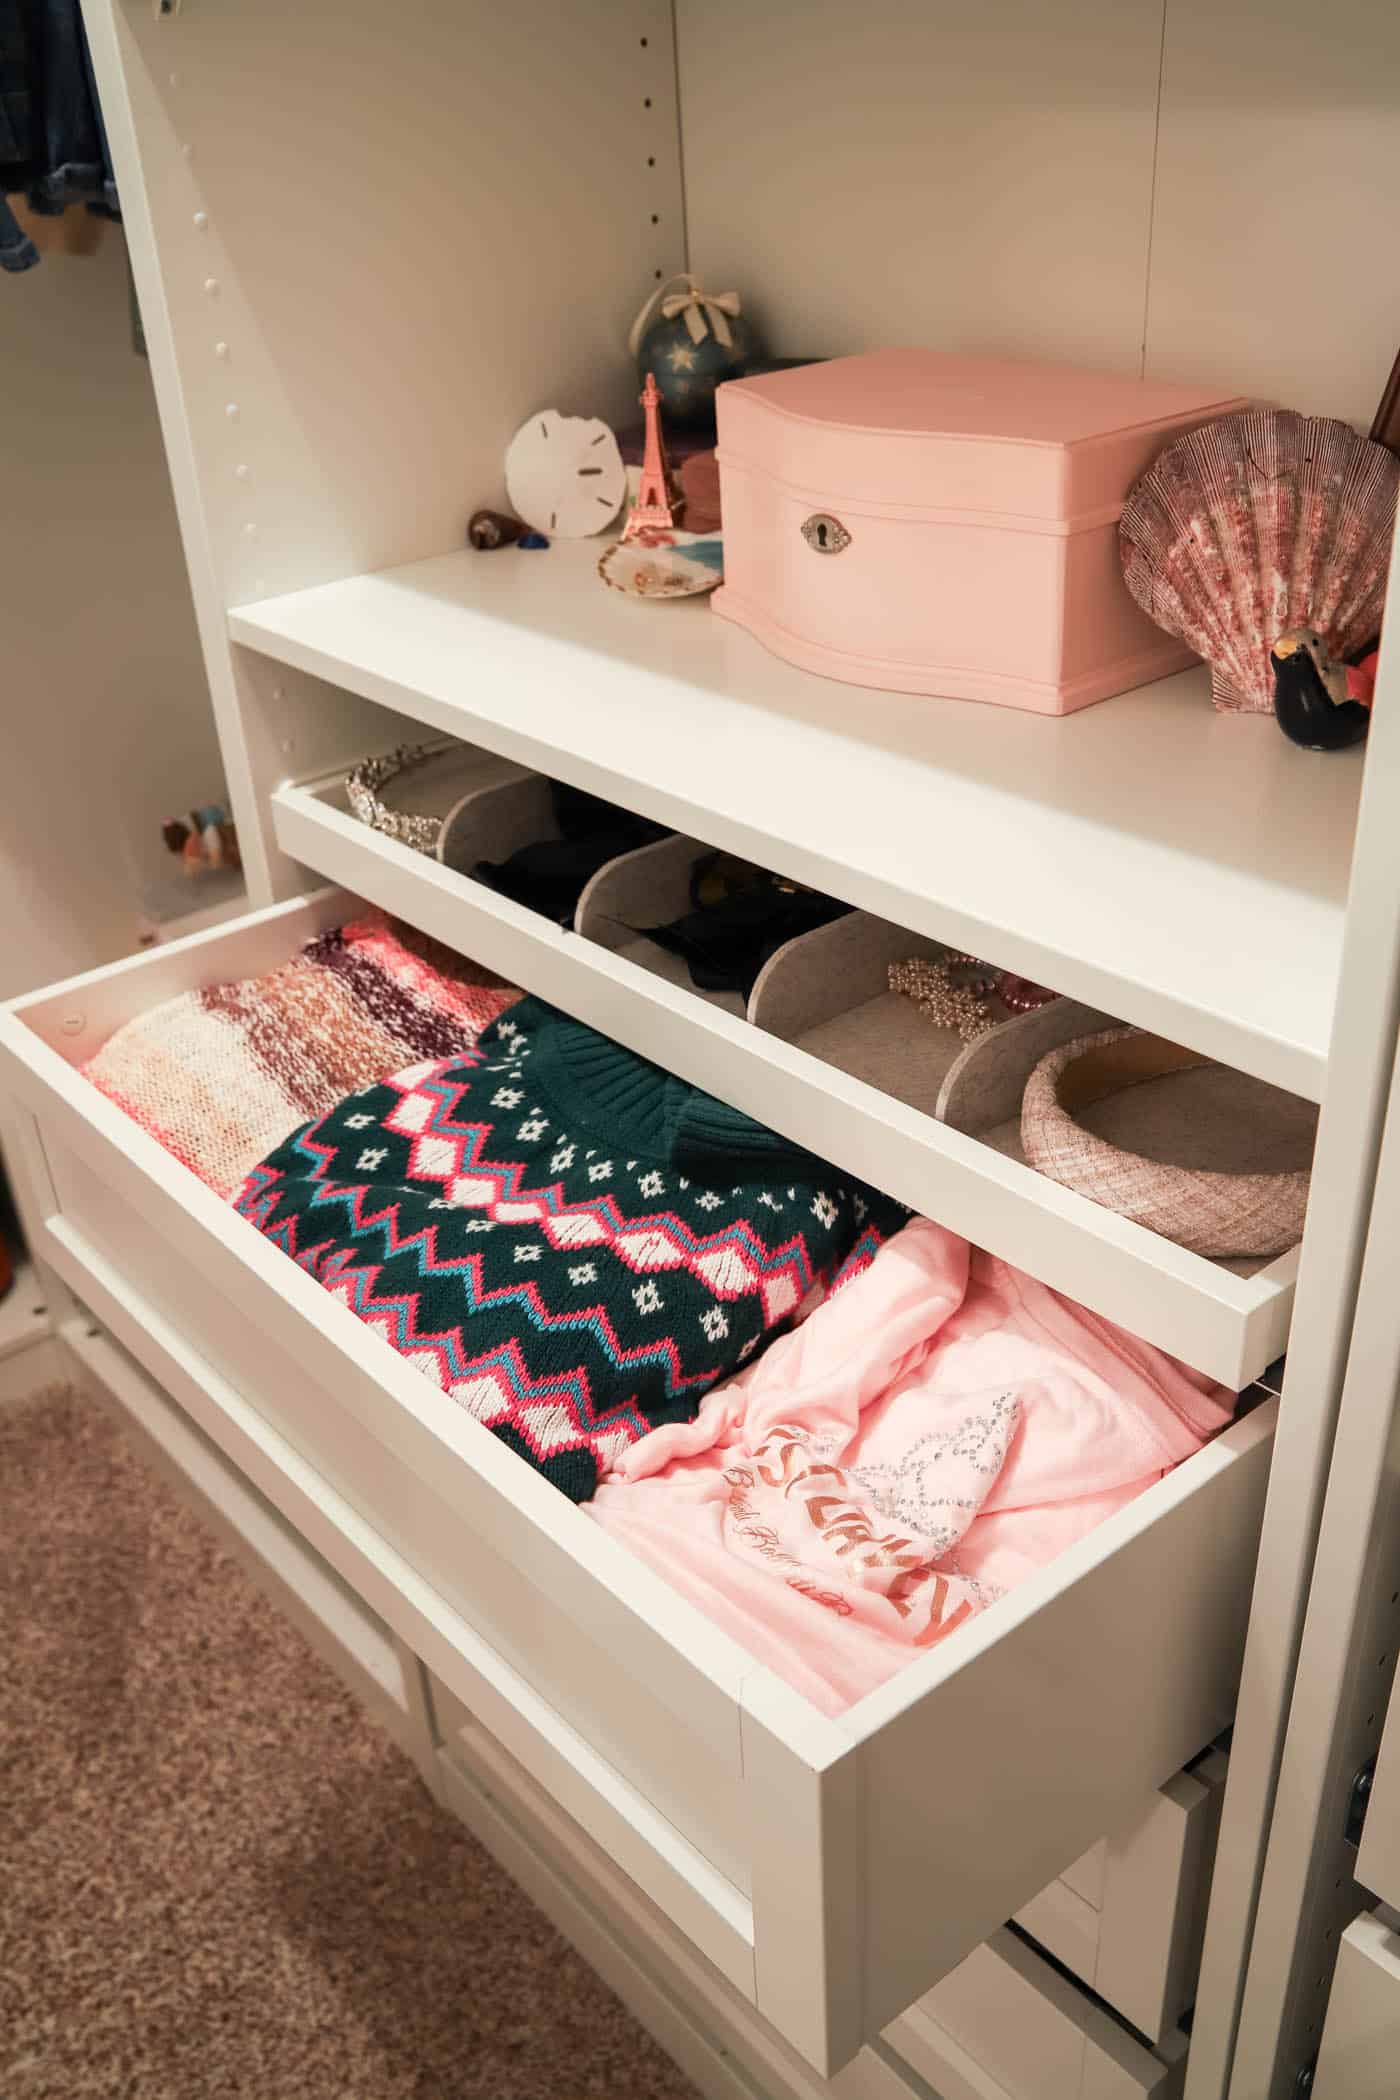
For now, though, we're thrilled with how much these drawers hold! They were easy to assemble and install, and they have a soft-close feature.
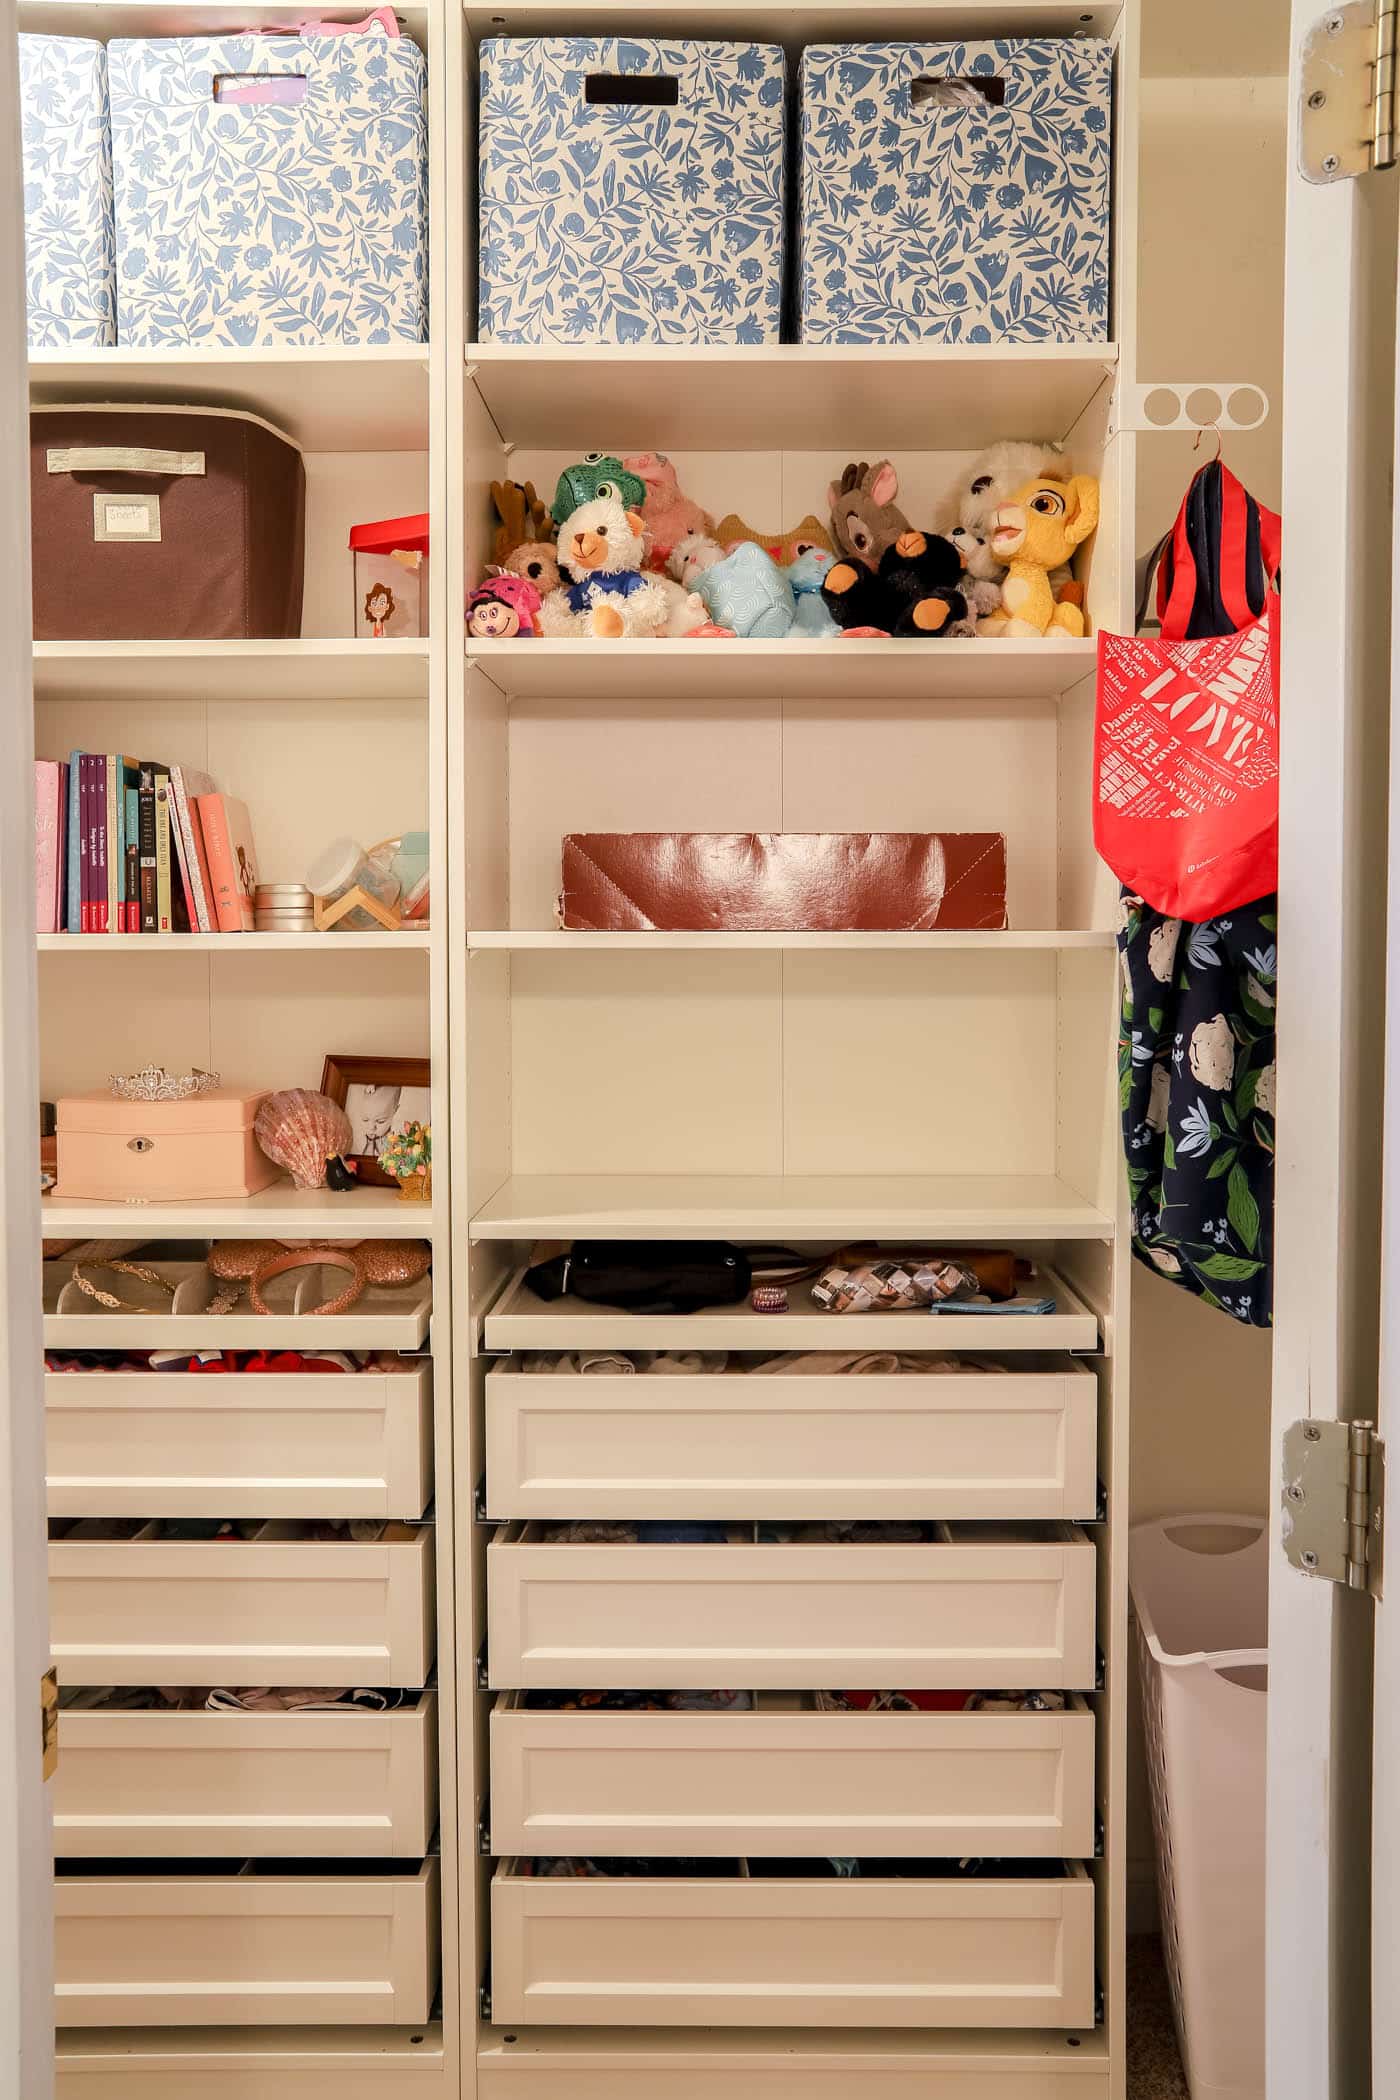
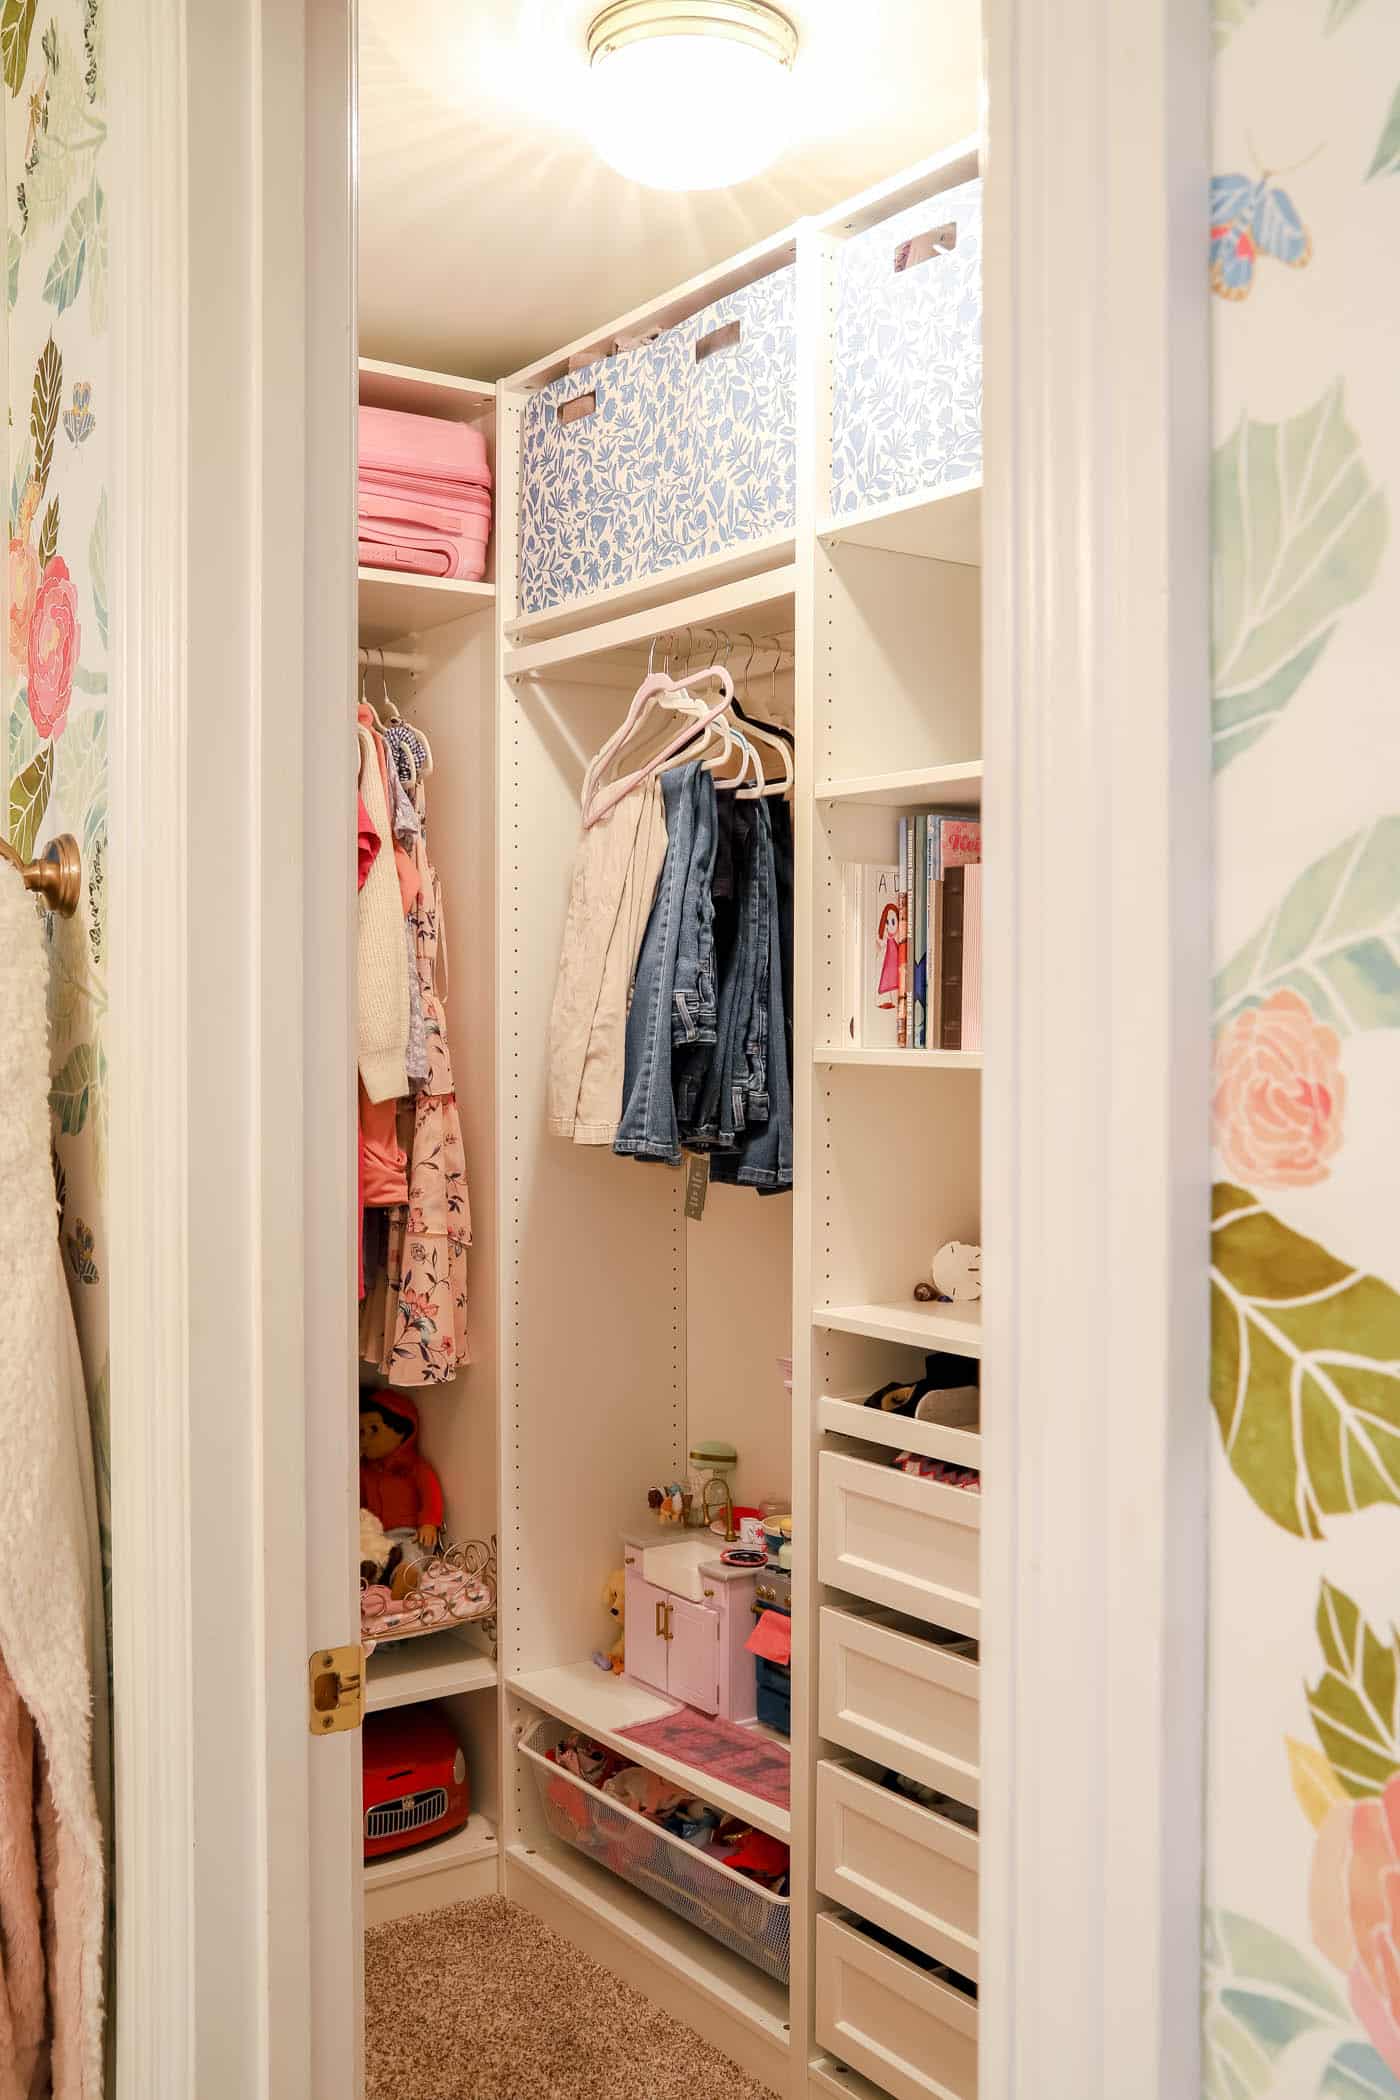
It's amazing to me that installing this closet system did away with my daughter's need for a dresser in her bedroom. I love how much more efficiently we're using the space now. As you can see, we still have plenty of shelf space to grow into.
IKEA also sells drawer organizers that fit their drawers perfectly, if you need them. I use them in a few drawers for undergarments and socks, but I didn't take pictures of those drawers.
KOMPLEMENT Pull-Out Trays with Inserts
IKEA makes these handy pull-out trays with optional inserts. The 22-inch deep trays offer more versatile inserts, but we were working with the 13-inch deep organizer trays, so that's what was available. We bought the felt drawer liner and felt divider separately because the bundle was sold out.
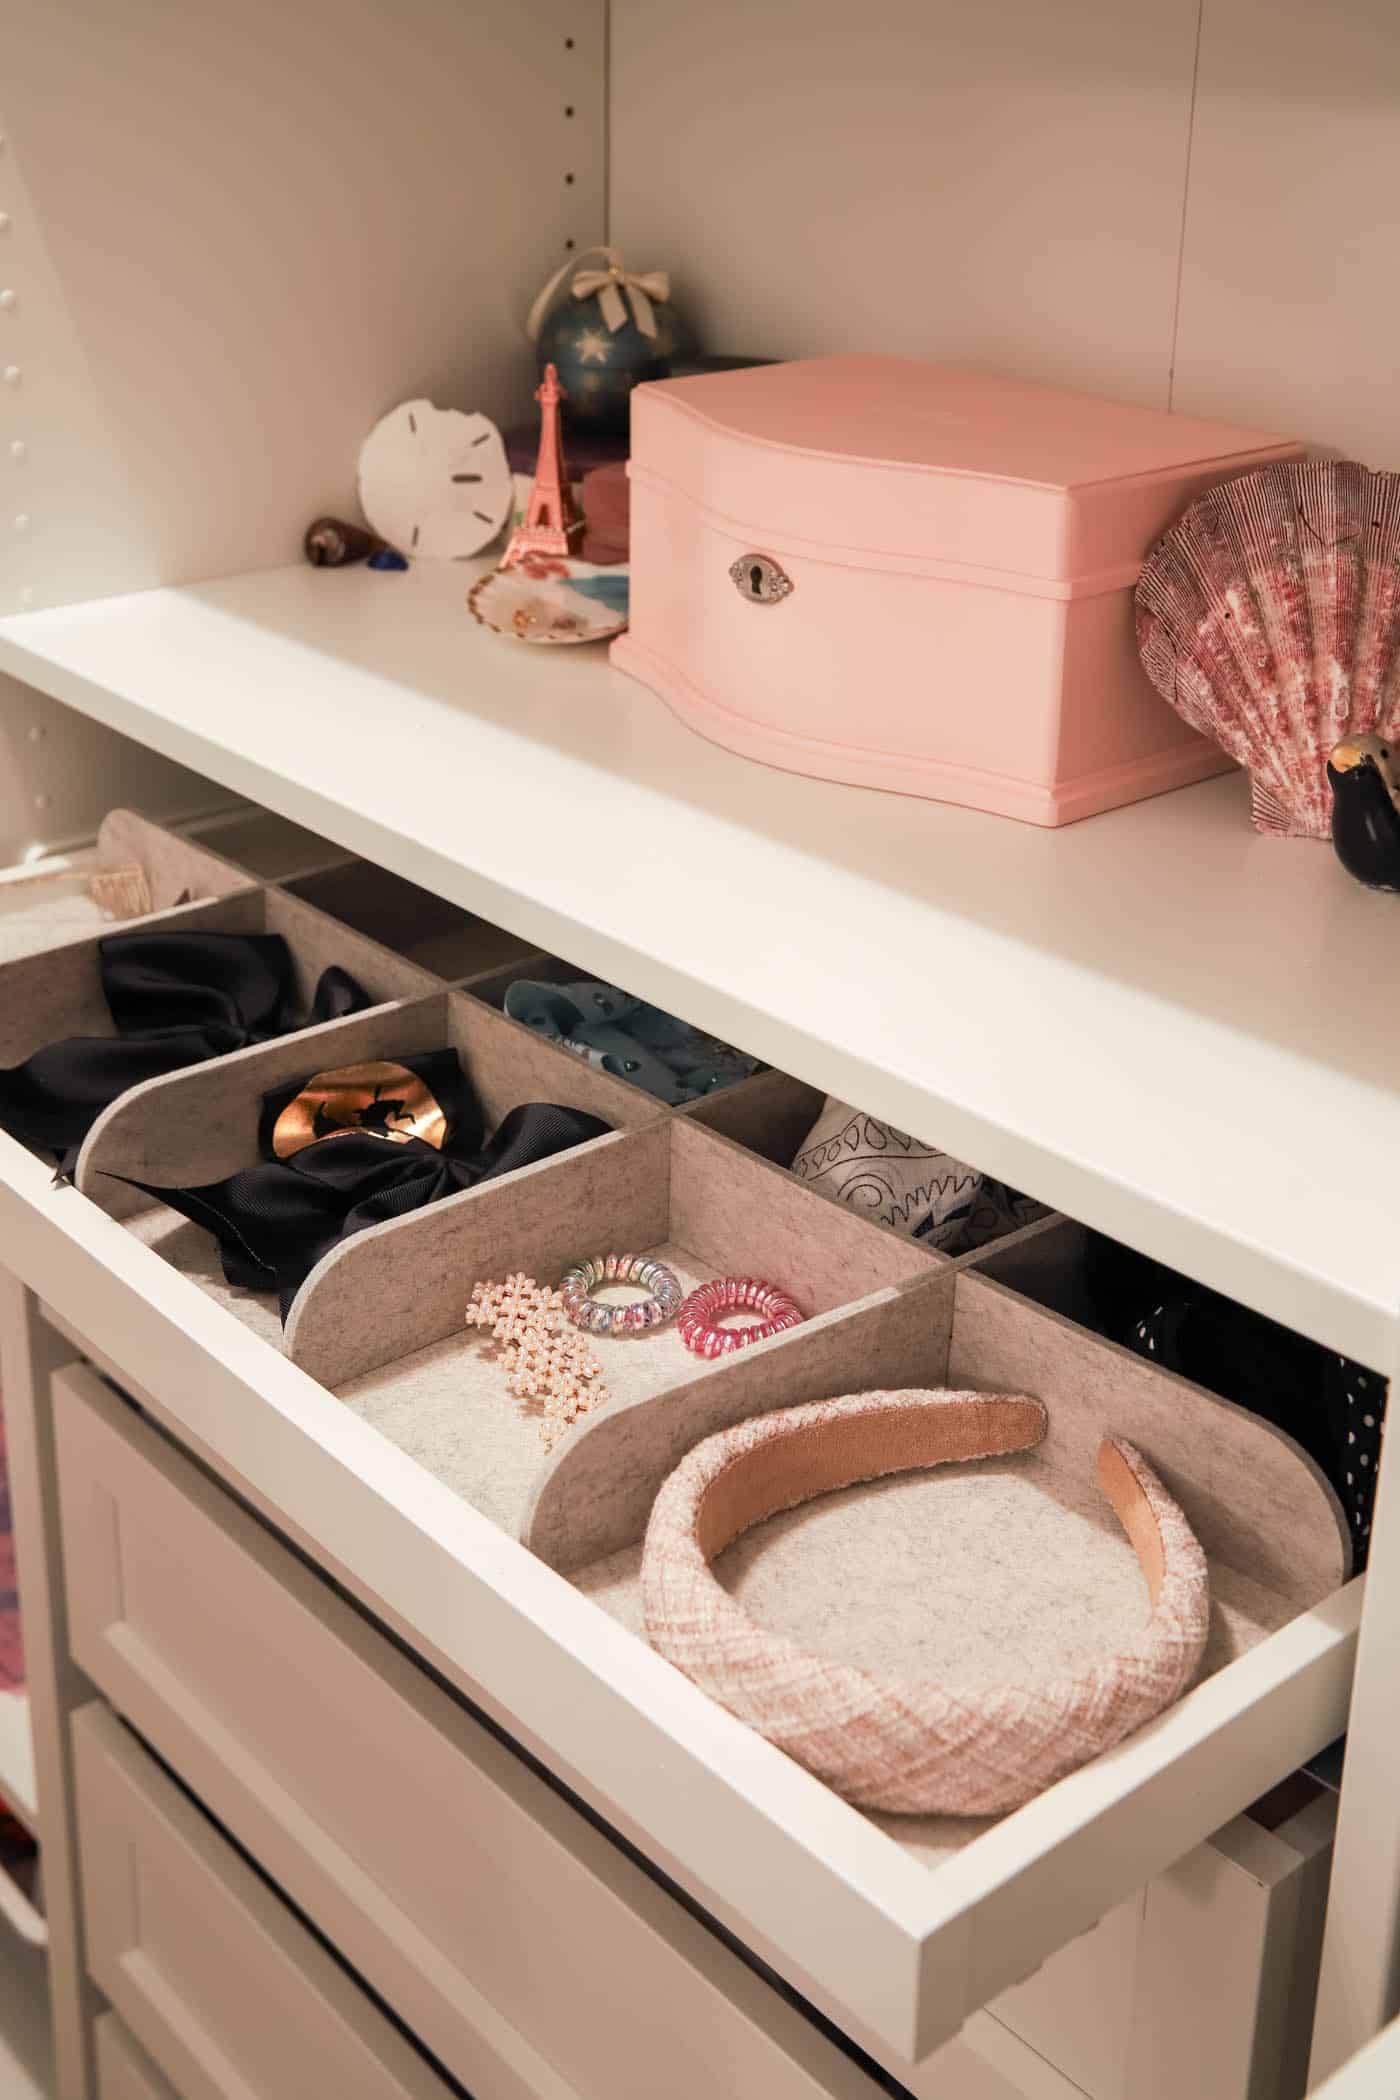
For now my daughter uses one to hold bows and hair accessories. I imagine it will turn into a jewelry tray as she gets older. Honestly, I'm a little jealous of her closet system! Ha! I didn't add dividers to the second tray, just a felt liner. She uses that tray for her small bags and purses.
Browse all of the tray inserts here.
KOMPLEMENT Valet Hanger
There's about a 12-inch gap between the edge of the closet system and the wall. I left it on purpose to fit a clothes hamper, which we'll get to in a minute. But I spotted this valet hanger that attaches to the end of the closet, and I had to have it!
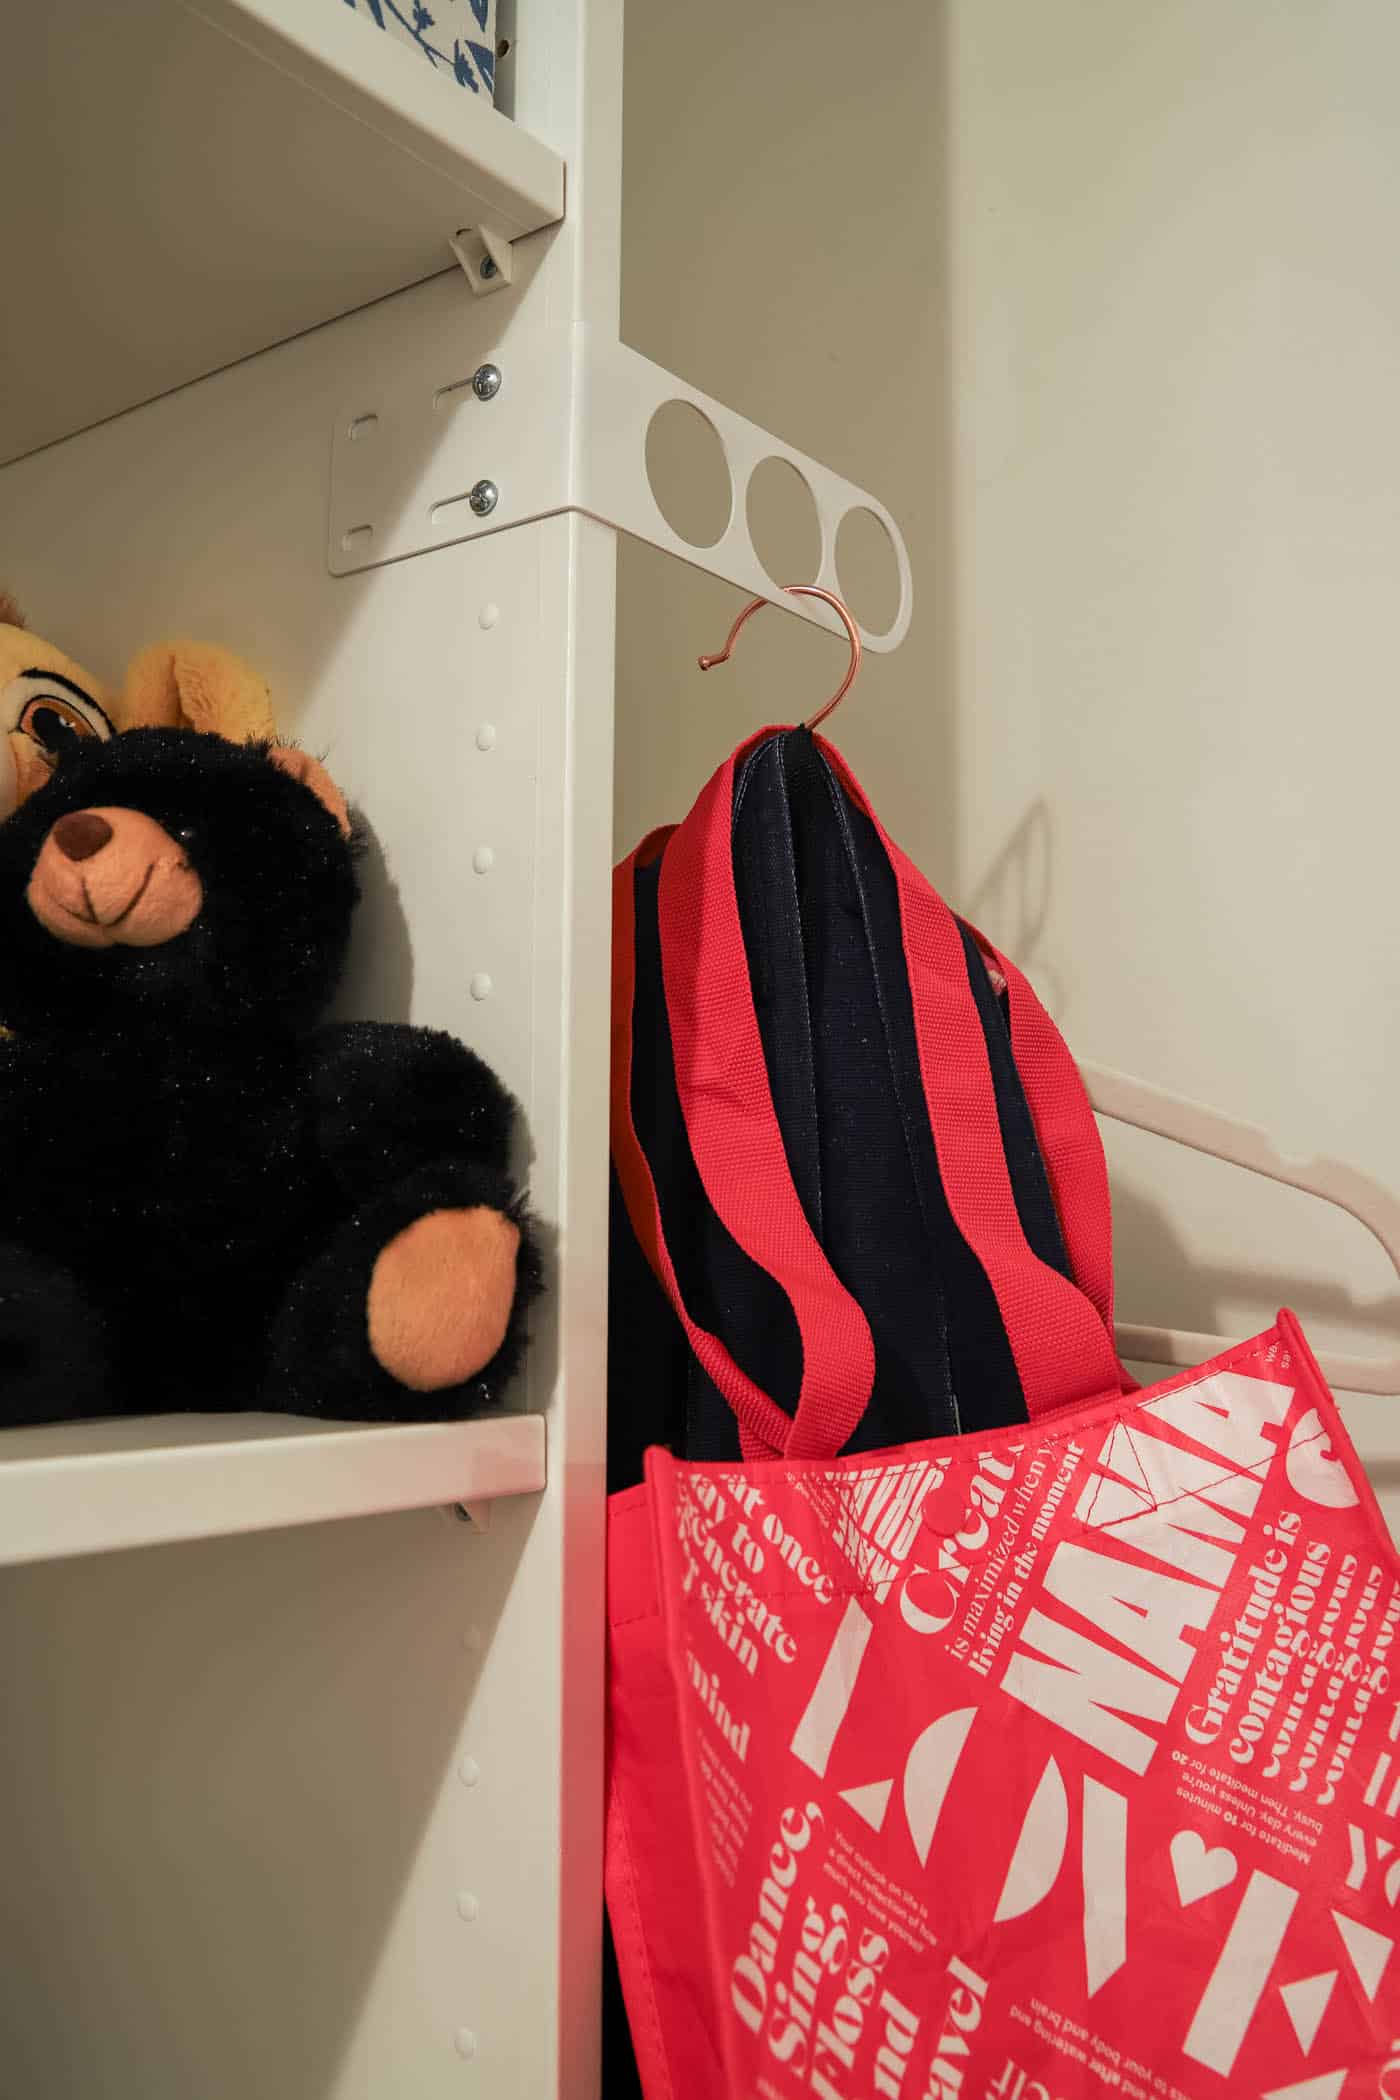
Right now it holds some bags for us, but it's a great spot to hang something up to dry, or to hang tomorrow's outfit so it's ready to go! I love using space that would otherwise sit empty.
Slim Clothes Hamper
As I mentioned, there's about a foot of floor space left for a small hamper. I searched everywhere for the perfect slim hamper to fit that spot, and I think I found my all-time favorite!
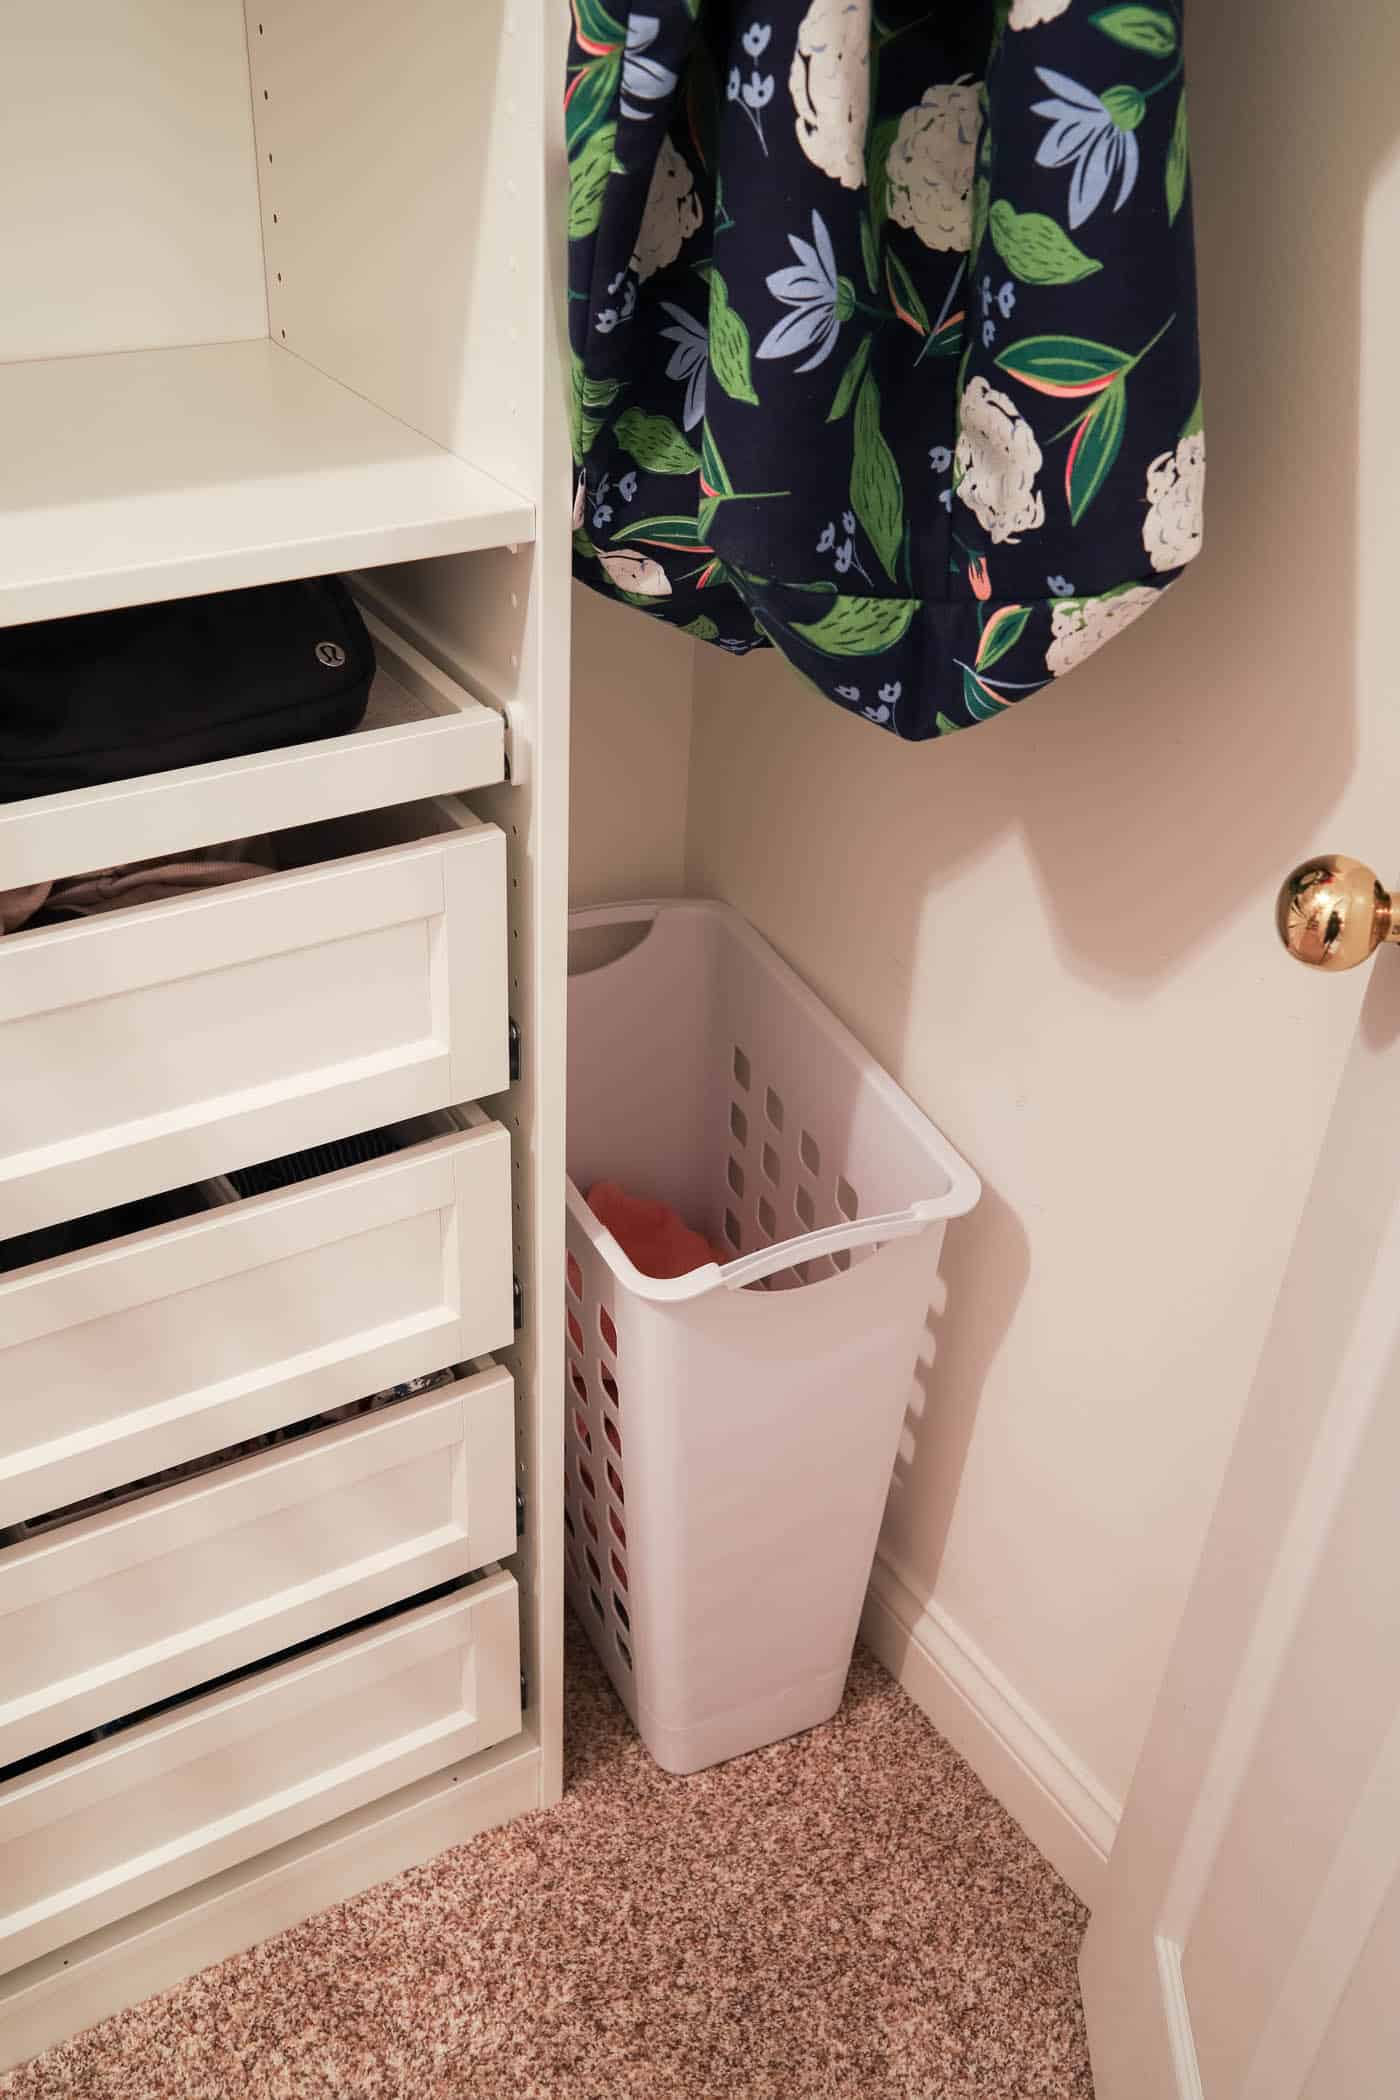
I bought one for my younger daughter's closet too, and both girls love it! The smaller size is easier for them to carry. It takes up very little floor space, feels sturdy, and even has handgrips on the bottom for lifting and dumping the laundry into the washing machine.
I think they're a great option for kids and small spaces! I was worried they wouldn't hold much laundry, but they work perfectly for our twice-a-week washing schedule.
More Interior Accessories I Didn't Use
Depending on your needs, there are many other accessories you can add or customize for your closet. We don't keep shoes upstairs, but I know many people need shoe storage in their closets.
So, here are a few great IKEA closet accessories that we didn't use:
- Pull-Out Shoe Shelf
- Pull-out Multi-use Hanger (I plan to get one of these for bags.)
- Glass Shelf
- Shoe Shelf
- Pull-out Mirror
IKEA PAX Closet Delivery
We live 3 hours from the nearest IKEA, so I decided it was worth having all of the pieces shipped to us. Since the IKEA PAX planner knew exactly what I needed, it was easy to add everything to my cart.
I was nervous about delivery, since I've had several furniture orders arrive damaged over the years. But this one went smoothly, and the delivery crew even carried the boxes upstairs to where I needed them. That saved me a lot of effort, because those boxes were heavy.
For the $99 shipping fee, I saved a 6-hour round trip, the time it would have taken to shop for everything on my list, and the hassle of hauling it all up the stairs. It was well worth it in my book.
Final Thoughts
Once everything was assembled and the clothes were put away, I wanted to cover the holes on the sides of the closet.
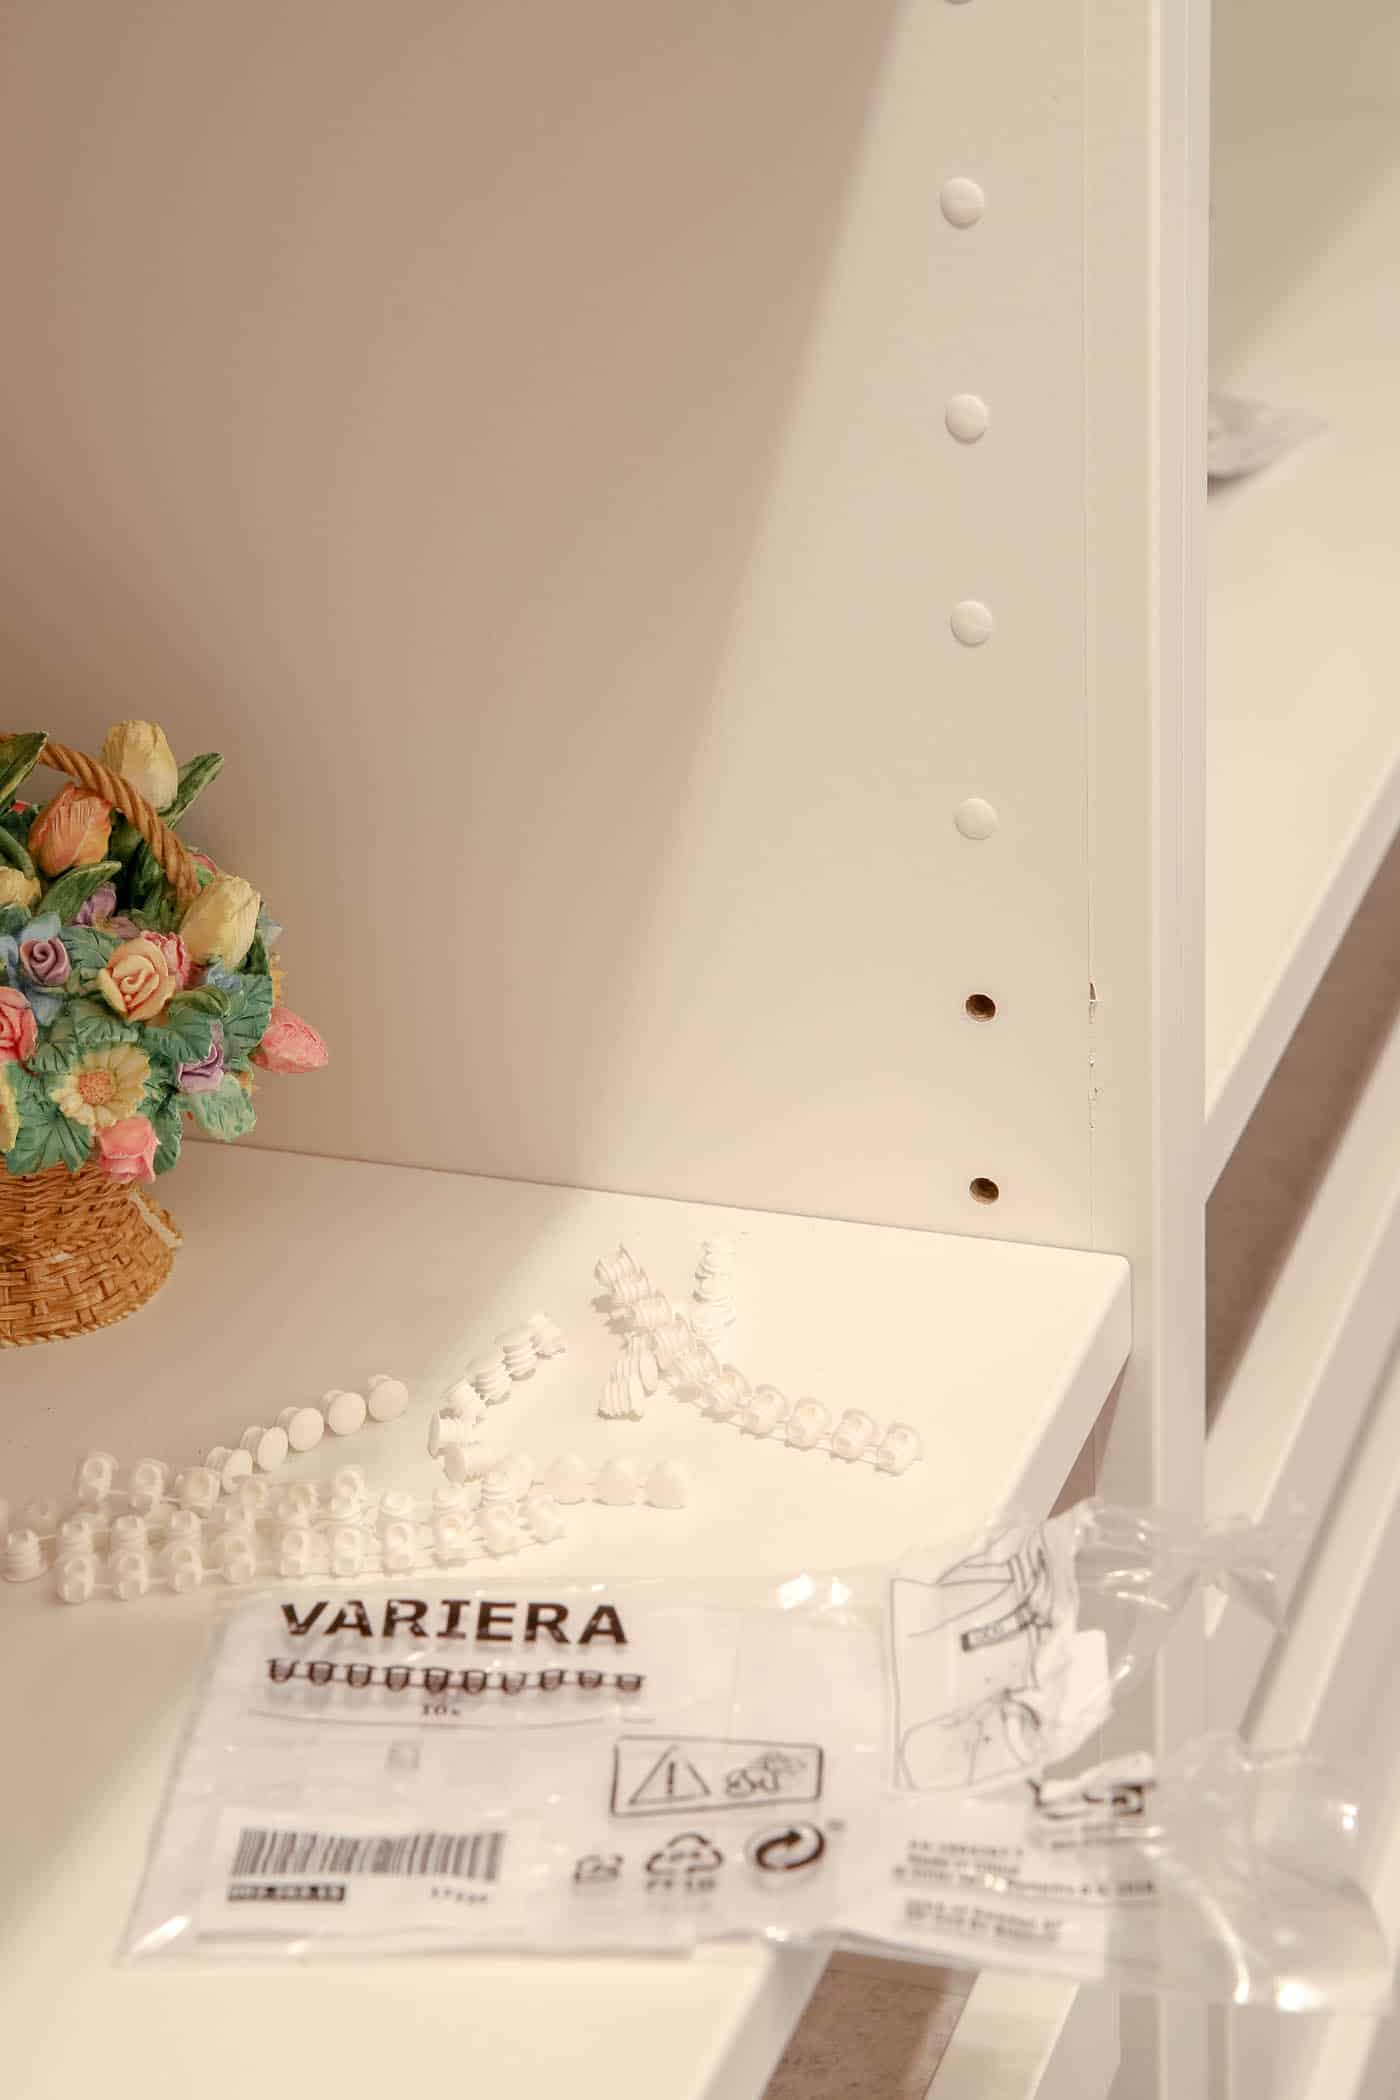
IKEA sells VARIERA covers for the unused holes. I grabbed 3 packs and thought that would be plenty. Ha! I've since ordered more and will finish covering them all later. But can you see what a difference they make?
Some people add base trim and crown molding over the closet system, but I decided not to do that for now. You can also finish the closet with caulk around the edges and paint. I may come back and make it look more finished or built-in, but for now I'm leaving it as is.
In the end, this closet system cost right around $1,500. I'm thrilled with how it turned out and how much storage it gave us. I'd install it again in a heartbeat!
I hope this helps if you're considering a closet system for yourself. It's a great way to take the affordable DIY route!
More Posts You Will Love: