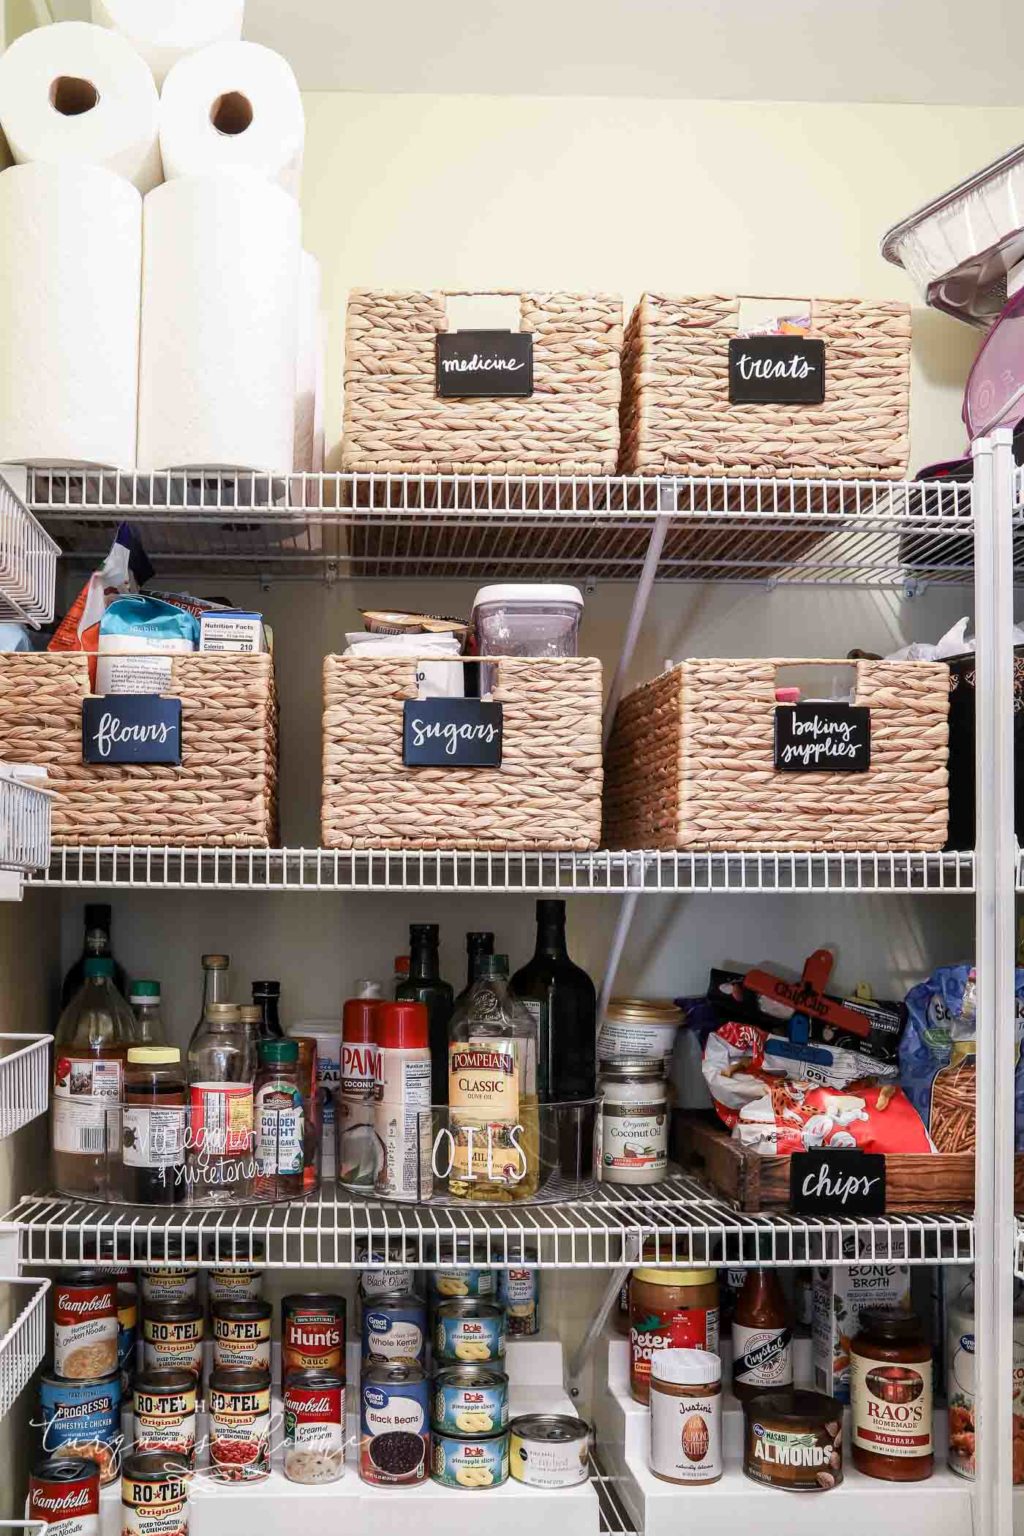
Discover how to organize a pantry with these tips and tricks to make it feel roomier and run more smoothly.
A well-organized pantry gives you back time and money, and spares you the frustration of searching for something you know you have or buying things you forgot you already own!
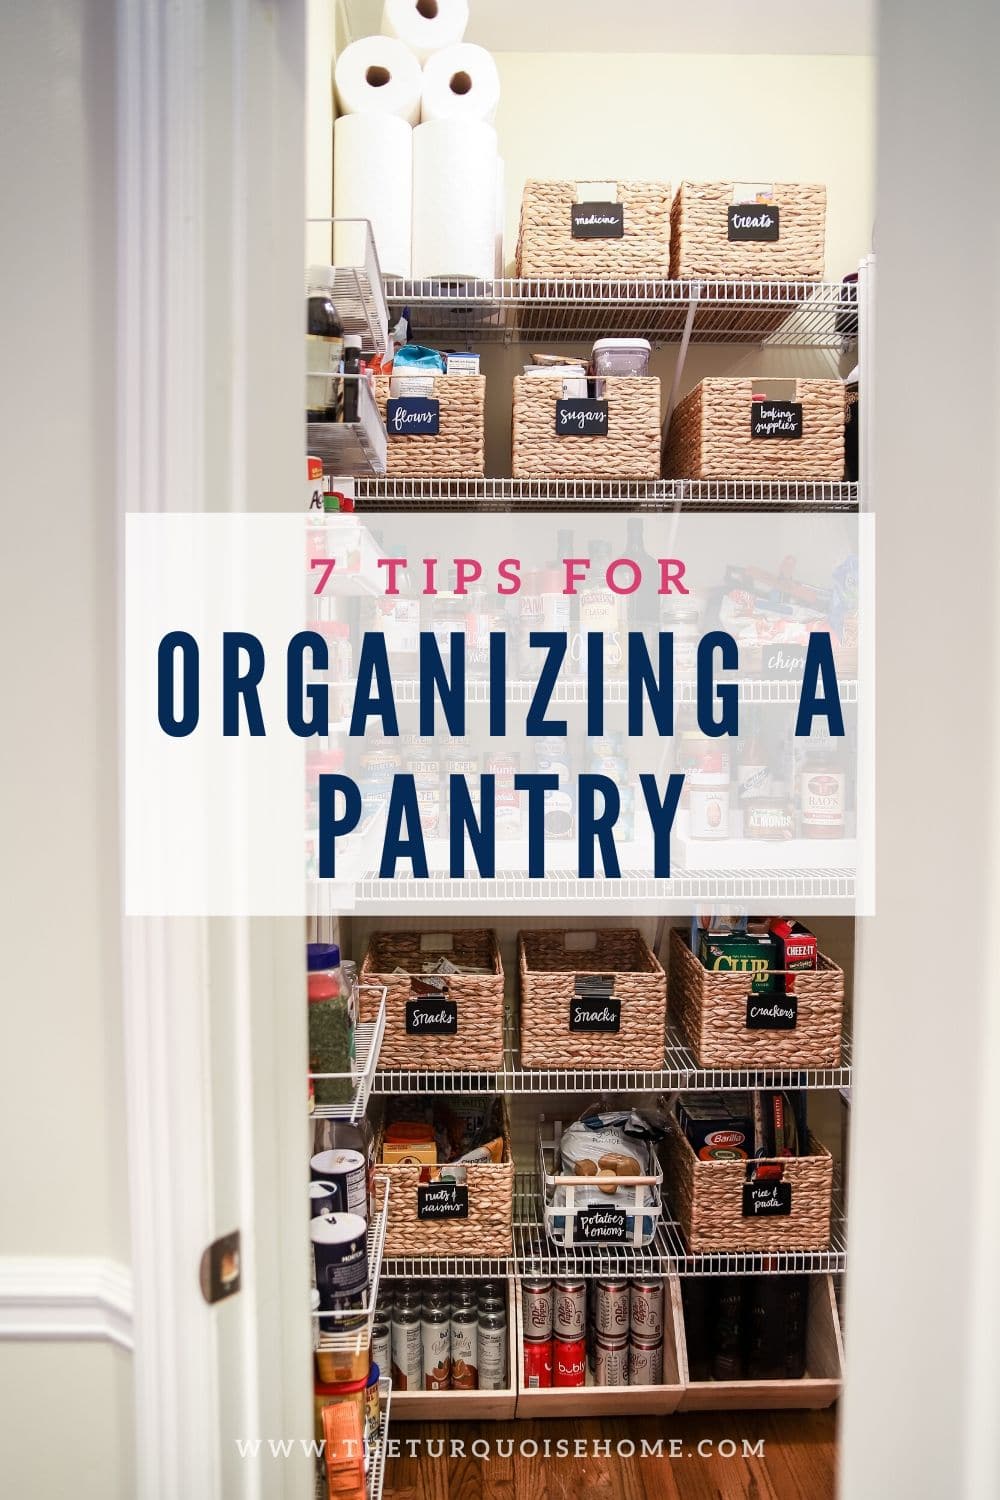
I nearly cry tears of joy every time I walk into my new pantry, which is organized from top to bottom. I'm 38 years old, and this is the first time I've had a walk-in pantry. I always knew I wanted one, but I never realized how amazing it would be!
Whether you store food in various cabinets (like I always have) or in a large walk-in pantry like the one I have now, these helpful tips will serve you well!
We moved into this house last month, and I knew the pantry had to be my first project because its disorder was driving me crazy. I tried to tidy it up a bit with everything still inside, but that didn't work at all.
Our Family Pantry Stats:
- We are a family of four: two adults and two young kids
- No pets
- We cook dinner about five nights a week and pack lunches every day.
- We do shop at Costco for a few things like snacks, pasta, and of course Rotel tomatoes.
- We have a walk-in pantry with two walls of wire shelving and a side unit for spices on one wall. The ceilings are 9 feet tall.
- I'd love to replace the wire shelving at some point, but that isn't a priority right now.
NOTE: Read through all the steps below before you start, because you'll want to measure your space and order your organizing baskets and bins before beginning step 1 of the decluttering process.

How to Declutter a Pantry
Before you organize anything, you need to declutter. You simply can't organize well with everything still in the space. It's like brushing your teeth with Oreos in your mouth. Not happening, right? So let's get rid of the unnecessary items before you sort your stuff, OK?
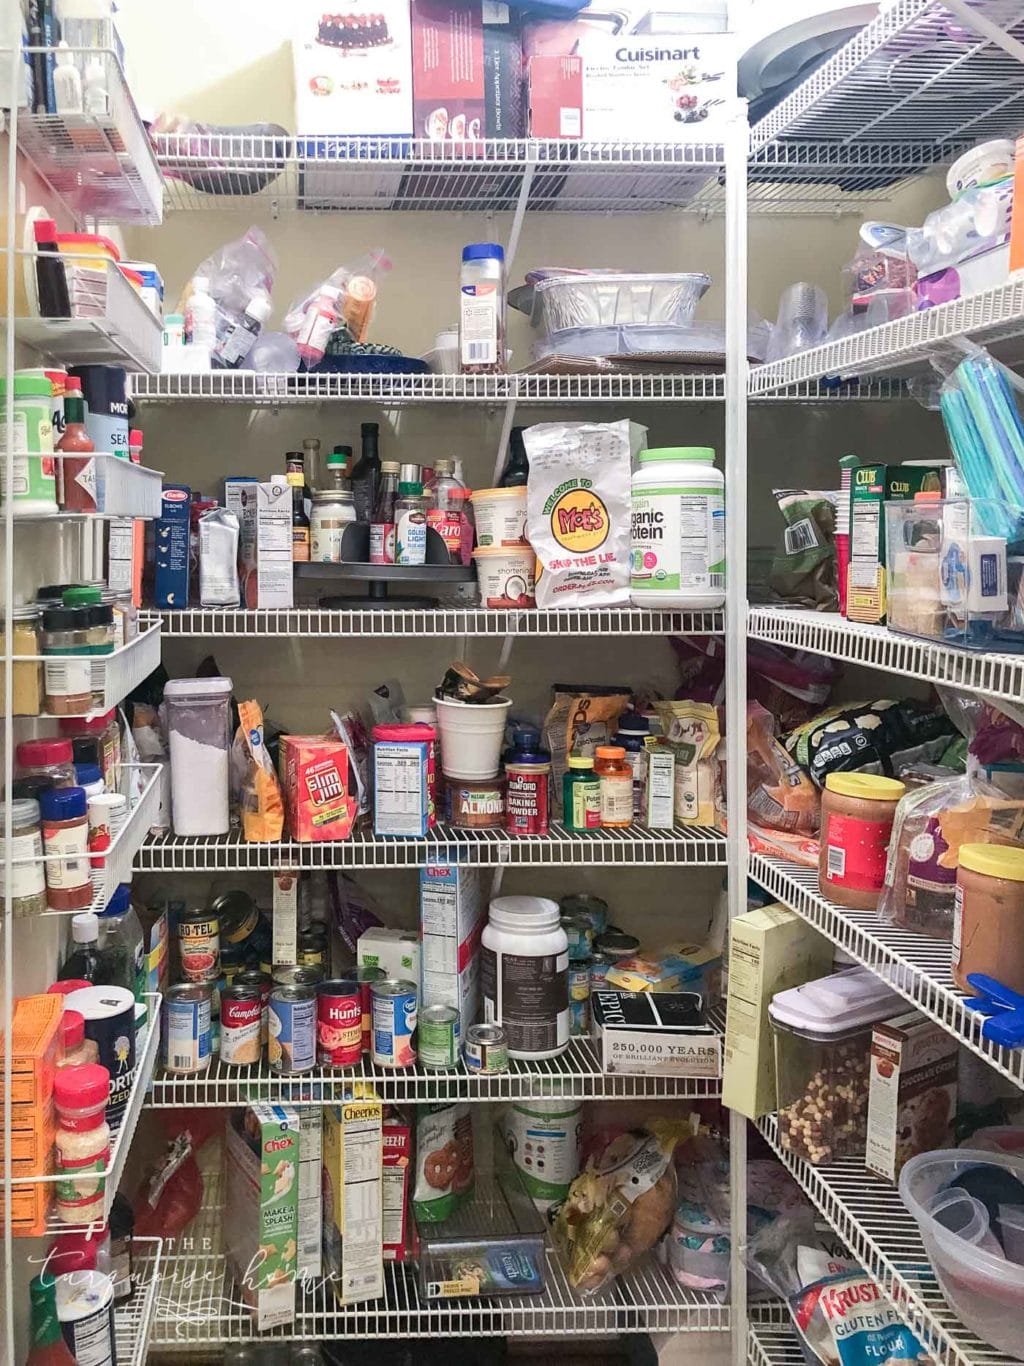
Step 1. Take Everything Out of the Pantry.
I took everything out of the pantry except for a few serving dishes on top that I knew were staying put. All the food came out, and nearly everything else did too.
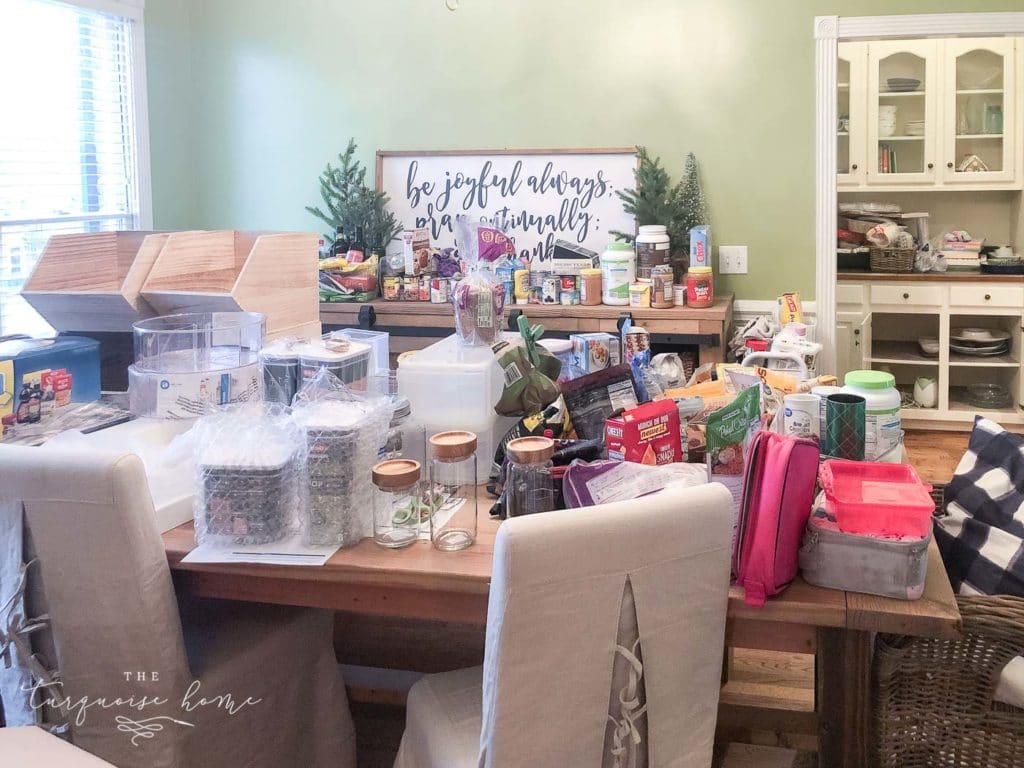
It will get worse before it gets better. It WILL look like a bomb went off in your home, and you'll wonder how all that stuff ever fit in the space. But it will get better if you follow every step, I promise!
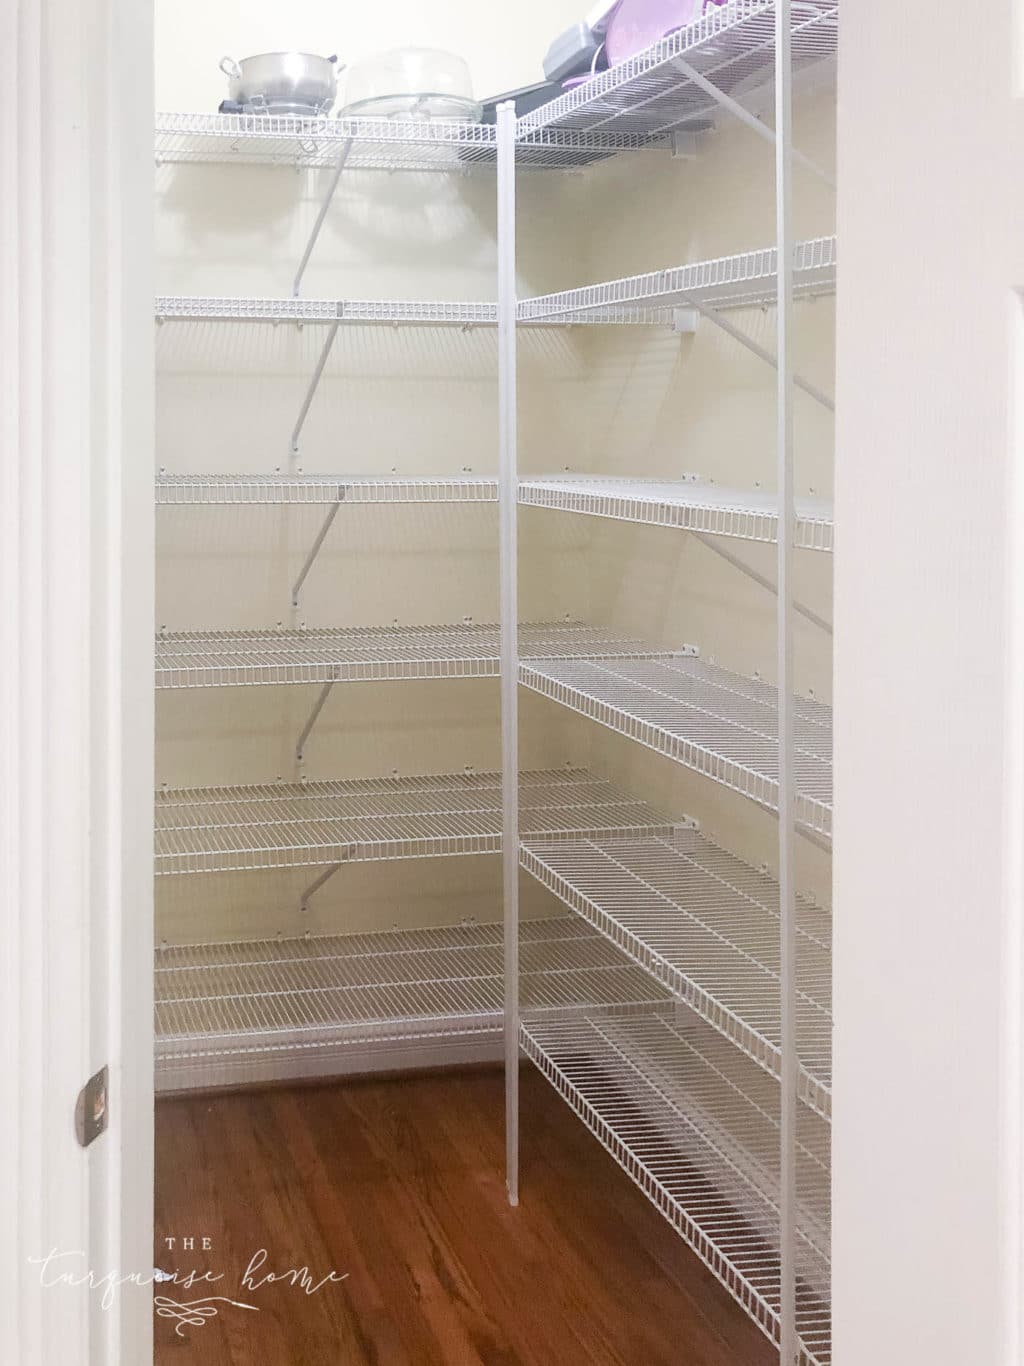
Step 2. Sweep the floor and wipe down the shelves.
Because you know it's dirty.
Step 3. Group similar items & throw away expired foods
This may look like two steps, but you can do them together. As you sort flour, sugar, oils, baking goods, snacks, and so on into groups, check the expiration dates and toss anything that's expired.
Step 4. Donate unexpired foods you know you won't use
For example, if you bought eight cans of sliced pineapple for your daughter's school party and then forgot to send them in (hypothetically, of course), it's time to pass them along to the food bank. You'll actually see mine still in the pantry, but I'm donating them as soon as I finish this post!
Step 5. Move any items to a new space in your home if it makes sense.
By moving items, I mean that anything in your pantry that belongs somewhere else should be relocated. I put all my serving pieces on top of the pantry while unpacking the moving boxes.
Then I realized I had empty cabinets in my butler's pantry, and the serving pieces would be better off there. They're easier to reach and less likely to break when I take them down from the top shelf of the pantry. That freed up the top shelf for my paper towels.
So move anything that belongs somewhere else in your home!
Walk-In Pantry Organization Ideas
Now comes the fun part! Once you've decluttered and grouped like items into categories, it's time to learn how to organize a pantry with deep shelves! Let's make it both beautiful and functional!
Years ago I would have argued that you could just use whatever baskets and bins you already have to organize your pantry. And if money is tight, then by all means use what you have and save up for pretty storage bins later. (Cover those diaper boxes in contact paper all day long, friend!)
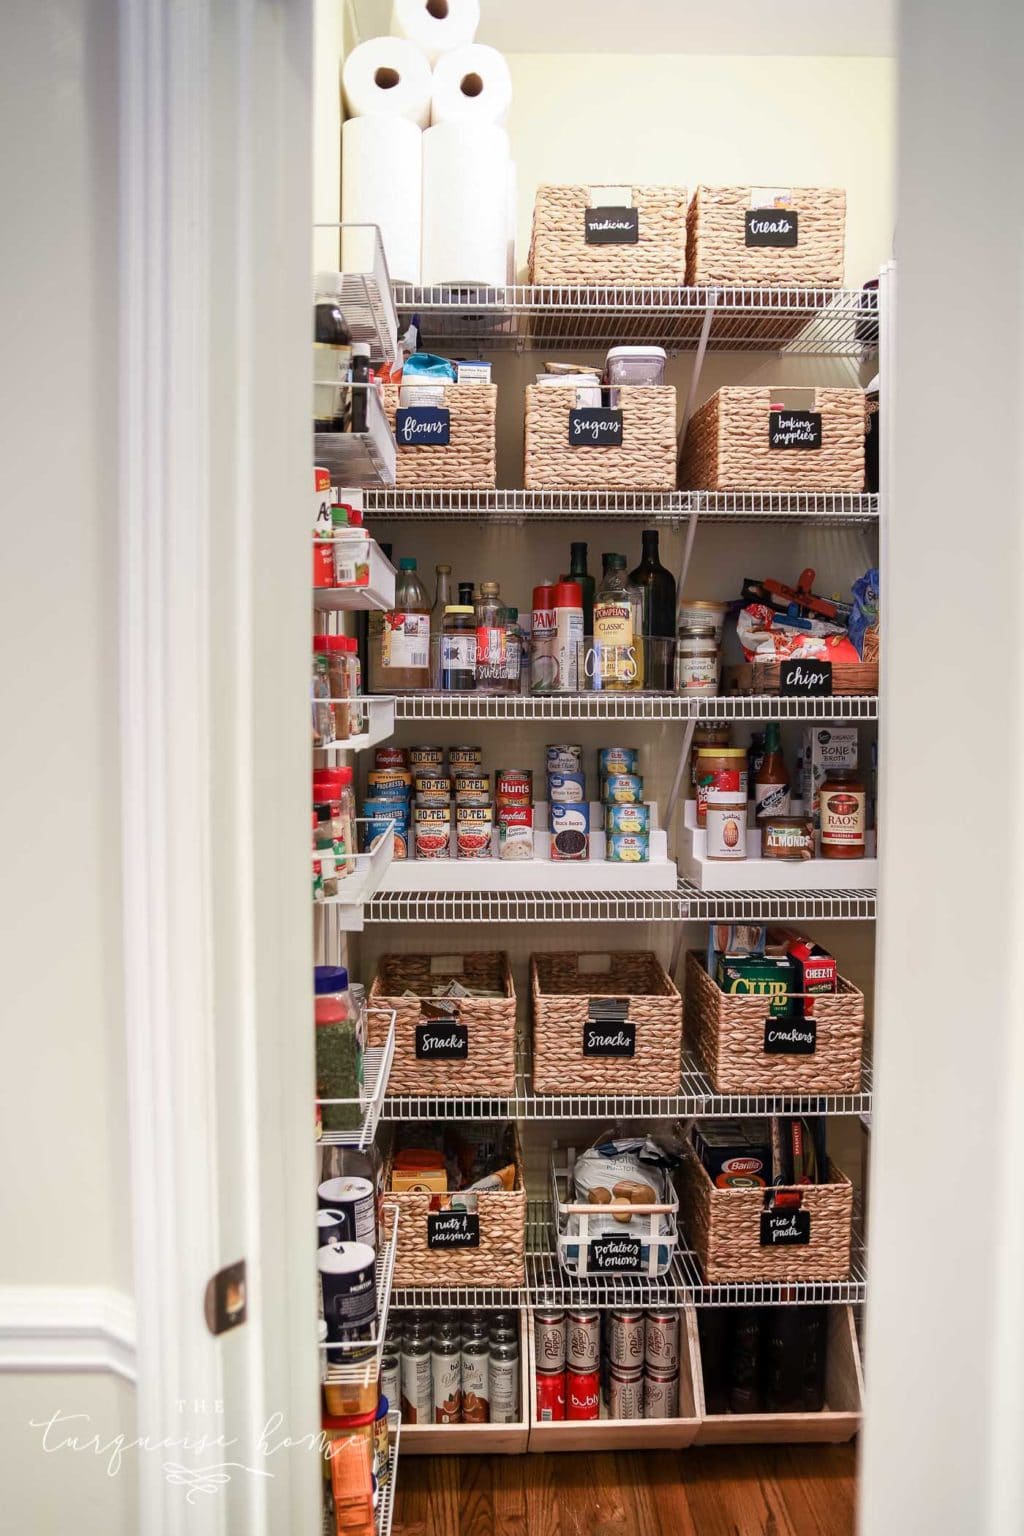
Scroll and Click an Image to Shop the Organization Pieces
But if you CAN invest in storage pieces that make your space look as good as they work, I highly recommend it! It isn't necessarily cheap if you have a large space to organize, but it's a worthwhile investment you'll only have to make once.
I know that if a space looks good, I just feel better in it. If I look into my pantry and LOVE what I see, I'm more likely to keep it that way and enjoy cooking for my family and packing their lunches each day. So if you can, do it!
Step 1. Measure Your Space!
Before you buy a pile of organizing tools, measure the height and width of your shelves. Take special note of any obstacles that could keep you from using certain tools, and make the most of the space you have.
I found that The Container Store had the best selection at the best prices. This isn't a sponsored post (I wish it were), but be sure to sign up for their free loyalty program and get 15% off your first purchase.
I knew I wanted baskets because of my wire shelving: baskets slide easily along the shelves and act like drawers. So finding baskets in exactly the right size for my space was crucial. Thankfully, closet shelving comes in standard sizes, and basket makers produce versions to fit those!
Step 2. Think through what you need to store.
Do you have a large stash of cans that need plenty of storage? Or a lot of food you'd like to transfer into canisters when you get home from the store, like flour, sugar, rice, and beans?
Do you have many snacks that need baskets, or oils and vinegars that need lazy Susans?
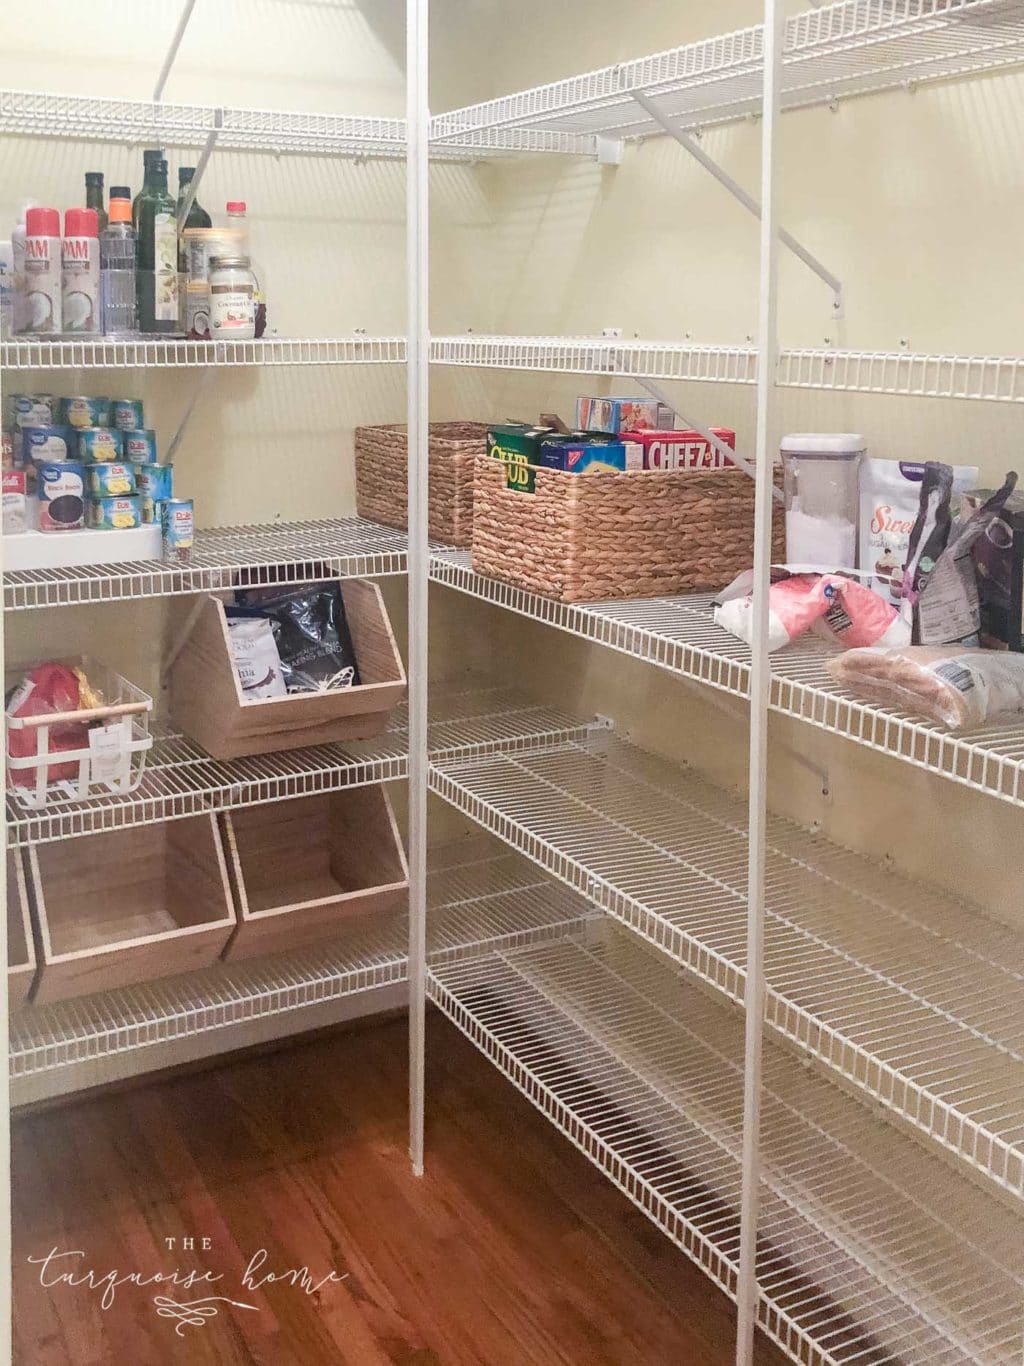
Step 3. Buy the containers you need & want + extras!
With your measurements and food needs in mind, start filling your online cart. I wanted opaque storage so that when I opened the door, I'd see mostly uniform color and texture rather than every item in the pantry. You might prefer clear plastic bins so you can see what you have at a glance.
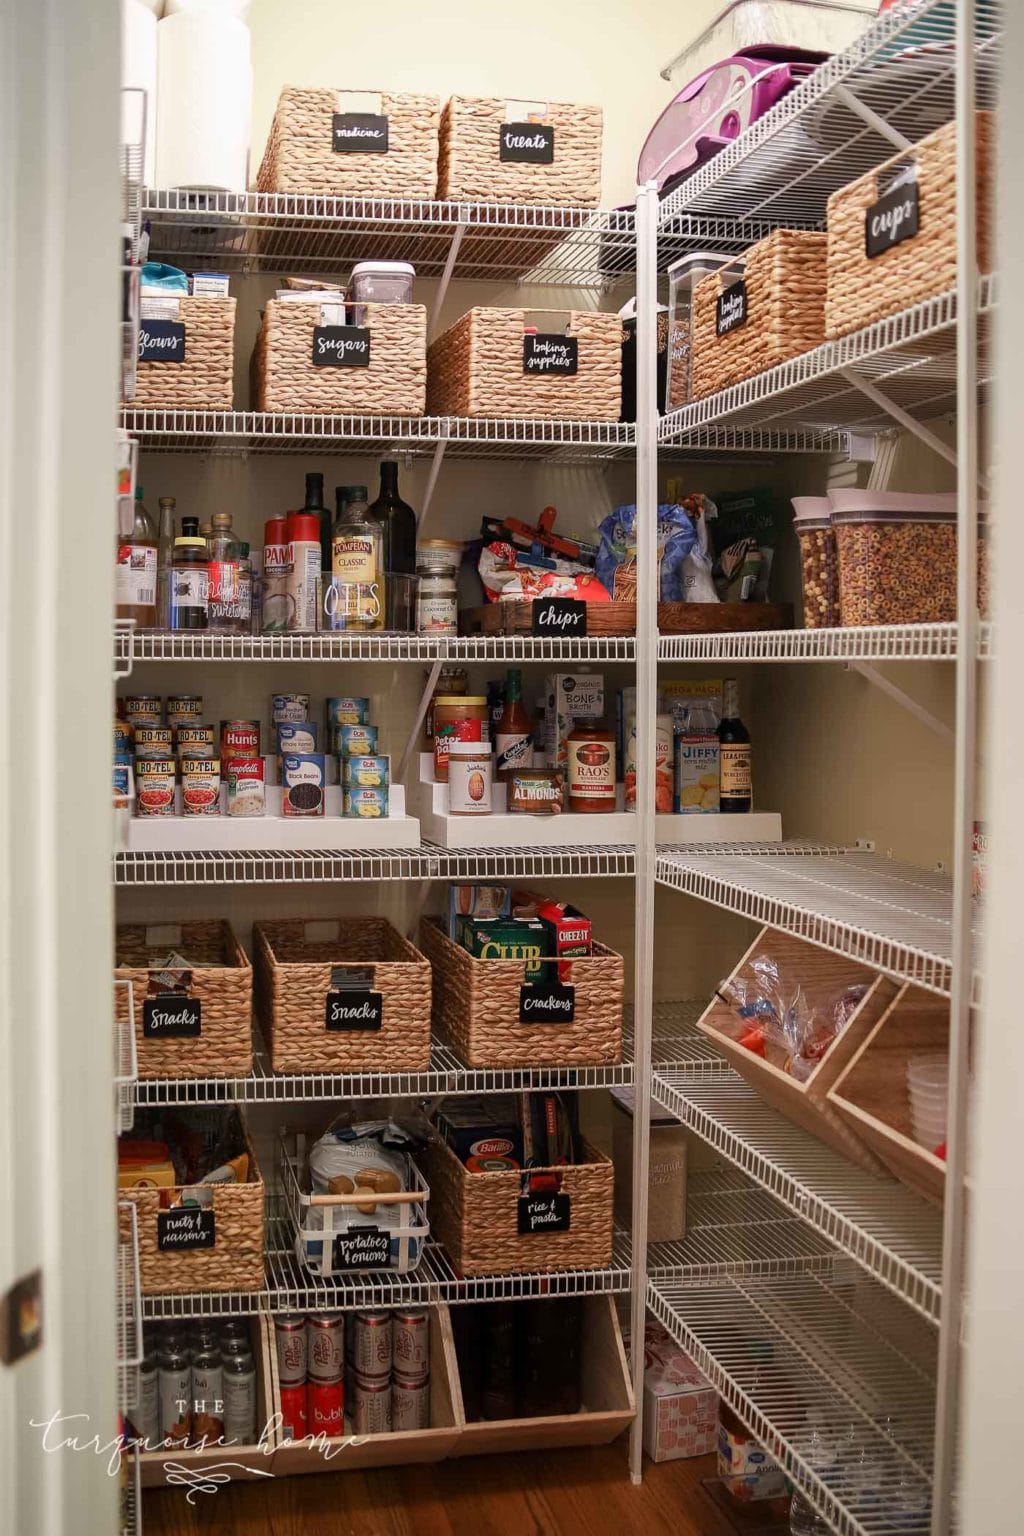
Scroll and Click an Image to Shop the Organization Pieces
I wanted white and wood tones, so I stuck with the water hyacinth baskets, large white shelf risers, and the white metal baskets with wood handles. Think about how you want your pantry to look when you're finished, and choose your storage solutions accordingly.
And order MORE than you think you'll need! You can always return extras, but reordering is a hassle. I thought I was ordering plenty, and for some things I was. But I didn't get enough baskets at first and had to order eight more after my first order arrived!
Step 4. Organize the contents in a systematic way that makes the most sense to you!
I can't figure out this step for you, because I don't know your life. BUT I'll share below how I organized MY pantry, and I hope it gives you lots of pantry organization ideas!
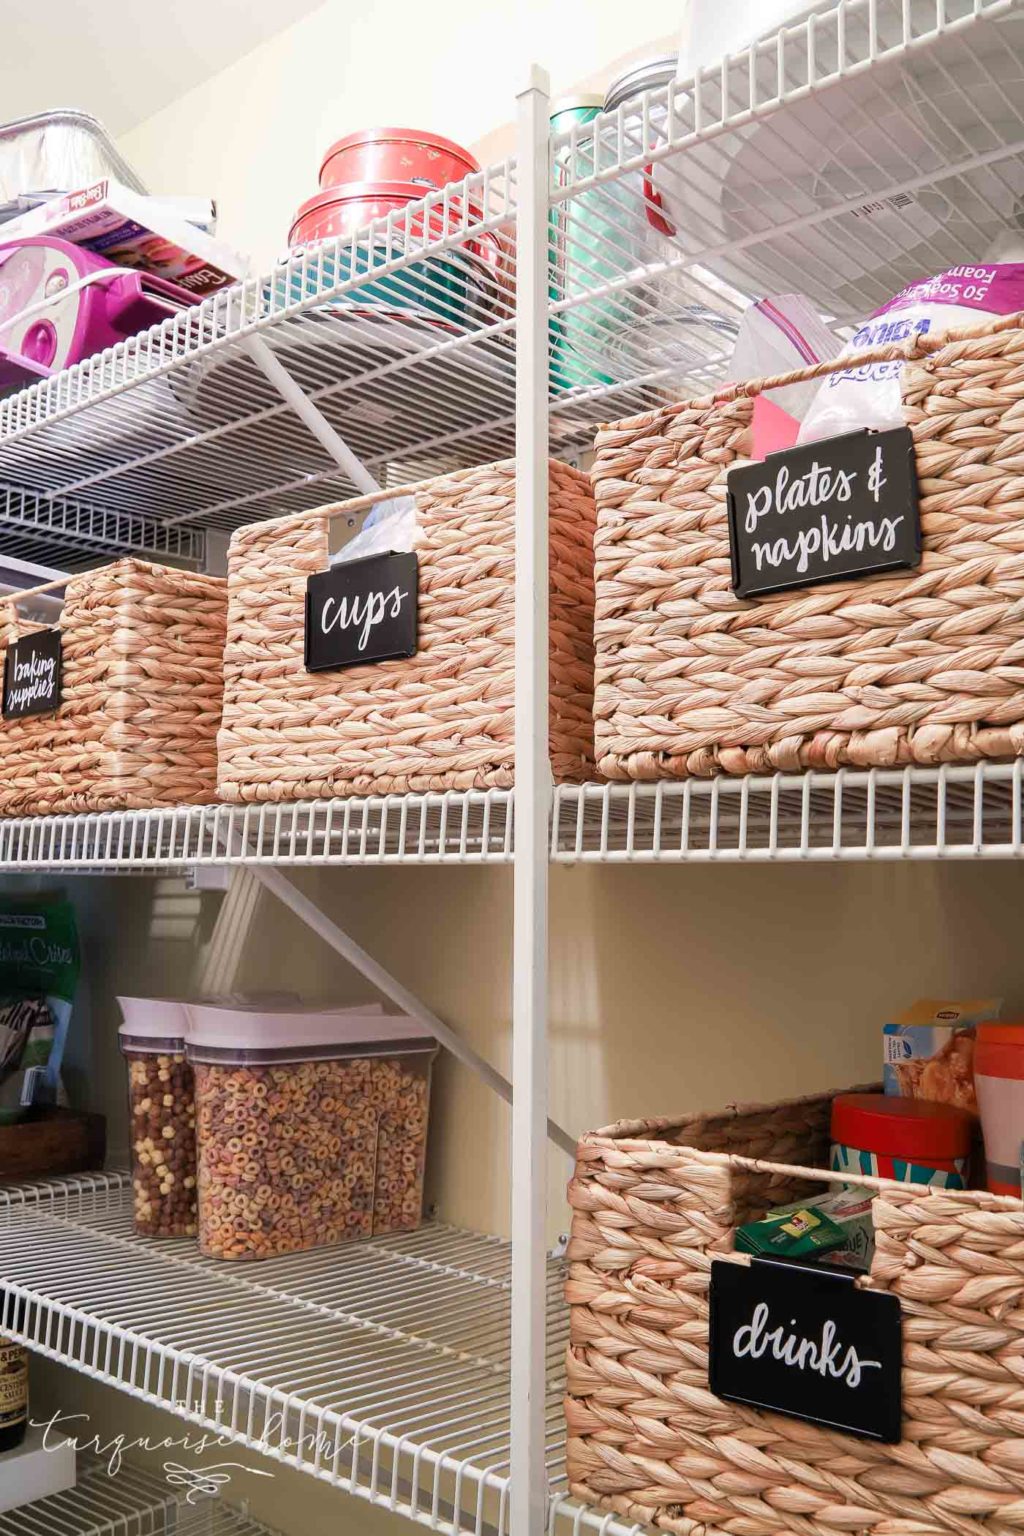
How I Set Up My Pantry {tips and tricks}
Scroll and Click an Image to Shop the Organization Pieces
1. Use Can Risers for Cans (and other back stock items)
I did a lot of research before starting my pantry project. I watched Instagram stories and read books, because I wanted to know the BEST way to make my pantry work for me.
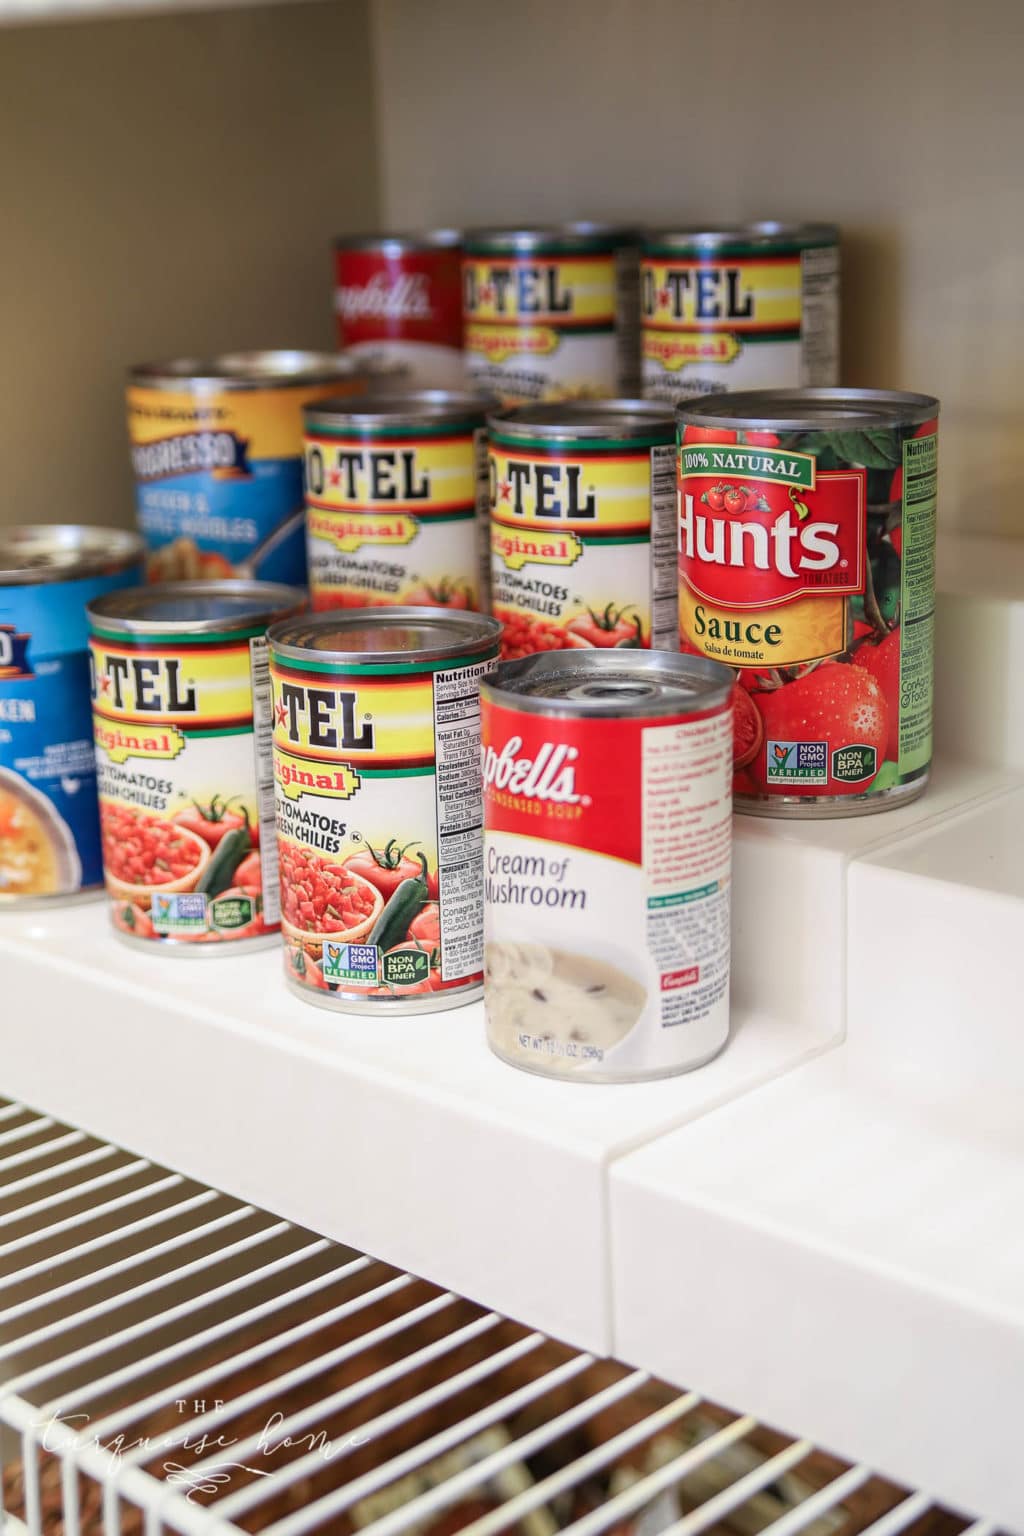
The advice I heard over and over was to use the large Expand-a-Shelf for cans. I don't have a ton of cans, so I used the second expand-a-shelf for random back stock. (Don't buy the original size, because it doesn't fit full-sized cans. The large size fits all kinds of cans as well as big jars.)
Risers keep your items easy to reach and easy to see, which I love!
2. Label Your Heart Out!
Y'all. I've never loved a label more than these chalkboard bin labels that fit perfectly over the sides of my baskets. I used this chalk marker and practiced the words on paper first, then wrote them in pencil on the chalkboard labels before going over them with the chalk pen. Aren't they just adorable??
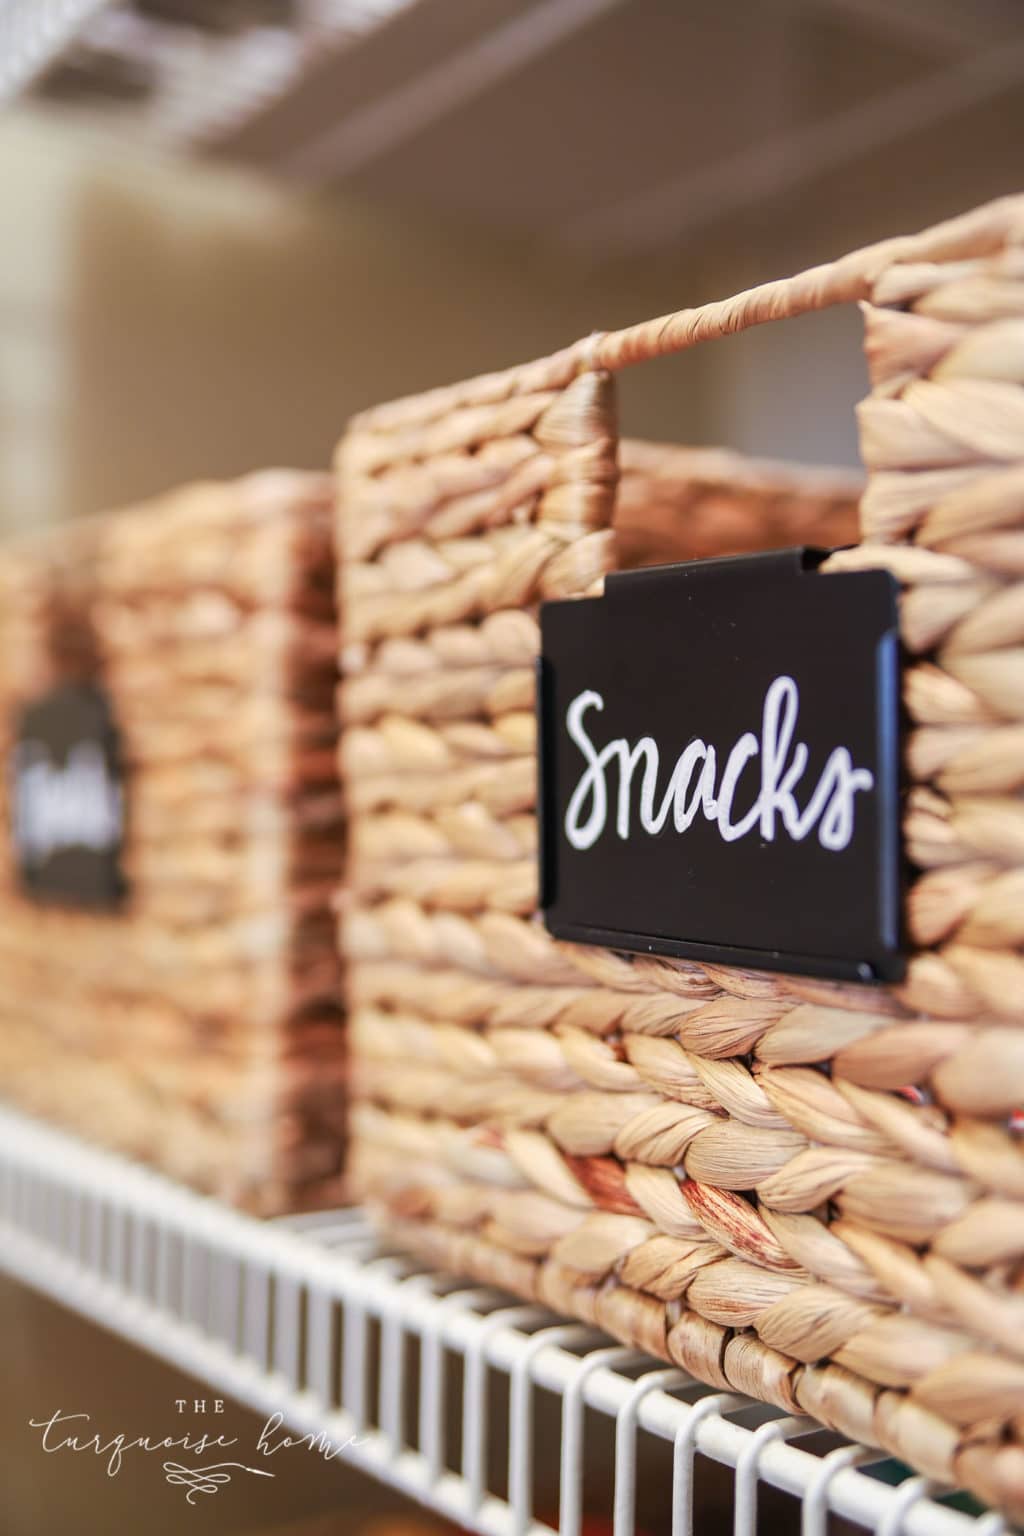
Now, instead of telling my husband the rice is in the middle left side of the pantry, I can say it's in the "rice and pasta" bin and he can find it with ease! Magical, I tell ya!
I'm pretty sure labeling my baskets will be the number one reason this pantry stays organized. I'll be sure to post an update in a year.
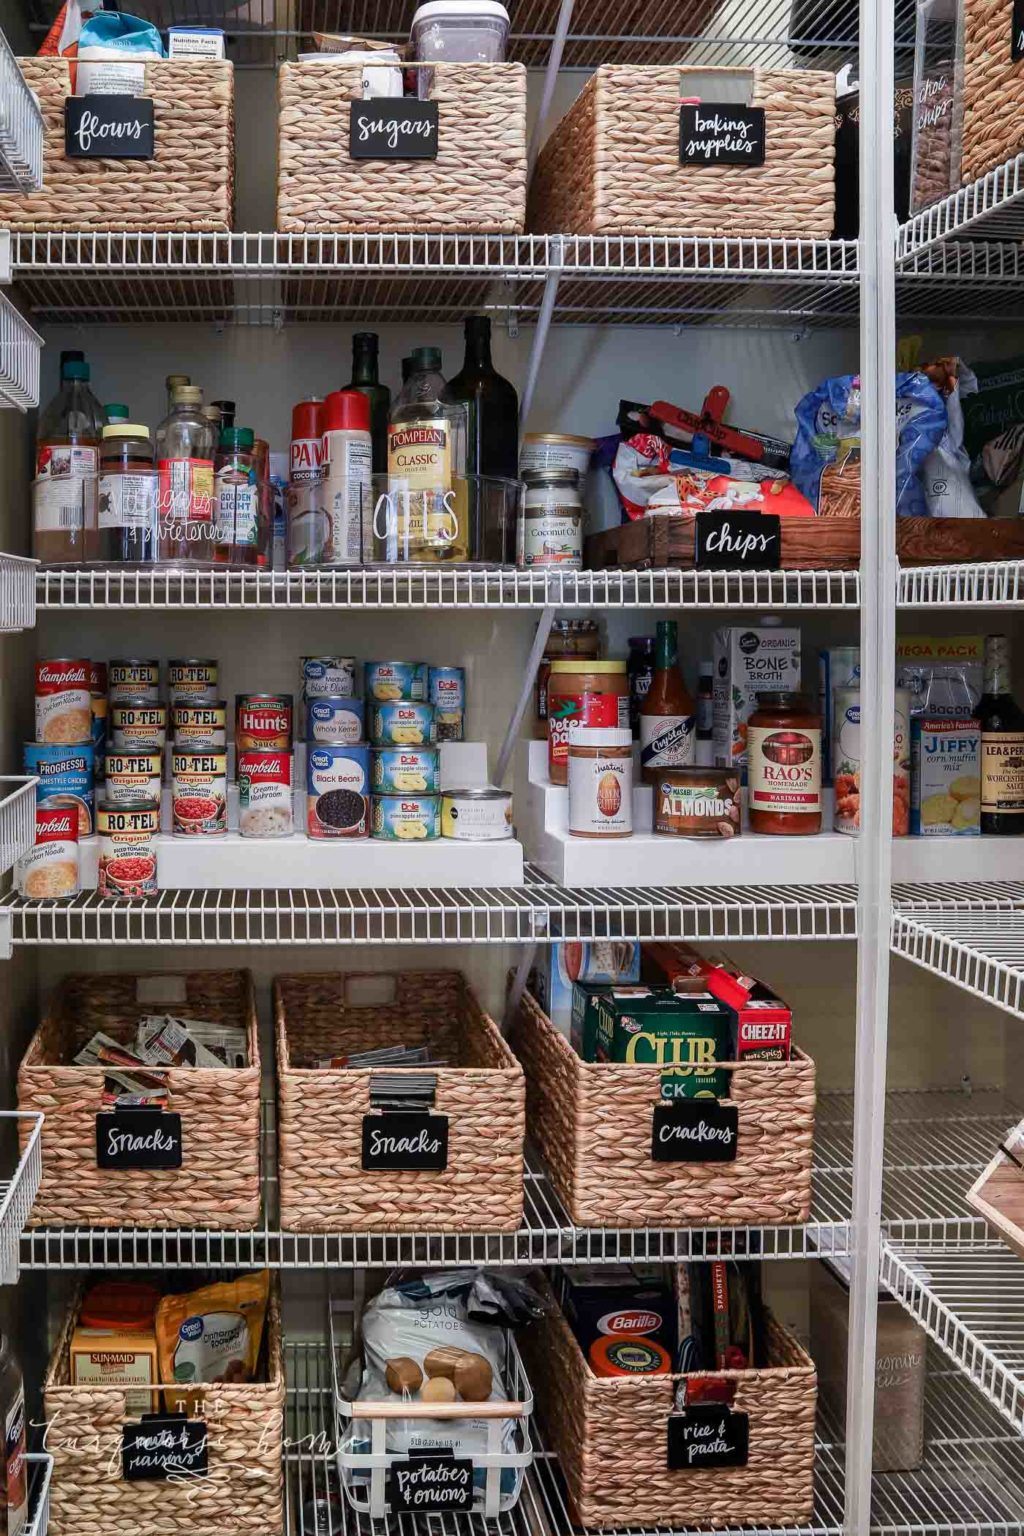
That said, you don't have to label EVERY. SINGLE. THING. I didn't feel the need to label my large tubs of protein powder. I just put them on a shelf and called it a day!
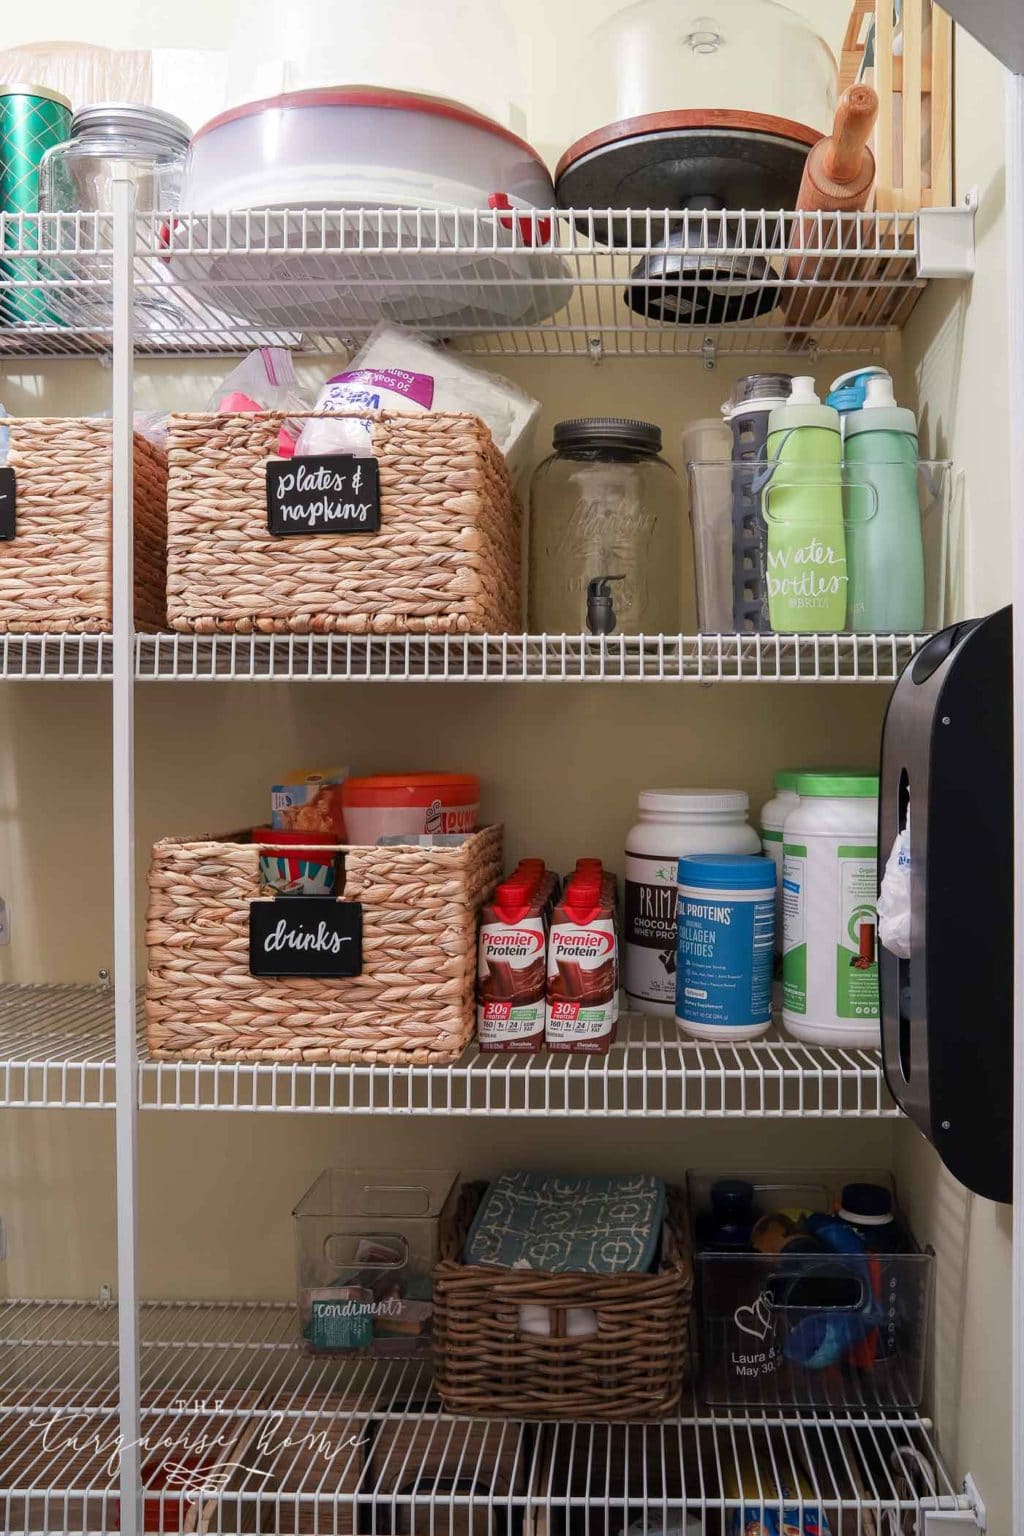
3. Categorize in a way that works for you.
When you group like items, the right system will become obvious. You might prefer more general labels, like dinner, lunch, breakfast, and beverages. Or you may cook with five different kinds of pasta, so you want clear containers and to decant every pasta when you go grocery shopping.
Your family may eat seven types of cereal, which means you need that many cereal containers. You do you, boo. And it will be glorious!
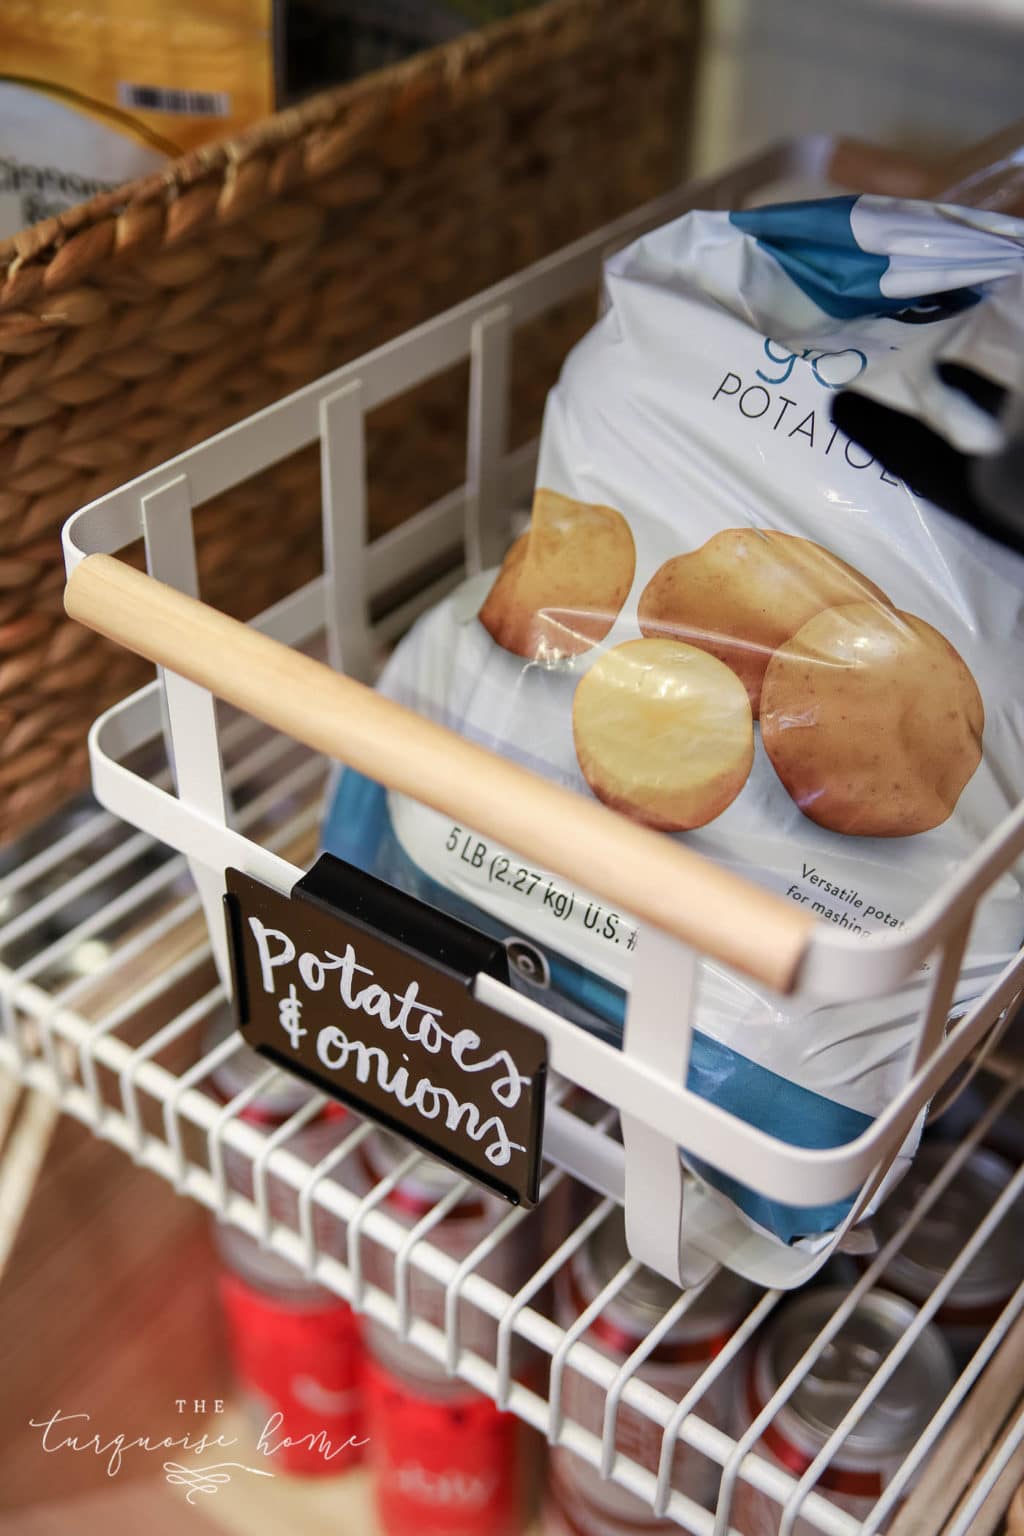
I bought two of those white baskets with wood handles: one for potatoes and one for onions. Then I realized one would work for both, so I took the second basket and used it elsewhere in my home. You'll figure it out as you go!
4. Use extra wall space or the back of the door.
We don't need any storage on the back of the pantry door, but I would use it if I did. We do have an organizer on the left wall, where I've alphabetized our spices. (I plan to buy matching spice containers to make it look more uniform, but that'll be another project for another day.)
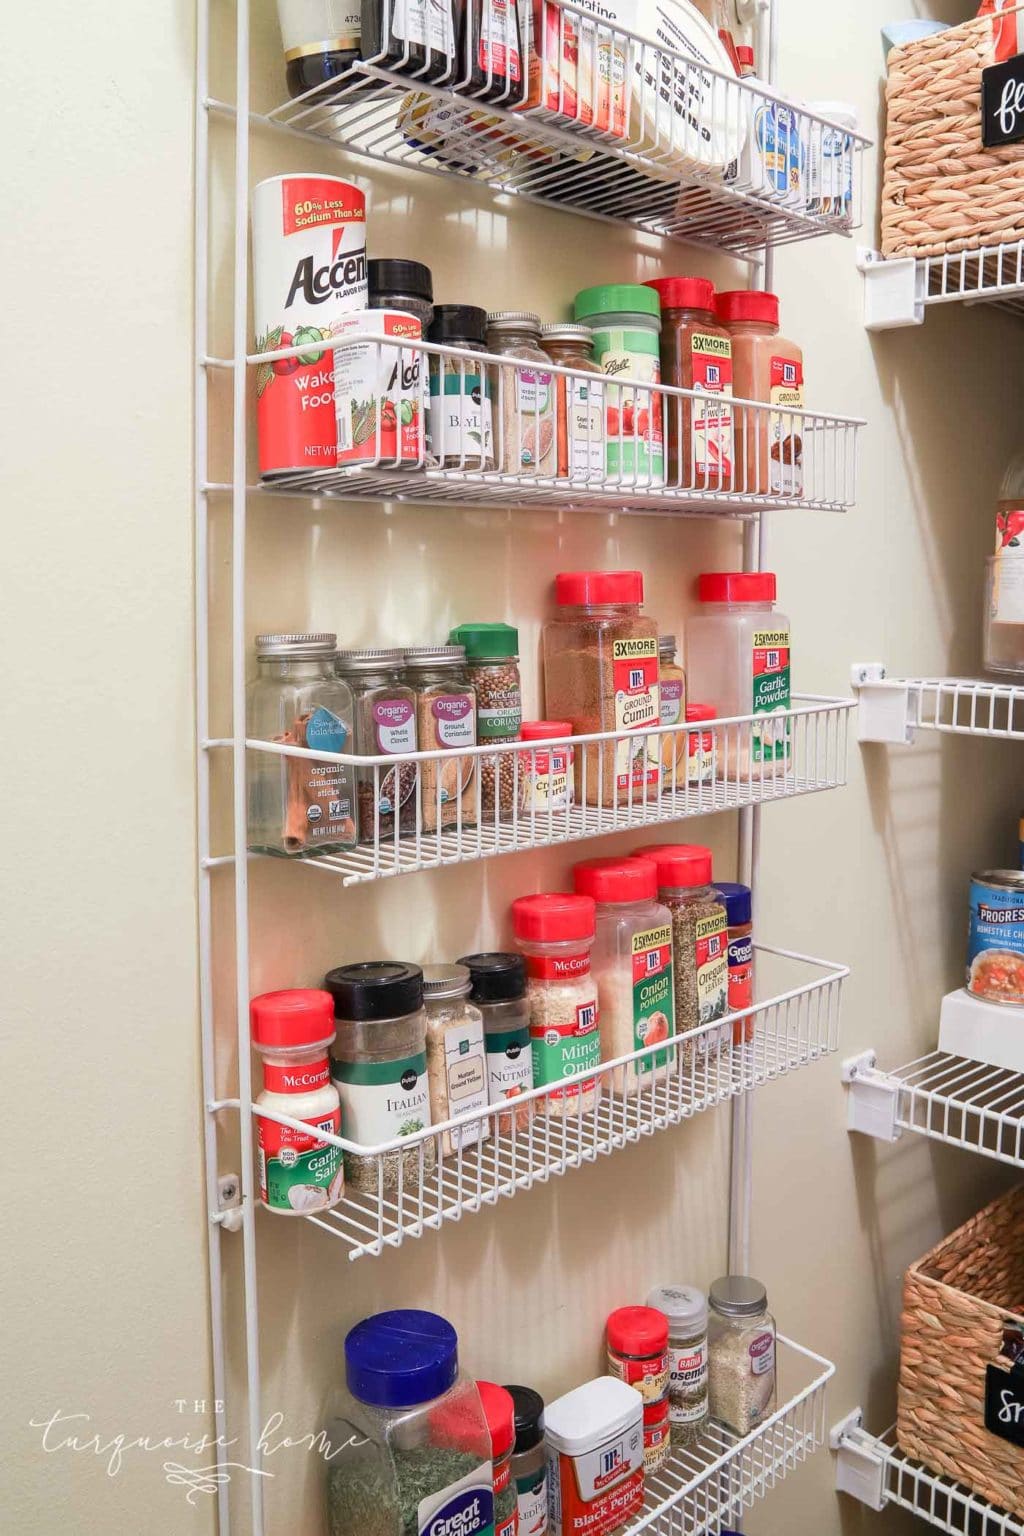
I also used the right side wall of our pantry for our grocery bag organizer. I've had this thing for years, and it's perfect for keeping those plastic bags tidy and within reach!
5. Use a lazy Susan for small round containers or hard-to-reach corners
With wire shelving, round containers of oil and sweeteners can easily tip over. It's also hard to see what's behind the front row. Enter the lazy Susan!
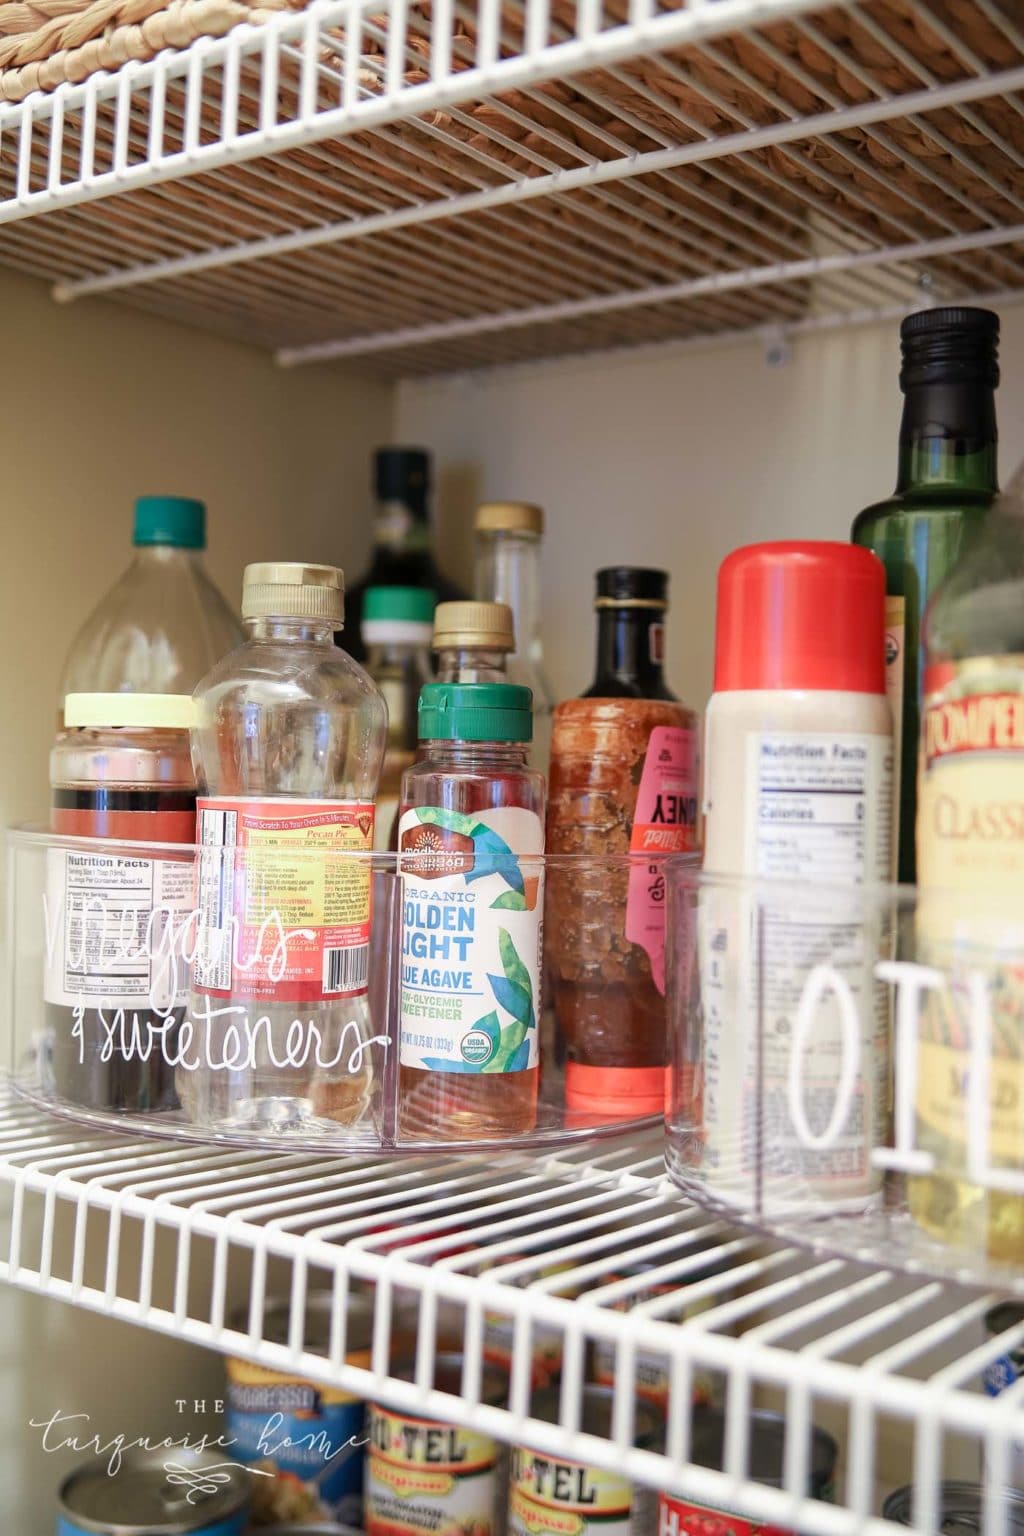
I put vinegars and sweeteners on one and oils on another. It's perfect!
I plan to buy more for the corners of my pantry to make use of that hard-to-reach space.
6. Put Frequently Used Items in Canisters
I don't want to decant everything I buy, because that would take too much time. BUT the things we use every day go into containers, like cereal, rice, and chocolate chips.
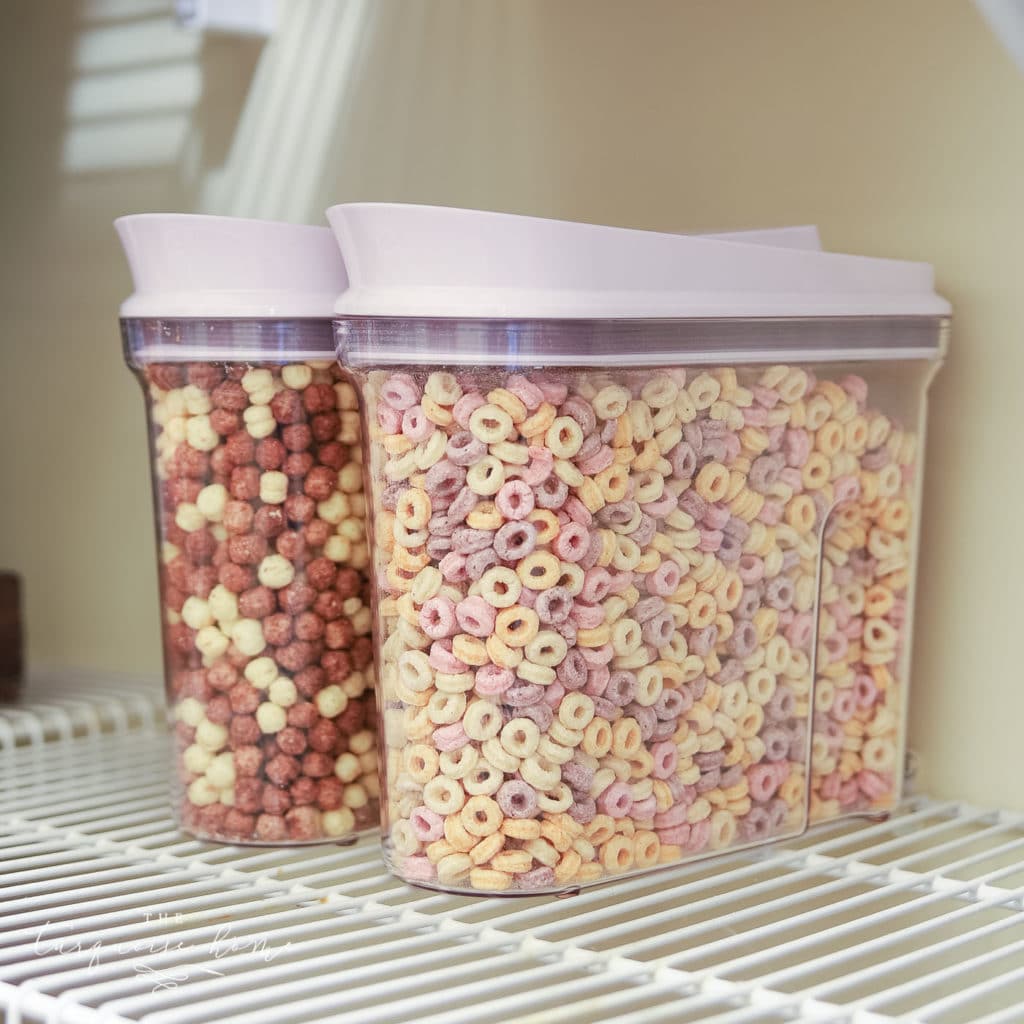
Those are literally the only things I took out of their boxes. I may put the chips in their own containers at some point if the tray of chip bags doesn't work out. (I have a feeling it won't.)
But if some dry goods are staples in your home and you go through them quickly, they're good candidates for canisters. I love the OXO Pop canisters and these cereal dispensers.
7. Use Reach-in Bins for Larger Items
I grabbed several stackable wooden bins to keep larger items together, like drinks on the floor and plastic containers. I wanted to see inside and reach everything easily, but I also wanted a way to keep them grouped.
The bins on the floor really stop the drinks from rolling around and getting lost back there.
Final Thoughts
I hope these tips help you get your own pantry space organized! Let me know in the comments if you have any other great tips I missed!
More Posts You Will Love: