Are you tired of looking at bare, boring windows? Cornice boards can add a touch of elegance and style to your decor. They’re the perfect finishing touch for any room, and surprisingly easy to make. With a little time and effort, you can build your own DIY cornice boards right at home.
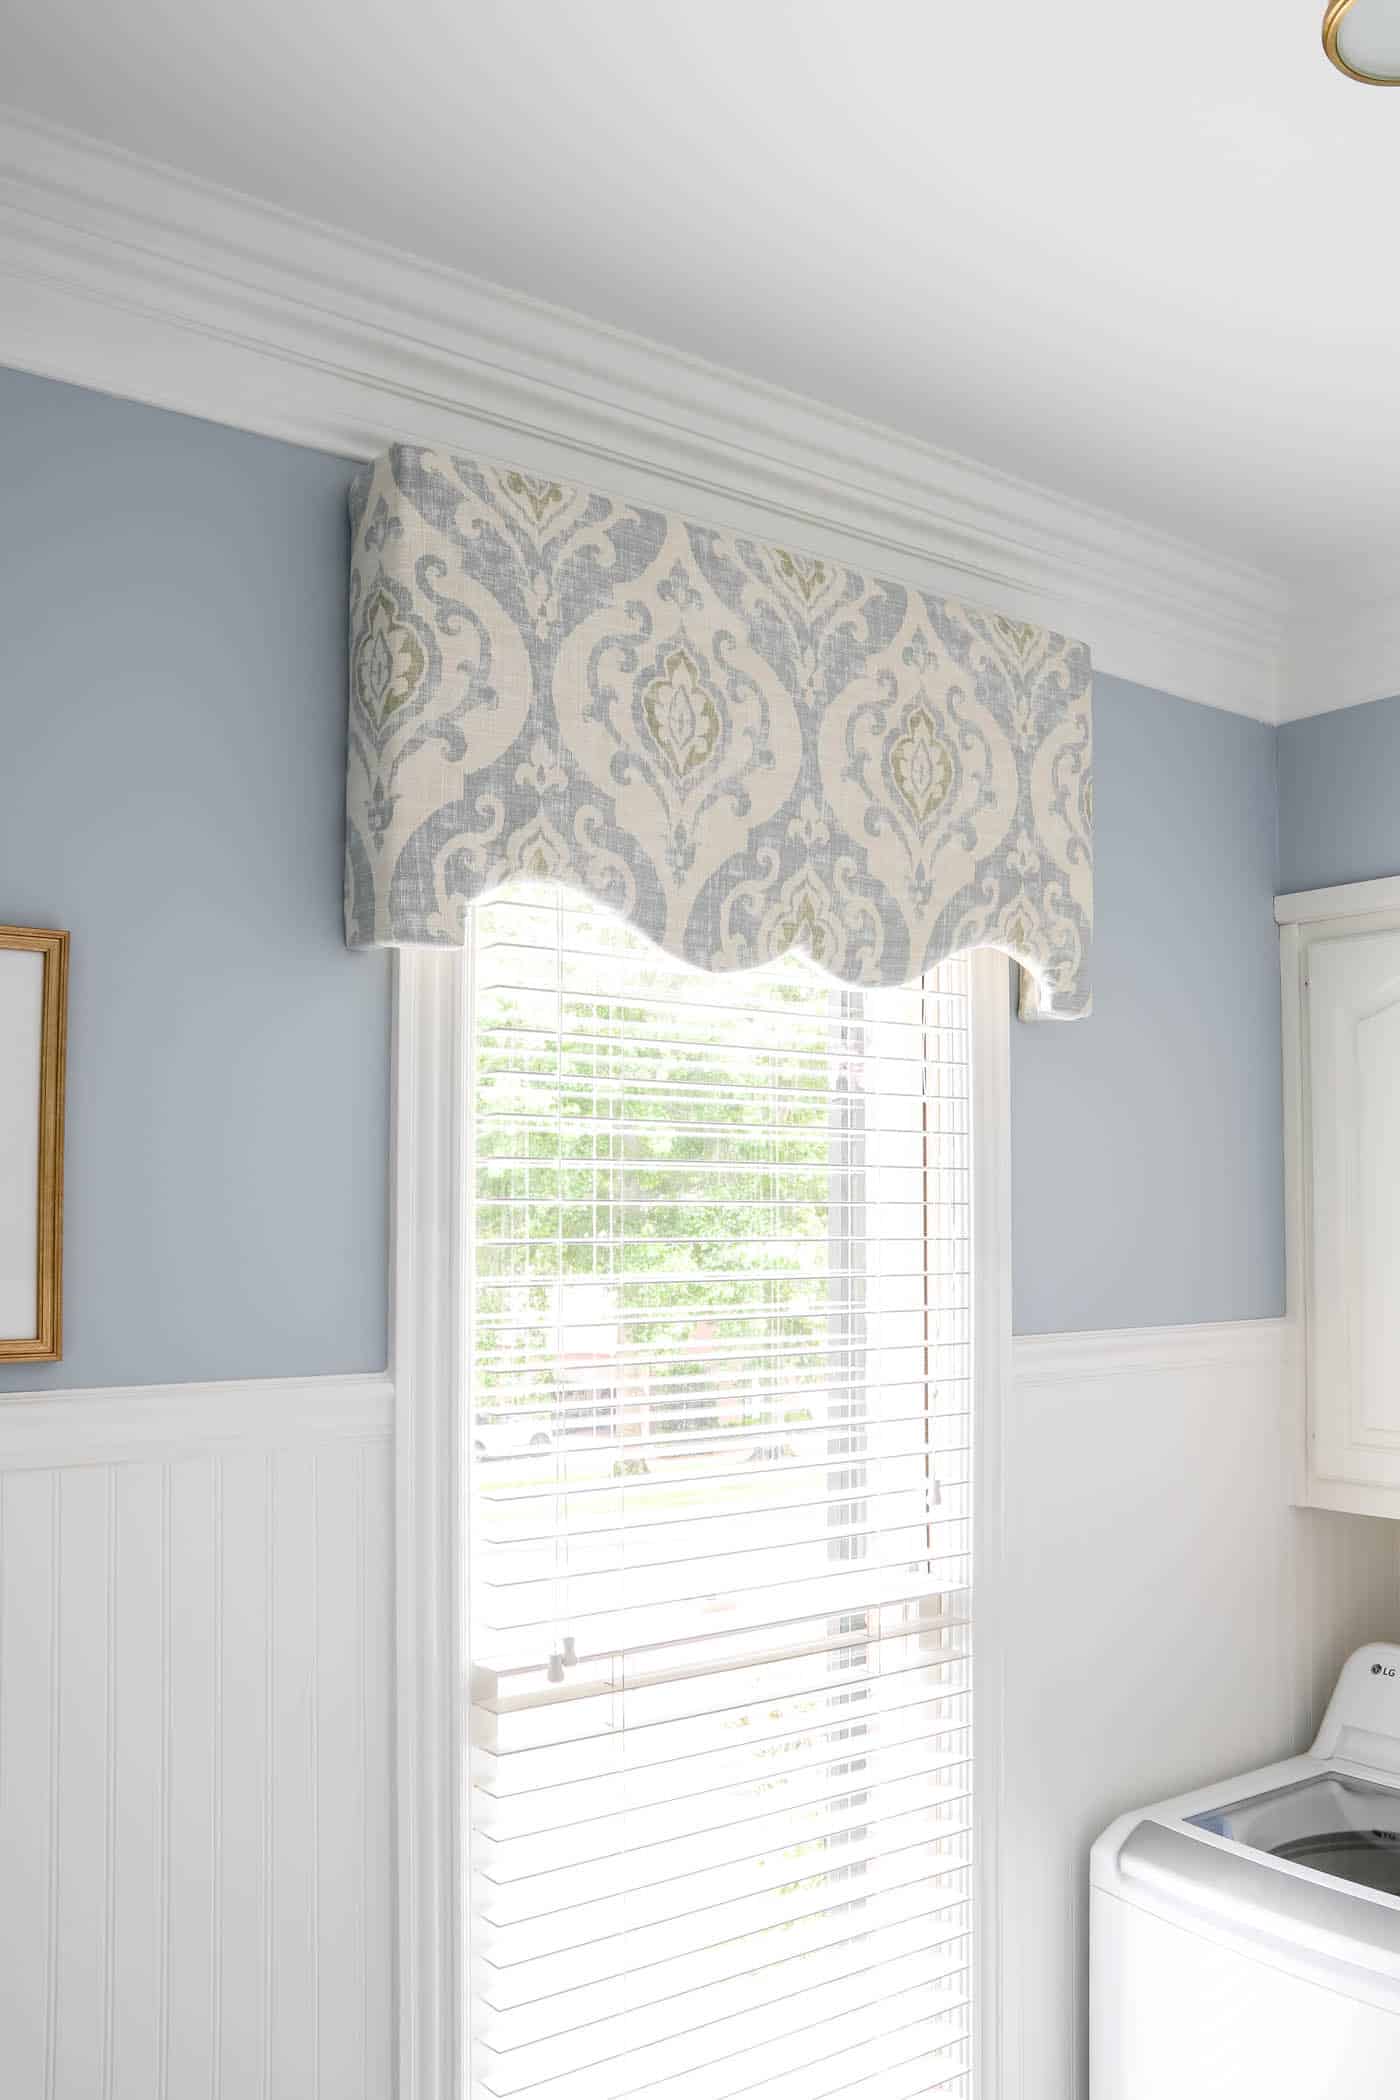
I’ve been working on updating my basic 1990s laundry room for more than a year now, and I’ve finally finished the next piece of the makeover! I’m almost at the finish line, and it has come together so well!
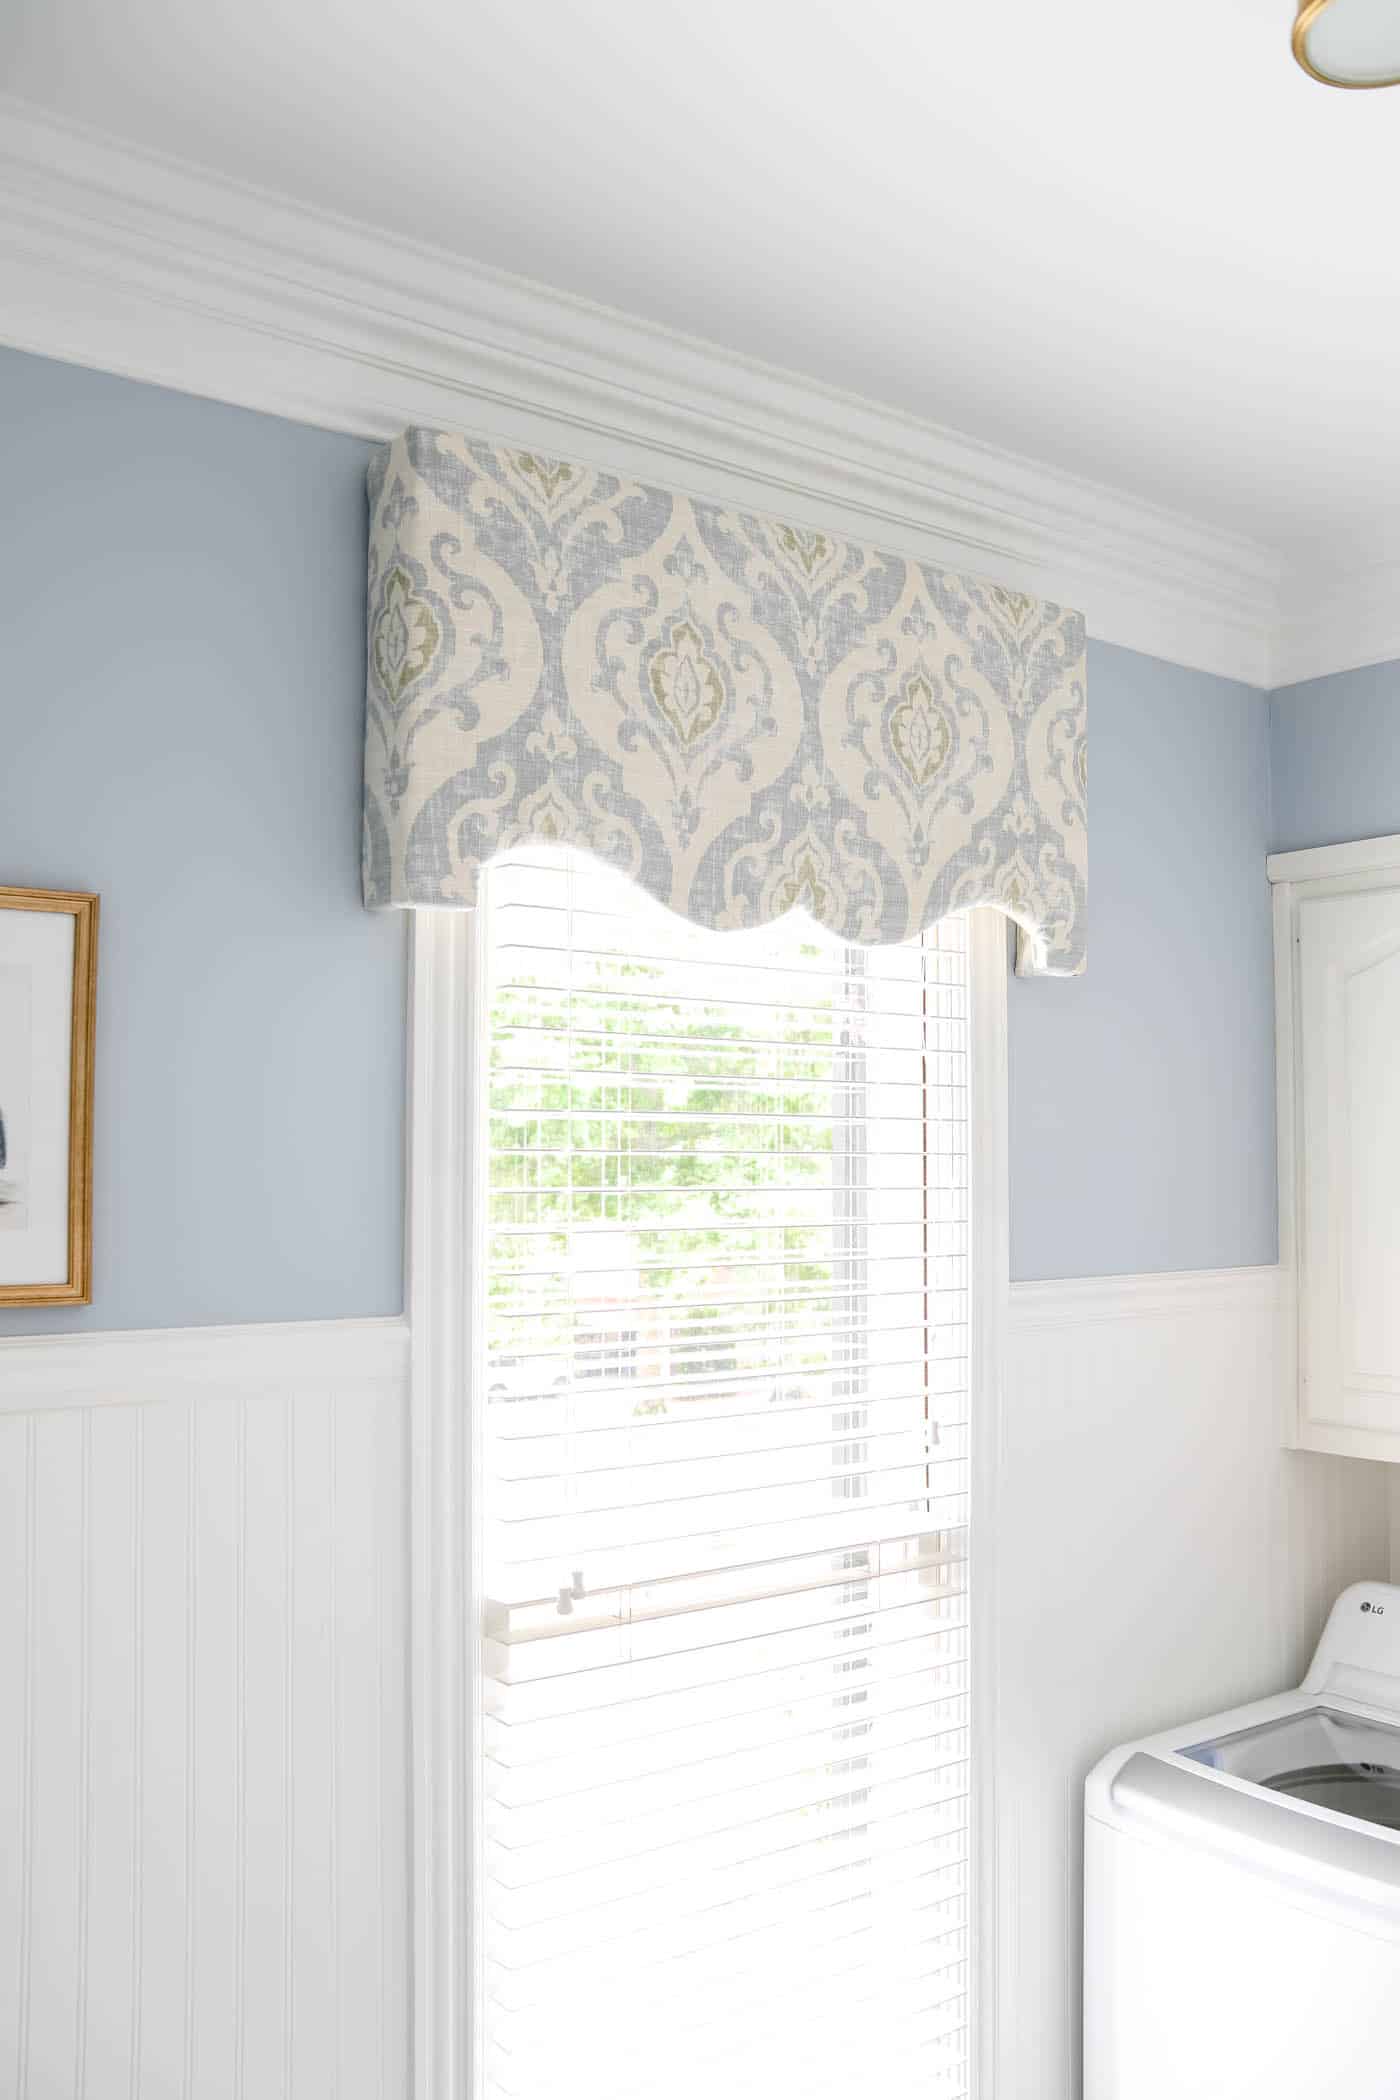
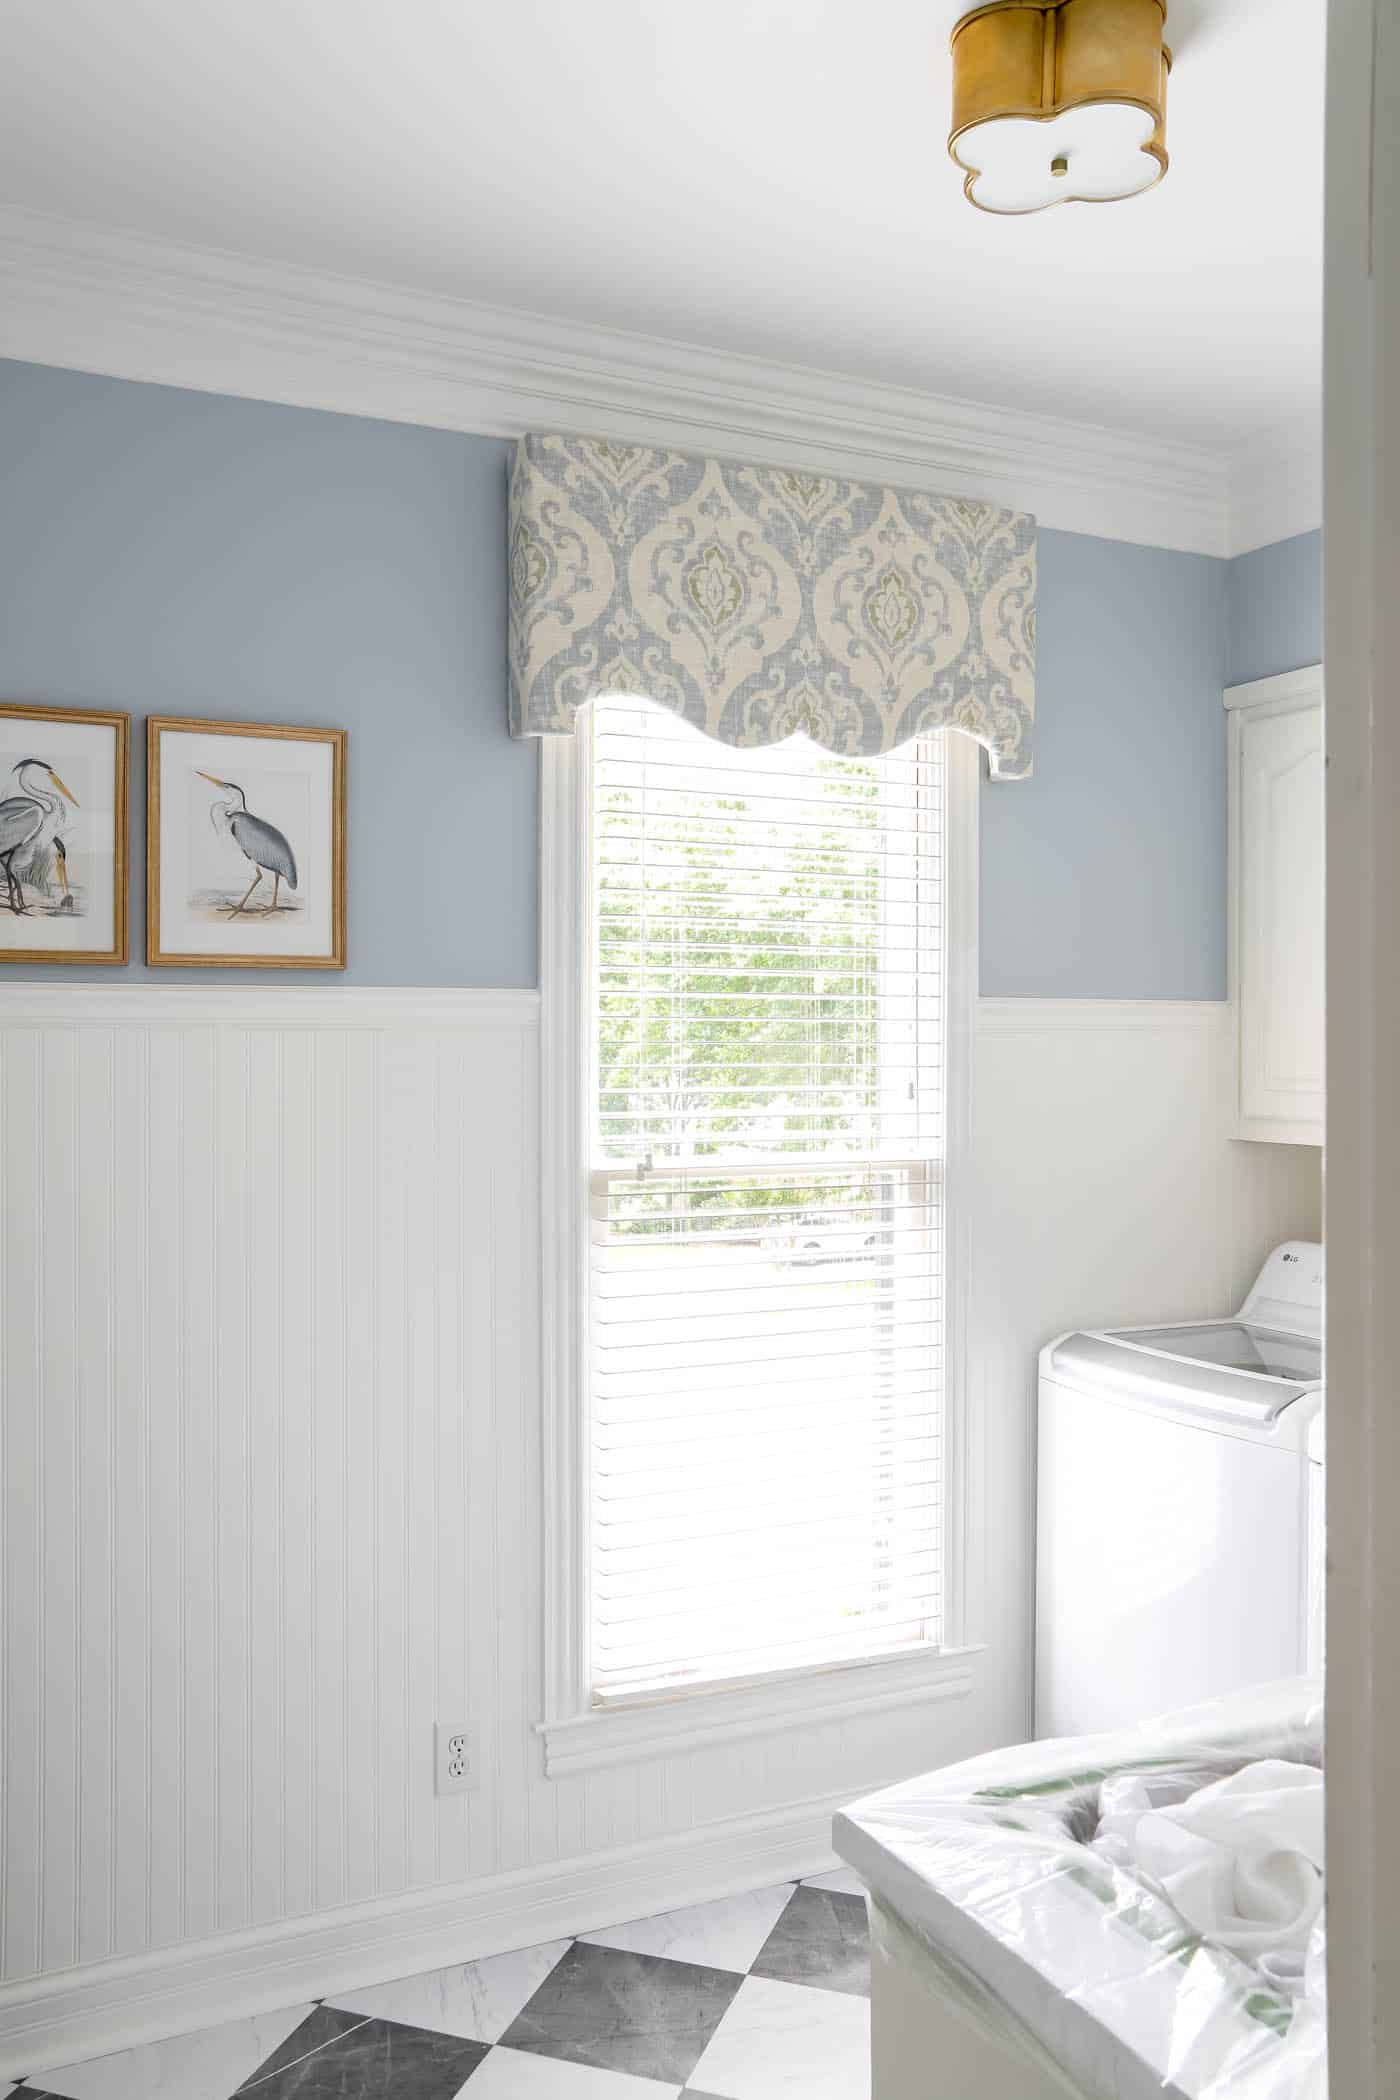
The room already has some color on the walls and in the art, but it needed some pattern, and I’m happy this fabric-covered window treatment was the perfect addition! Drapes would have gotten in the way of work in the laundry room, so a cornice board was the ideal option.
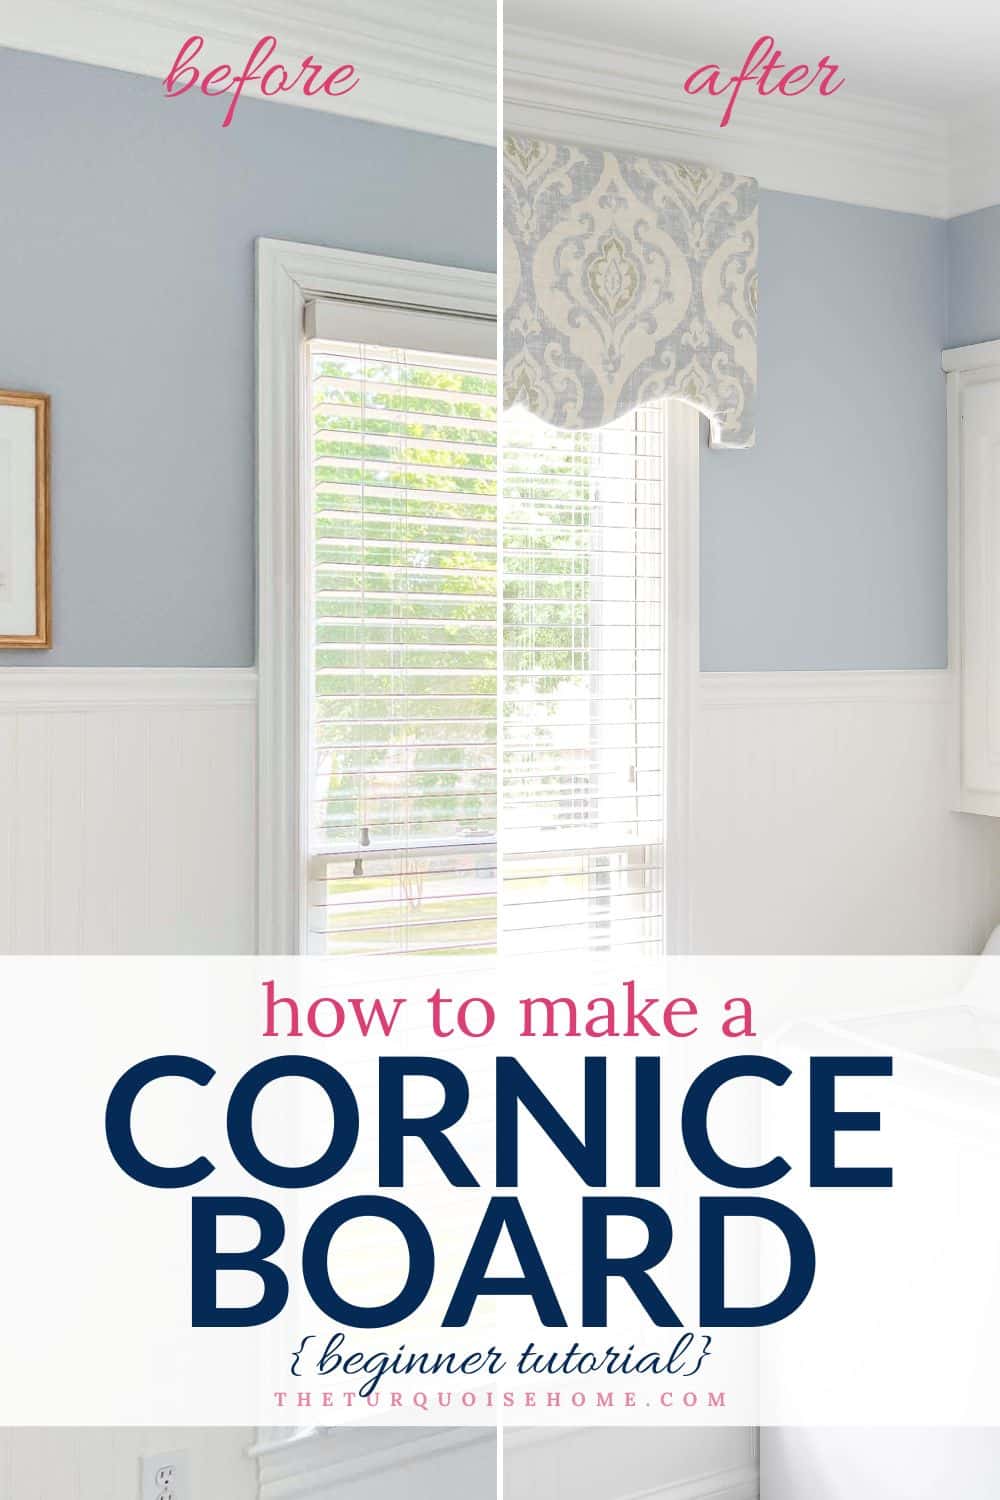
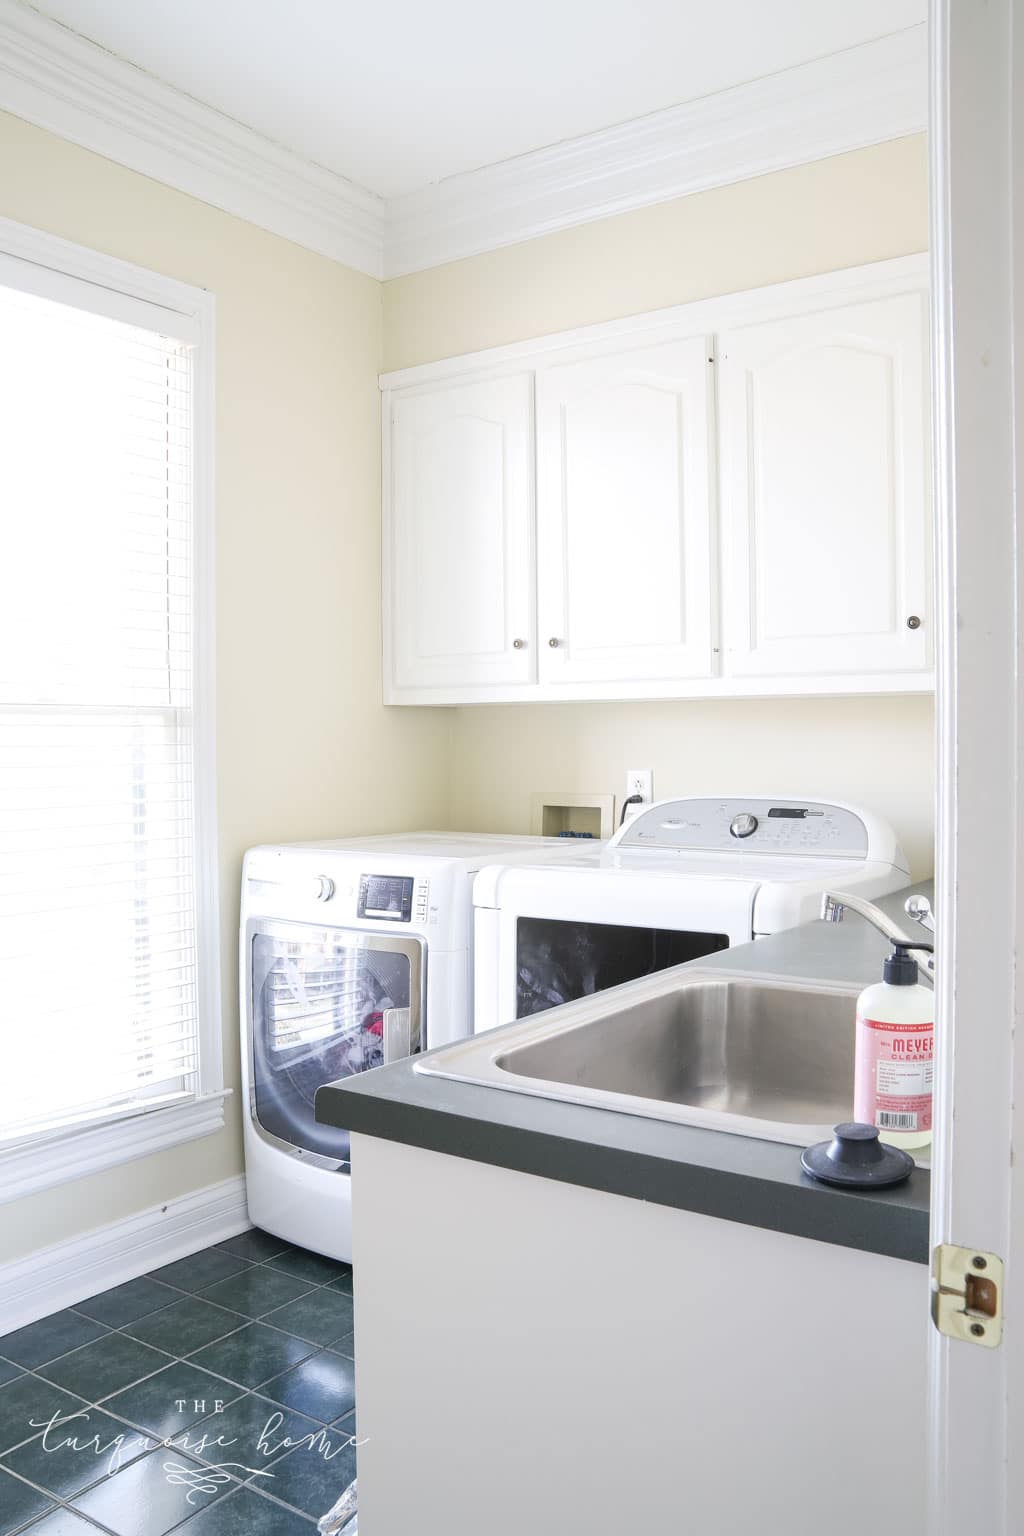
This is how the laundry room looked when we moved in.
And the picture below shows how it looked right before I started this project. You’ll have to scroll to the end to see the final picture!
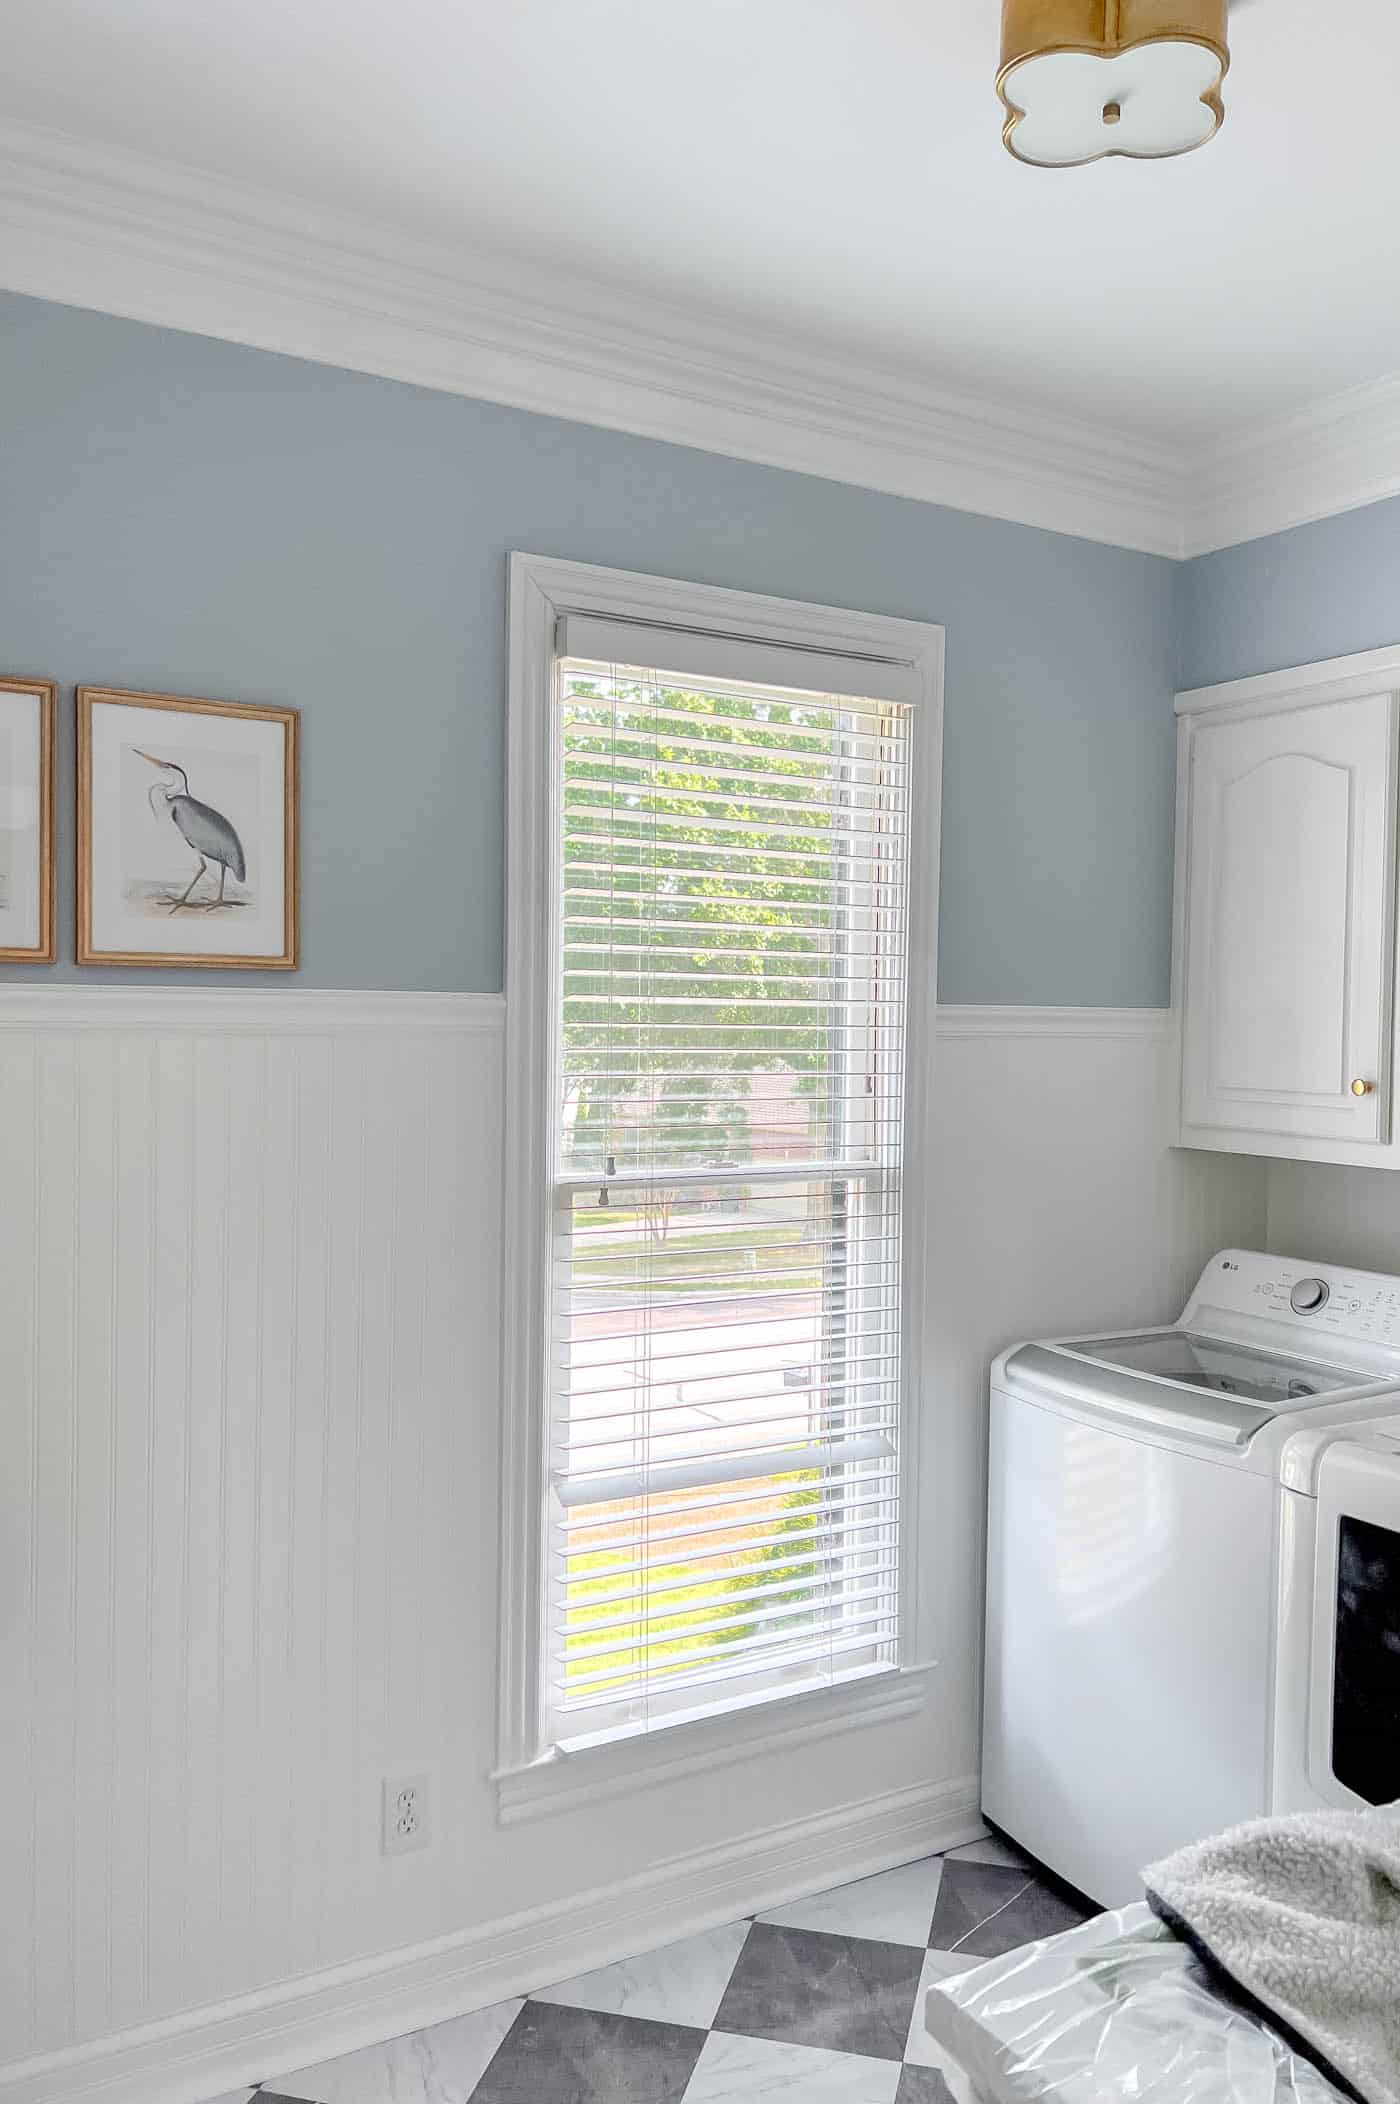
I’ve already:
- Covered the flooring with peel-and-stick vinyl tiles
- Installed beadboard and a chair rail
- Painted the walls Simply White and Heather Blue
- Moved the drying rack to a different wall
- Moved the mops and brooms behind the door
- Added art
- Swapped the light fixture for this beautiful flush mount light
- And now the cornice board is finished!!
Since then, I’ve also painted the old countertops to look like marble, which finally wrapped up this laundry room makeover!
DIY Cornice Board At a Glance
- Skill Level: Beginner/Intermediate
- Time: 3-4 hours
- Best for: Hiding blinds or window hardware and adding pattern without curtains
- Main Materials: Plywood, batting, fabric and brackets
- Tools: Saw, drill and staple gun

What are cornice boards?
Cornice boards are decorative, stationary window treatments that sit at the top of a window. They can be made from wood, fabric, or a combination of both, and their shape can vary depending on the room and your style.
Cornice boards are typically used to hide window treatment hardware and add an elegant finish to a room. Any beginner can make one for the cost of supplies and just a few hours. It’s a great first DIY project!
DIY Cornice Board Ideas and Styles
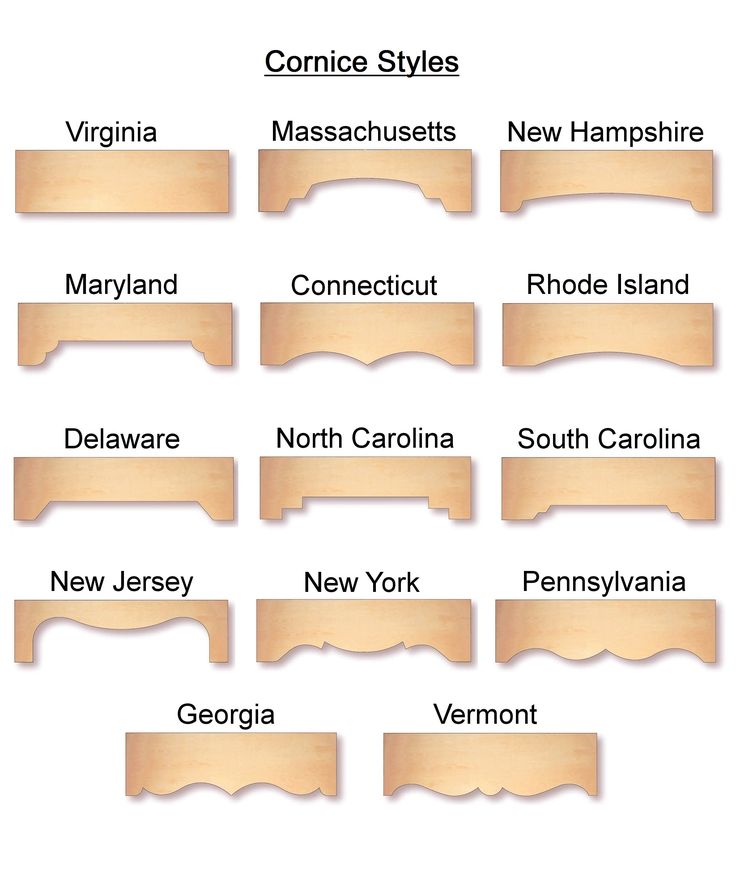
One of the best things about making your own cornice board is that you can completely customize its shape to suit your decorating style. A simple rectangular box is the easiest option for beginners, but you can also add curves, scallops or decorative details for a more traditional look.
For my laundry room, I chose a Pennsylvania-style cornice with a curved center. The shape adds a bit more personality to the window and looks especially pretty in patterned fabric.
If you’re unsure which style to pick, make a full-size paper or cardboard template first and hold it above your window. It’s much easier, and cheaper, to reshape a cardboard template than a piece of plywood!
How to Measure for a Cornice Board
Before you start cutting wood, figure out the best size for your cornice board. Don’t stress! There’s a little flexibility depending on your window and the look you want.
Start with the width of your window, including the trim, and add about 4–6 inches. This lets the cornice extend roughly 2–3 inches beyond the window casing on each side for a more finished look.
Next, decide how tall you want the cornice board to be. It should be tall enough to hide any blinds, shades or curtain hardware without covering more of the window than necessary.
For my laundry room window, I made the cornice 19 inches tall so it would cover the window hardware and fit neatly beneath the crown molding.
Finally, think about the depth of your cornice, meaning how far it will project from the wall. You’ll need enough clearance for your window trim, blinds or shades, plus room to install the finished cornice.
These measurements will determine the size of board you need to buy. I bought a large piece of plywood that was 23/32 inches thick. That gives plenty of depth for screwing the brackets into the wood.
One thing I’d do differently: My cornice projects 3.5 inches from the wall. That was deep enough to clear my blinds and window casing, but it was a tight squeeze when I tried to get my drill underneath during installation. If I made it again, I’d give myself a bit more room or use a different hanging method.
Holding a cardboard or poster board template above the window before cutting your wood is an easy way to make sure you like the size and proportions first.
Before You Start
Choose Your Fabric
You’ll want a medium-weight fabric, not too heavy or too light. Good options include linen, canvas, polyester or a cotton/polyester blend.
A medium-weight fabric folds over the board without pulling or wrinkling, but isn’t too bulky either. I chose this beautiful blue and green damask.
Here are some fabric ideas to get your wheels turning…
SHOP FOR FABRIC
Now that you have your measurements and fabric picked out, it’s time to gather your supplies and start the project!
Supplies Needed to Create a DIY Cornice Board
Making your own cornice board requires a few basic tools and materials. Here’s a list of what you’ll need:
- Poster board for a template
- Pencil
- Scissors
- ~ 3/4″ thick plywood or wood boards to build the cornice
- 1 x 4 x 8 board for sides and top, or cut these pieces from the plywood
- Fabric (enough to cover the cornice), usually 1 yard will cover it.
- Poly-fil cushion padding (enough to cover the cornice)
- Staple gun and staples
- Drill
- Saws: a circular saw, miter saw and jigsaw, or a miter box and hand saw
- Wood glue
- 3-5 “L” brackets and screws
- 2 corner braces and screws
- Additional corner braces, optional
- Embellishments, like corded trim or fringe (optional)
- Additional plain fabric for the backing (optional)
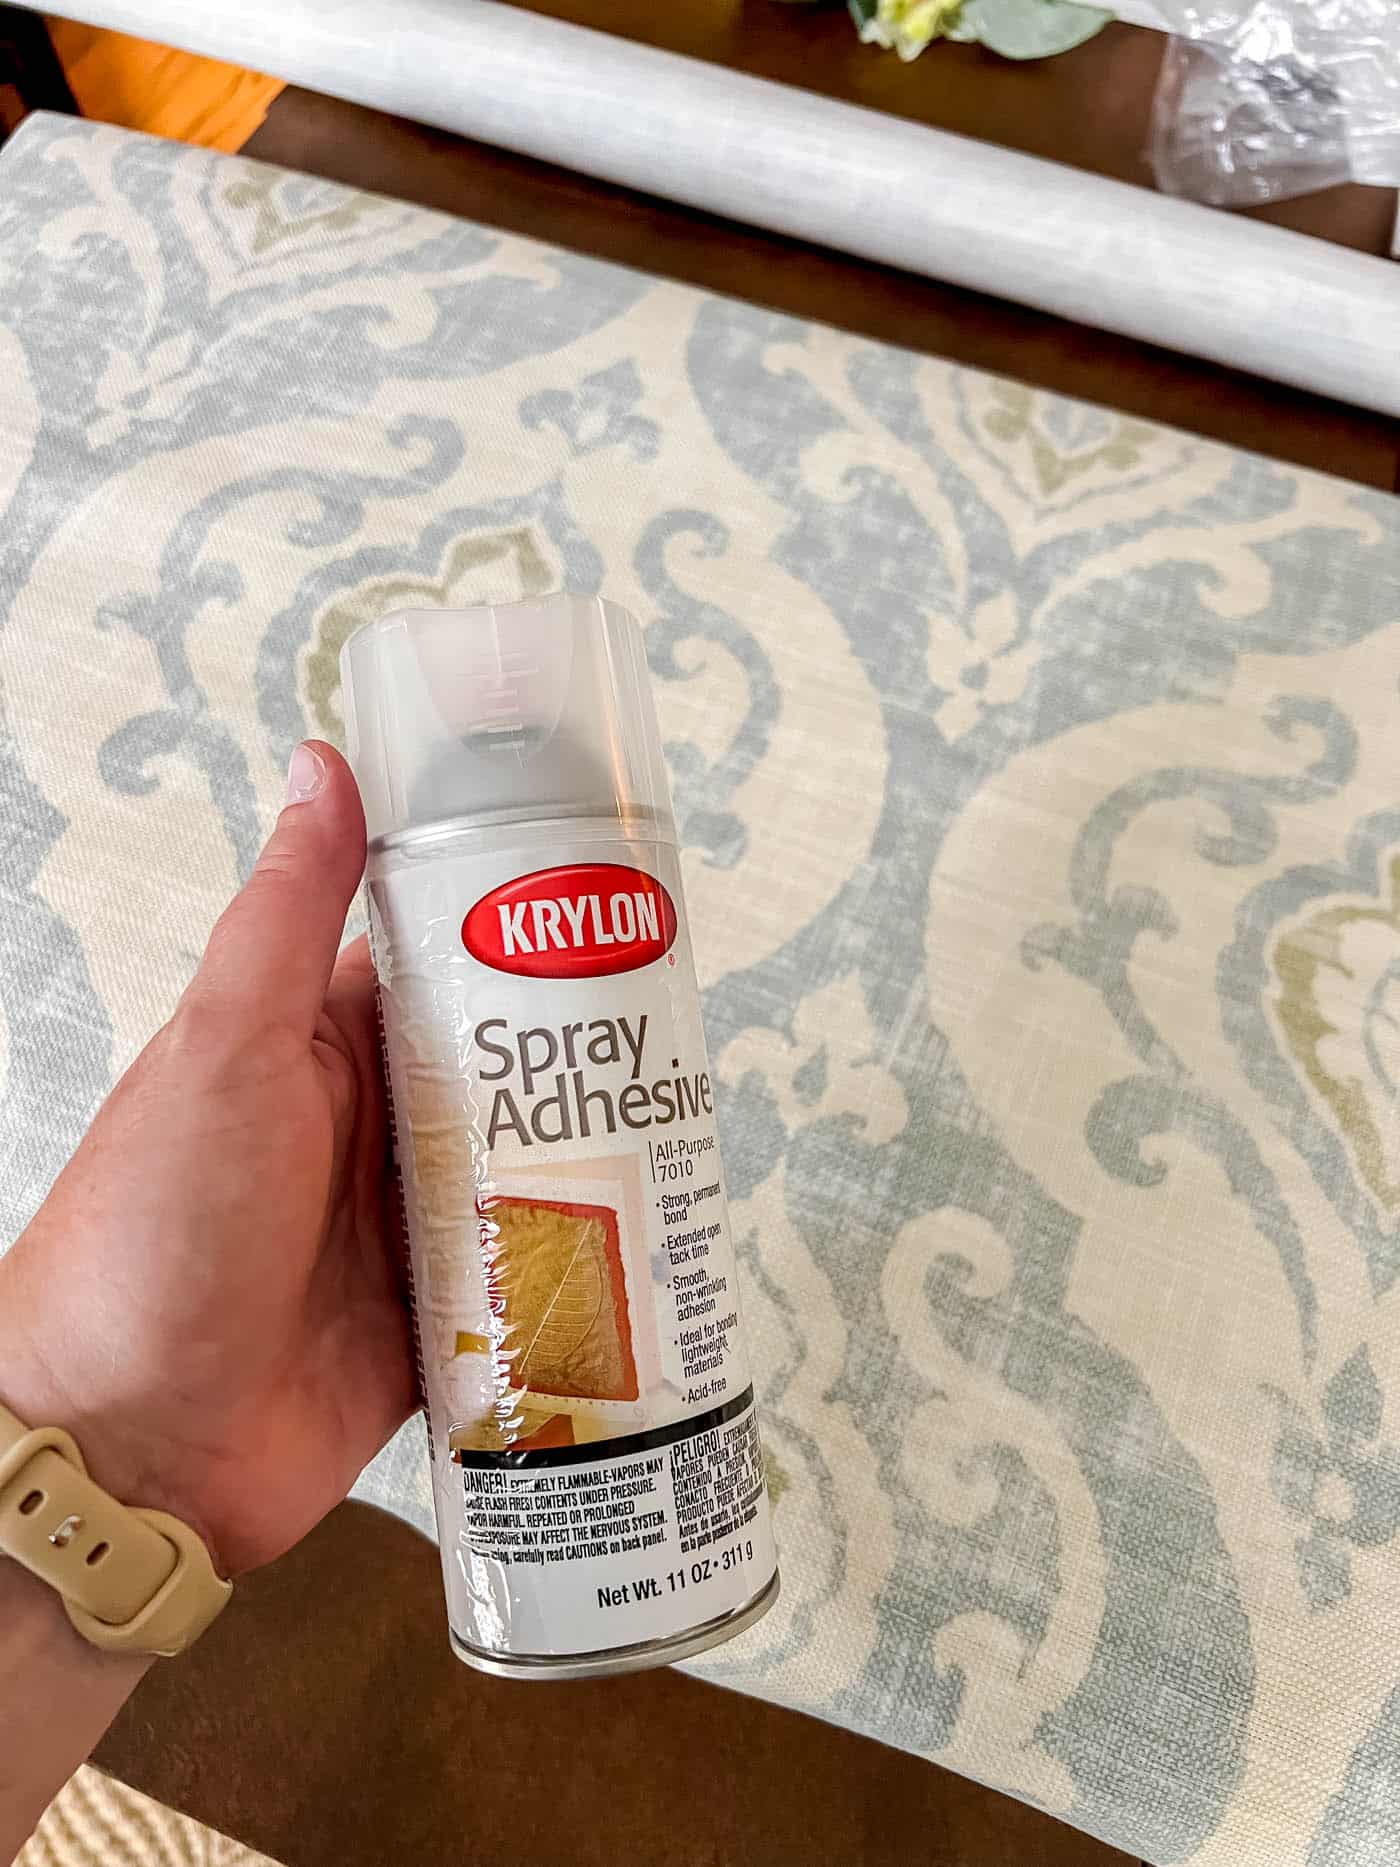
How to Make a DIY Cornice Board with Fabric
Here are the basic steps to create your own cornice board.
Step 1: Make a Cornice Board Template
Unless you’re making a simple, straight cornice, you’ll need a template. Use the shapes I’ve shared above for ideas. I taped two pieces of cardboard together to get the size I needed, then traced a lazy susan to create the “Pennsylvania” shape.
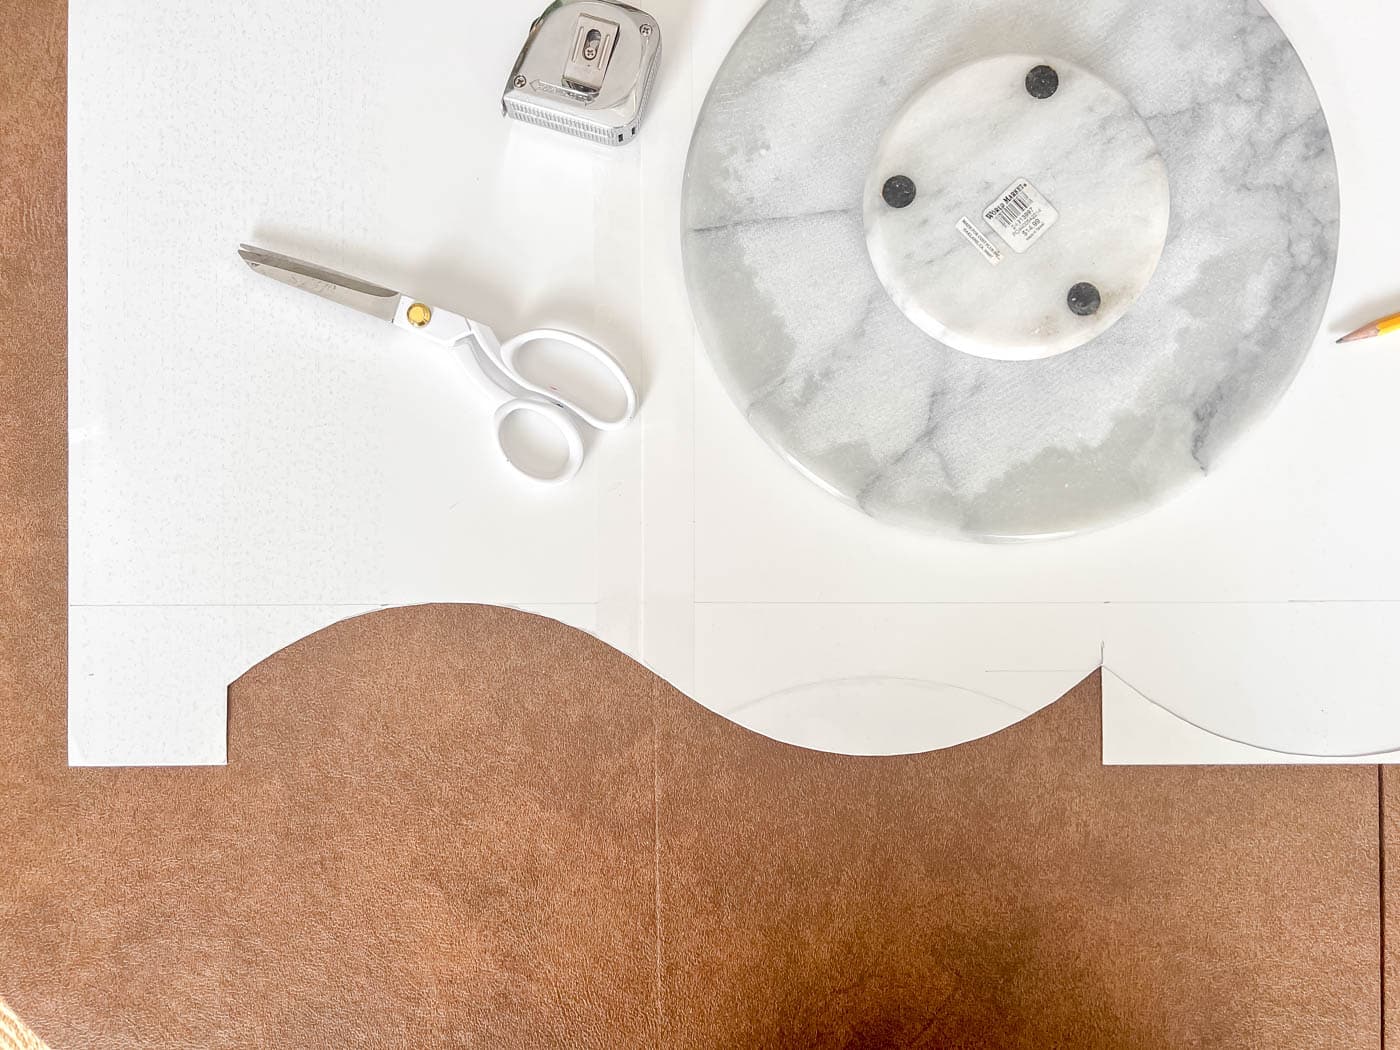
Once the template is drawn just right, cut it out.
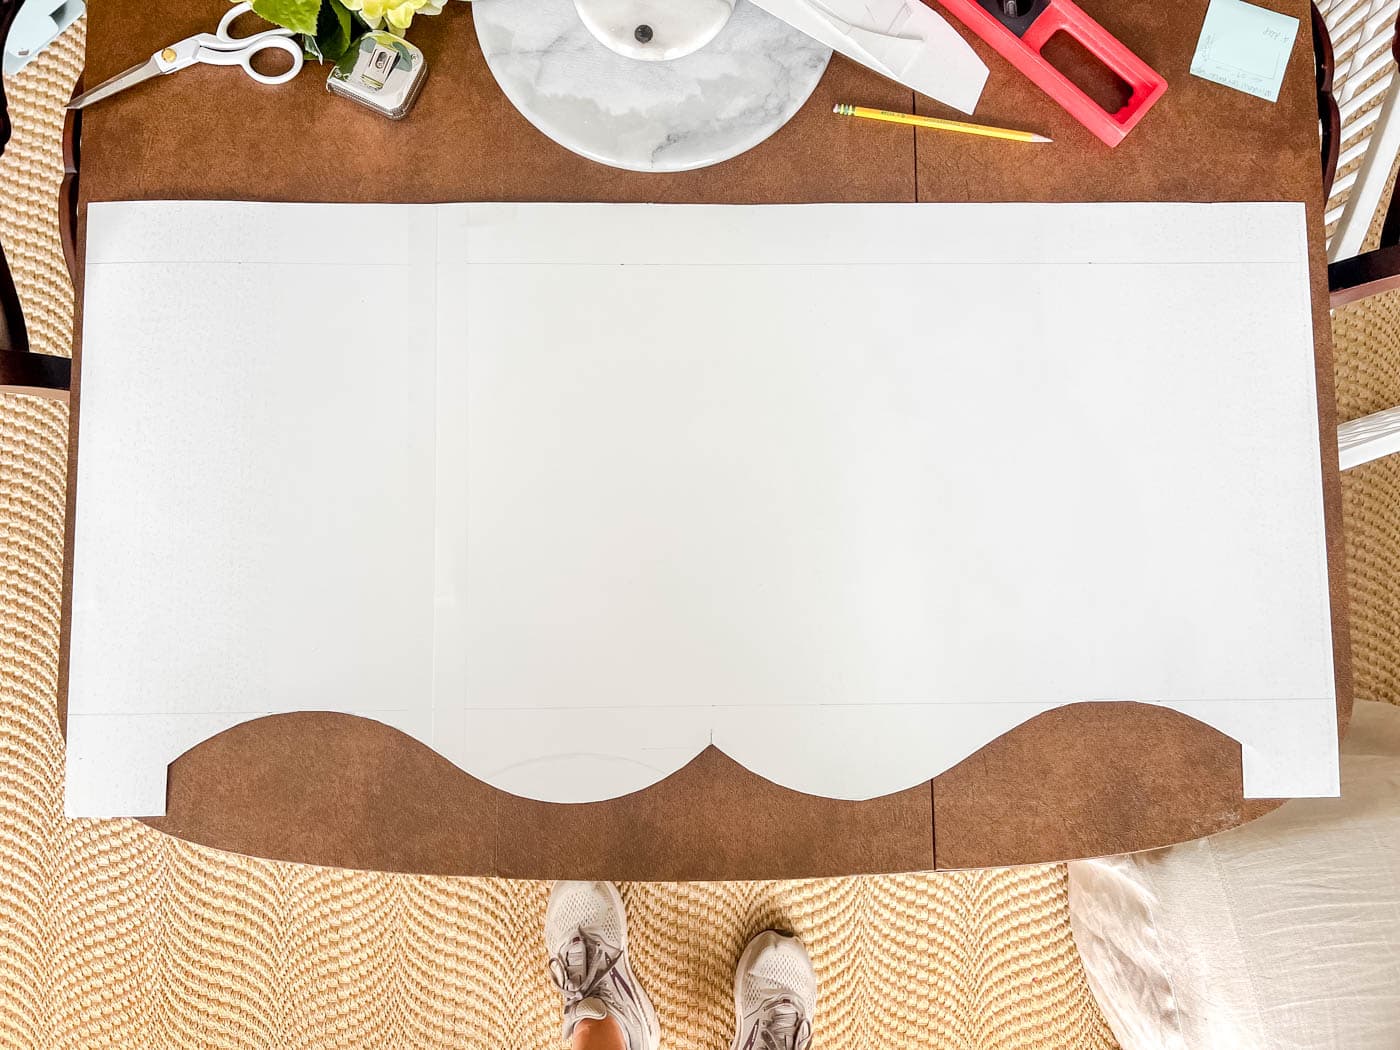
Step 2: Cut the Plywood
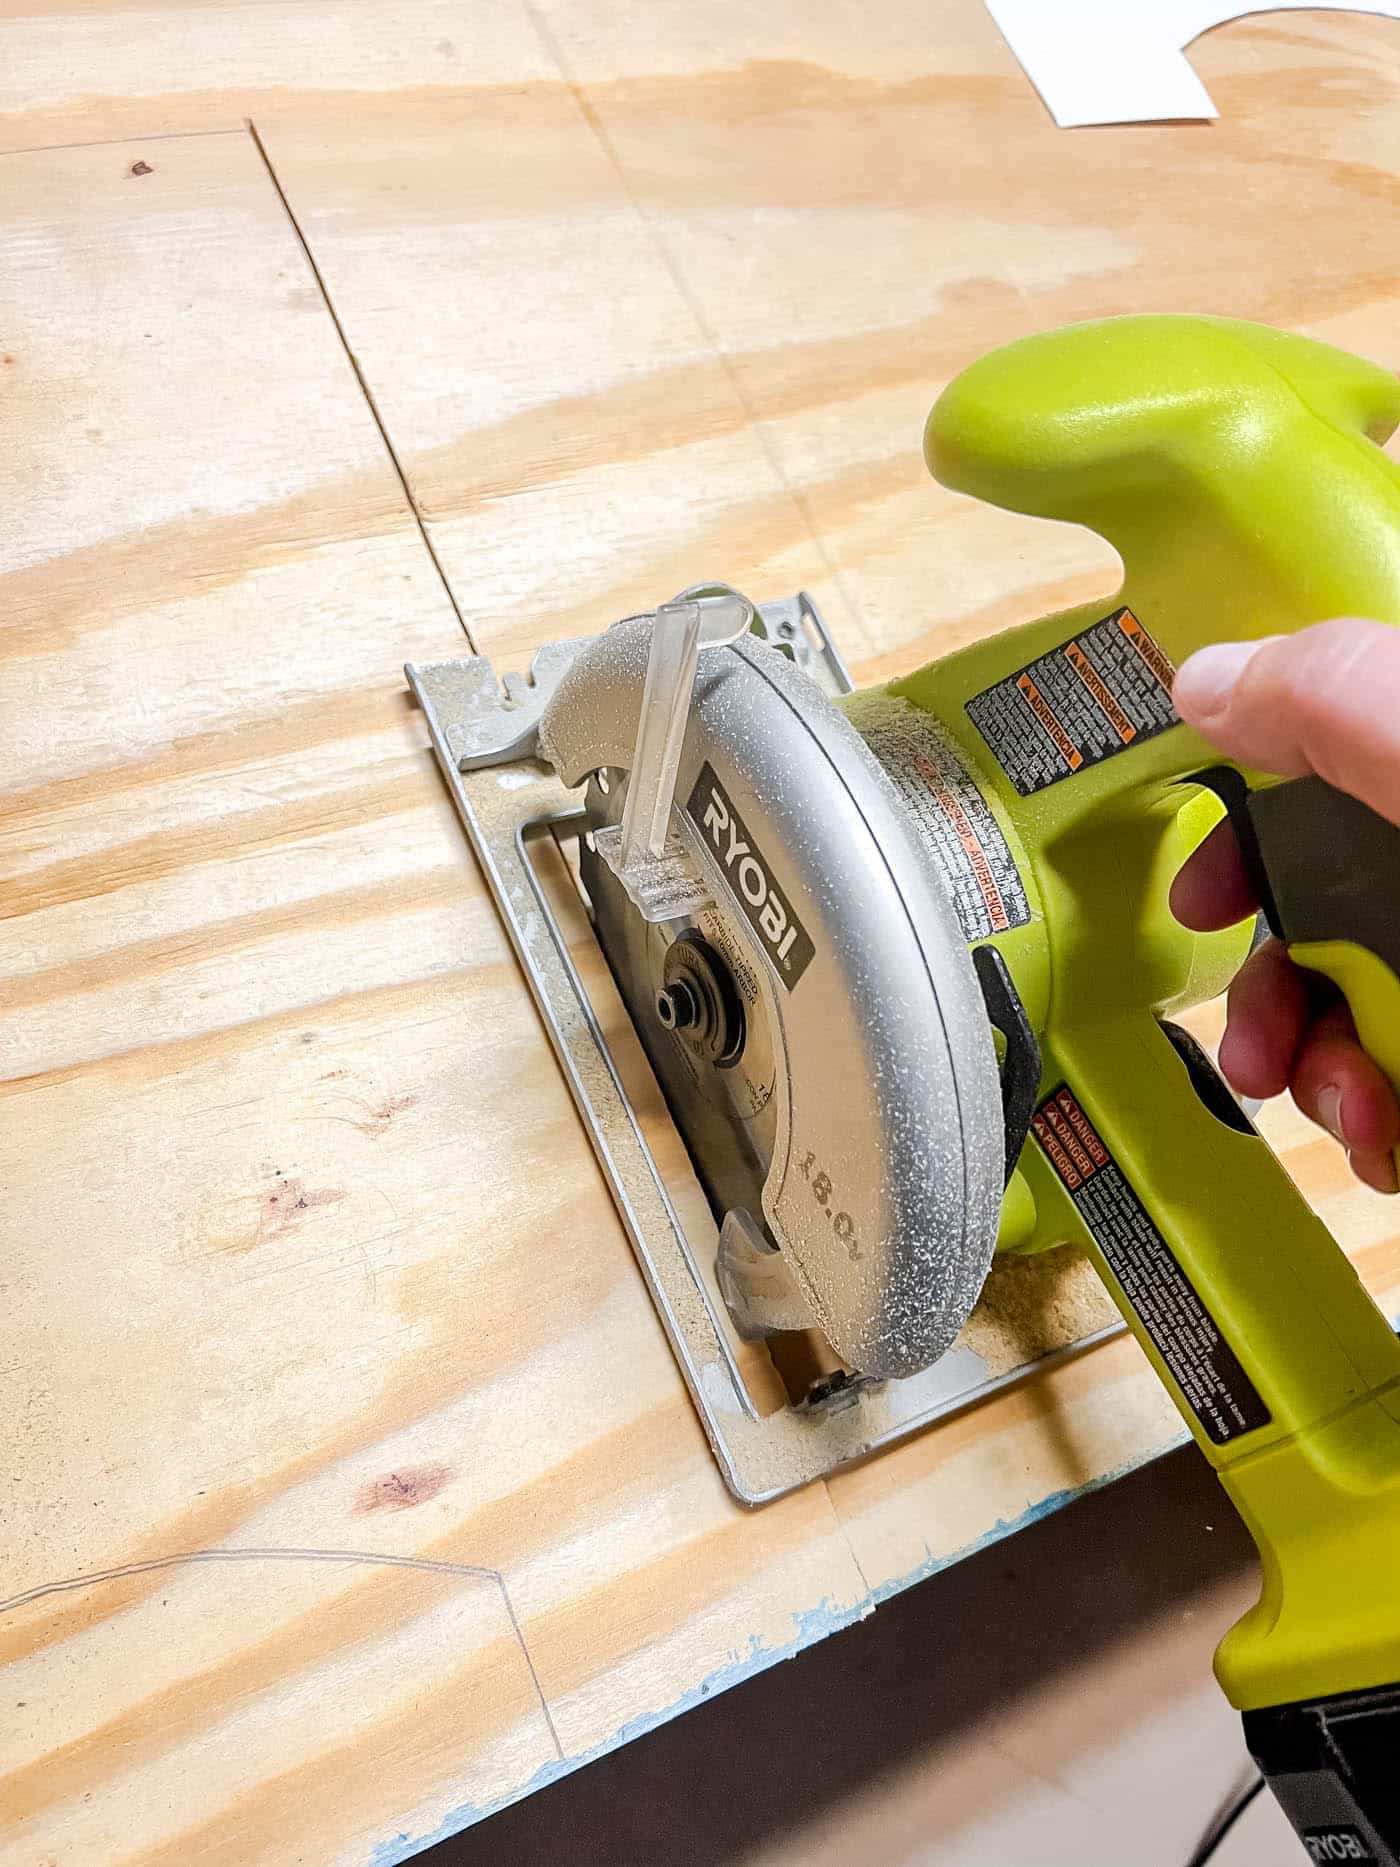
Trace the pattern onto the piece of wood using the template. Cut it out with a circular saw and jigsaw. I cut the straight edges with my Ryobi circular saw, which is small and easy to handle.
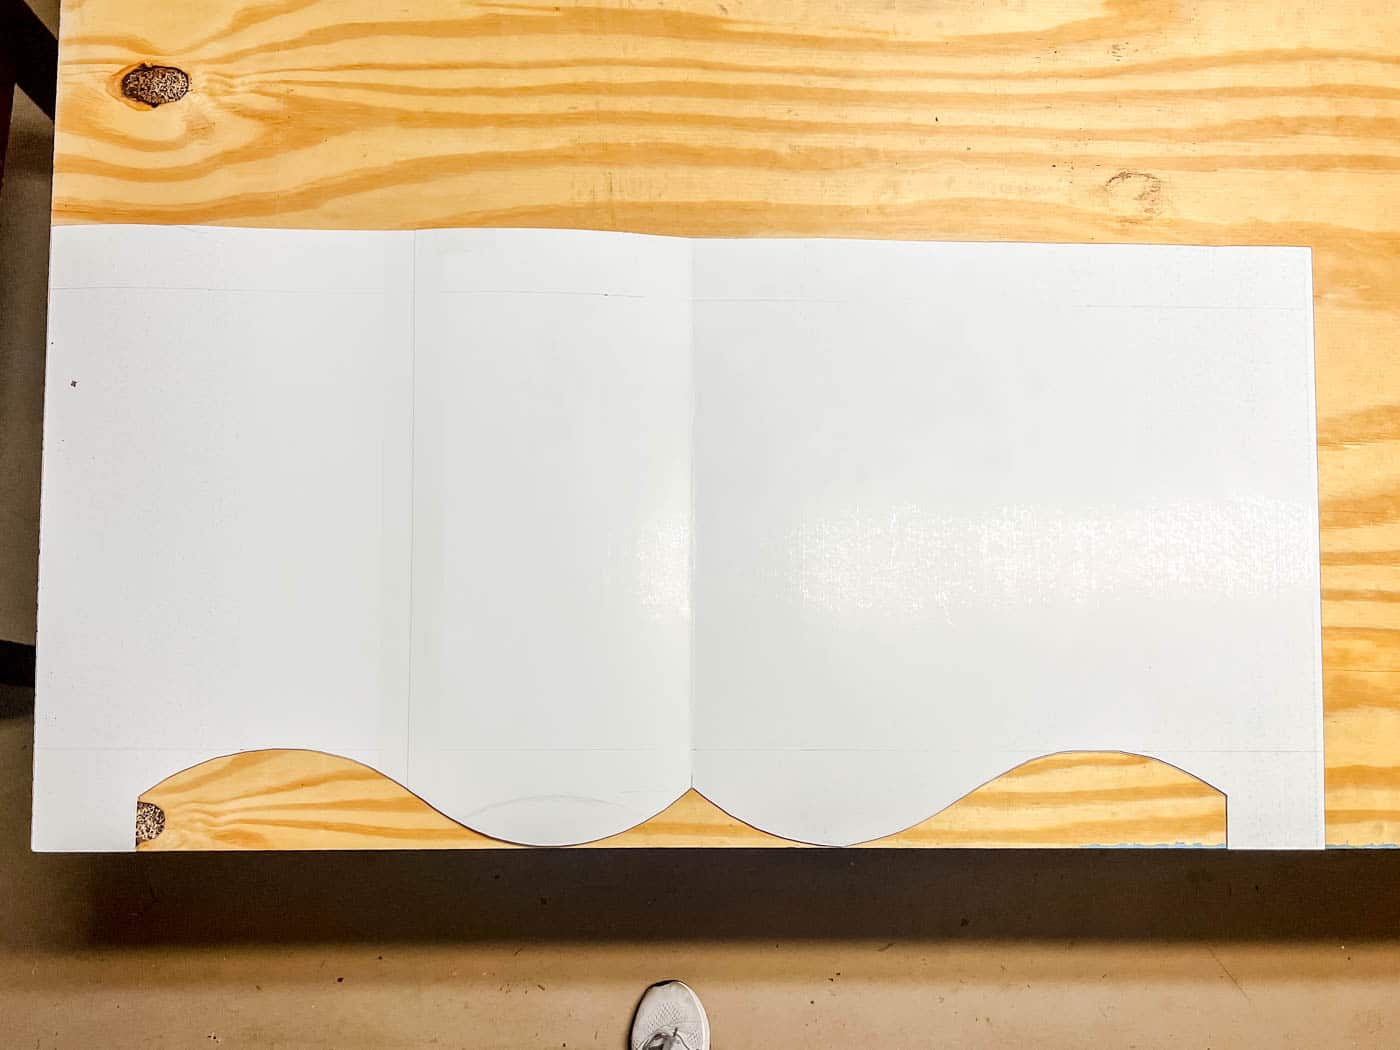
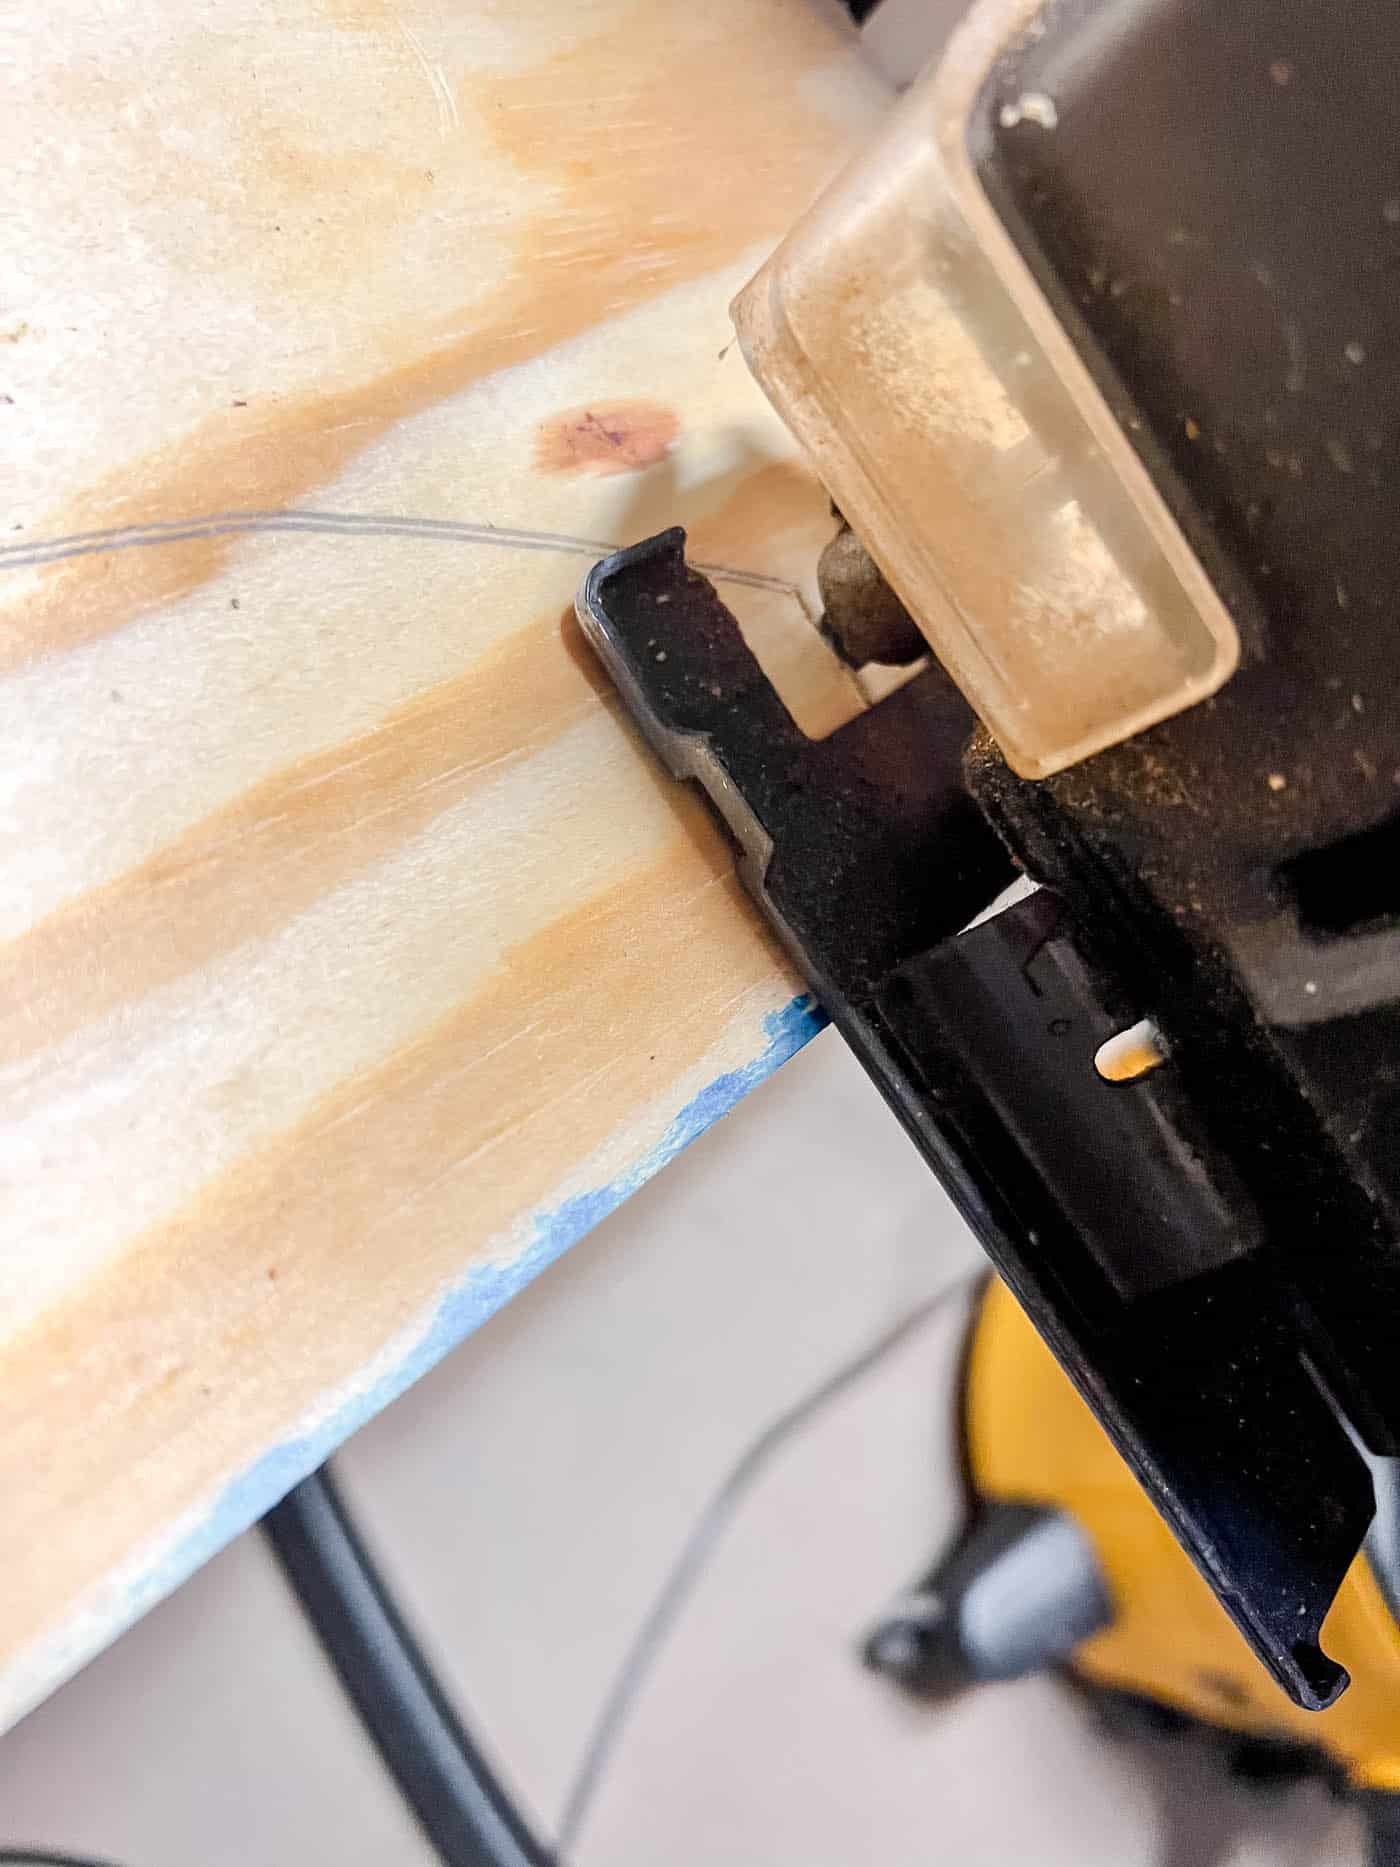
I used my jigsaw to cut the wavy pattern along the bottom. You’ll need a jigsaw for this part! I have an old one my husband came with, but I’d pick up the Ryobi one if I didn’t already have one.
Step 3: Cut the Top and Side Pieces
Next, cut the side and top pieces to the height and width of the board. See the diagram below.
The width of your top and side pieces will determine how far the cornice sticks out from the wall. So decide how far you want it to project before choosing and cutting your boards.
I had some leftover 1 x 4 boards lying around, so I used those. That meant my cornice board would stick out 3.5 inches from the wall, because a 4″ board is actually 3.5″.
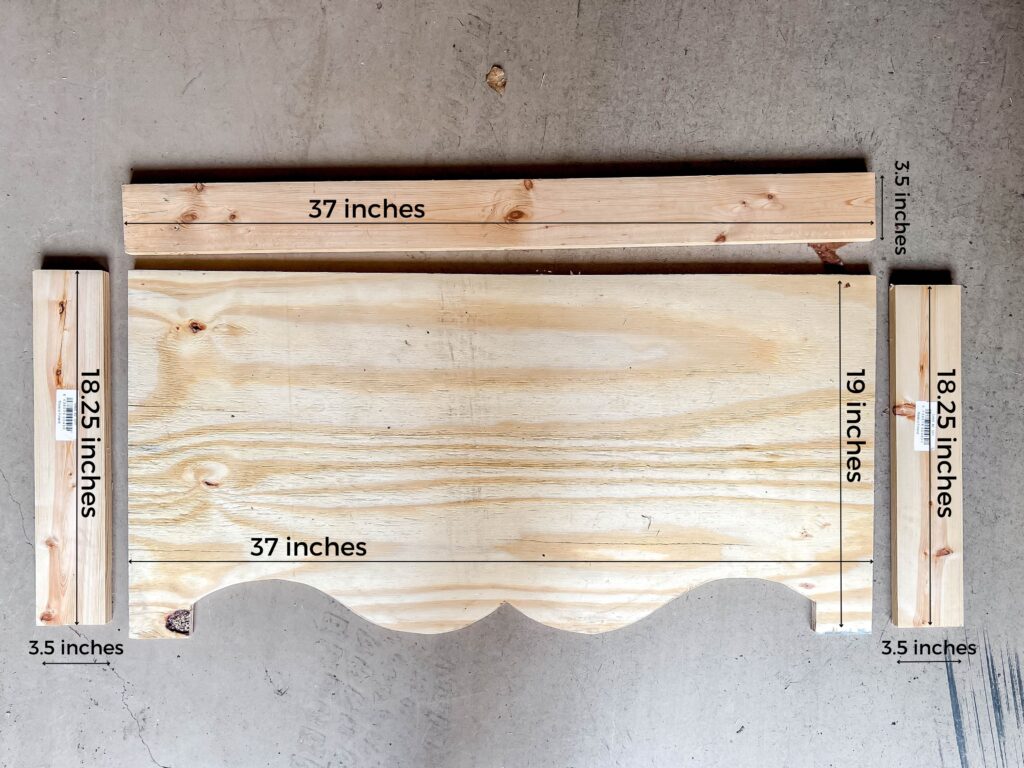
It was deep enough to clear the blinds and window casing, but it was almost too narrow for my hand and drill to fit underneath when screwing it in place. If I’d been thinking ahead, I could have hung D-rings on the back of the board instead. In the end, it all worked out.
The top piece is the same width as the front of my board. The side pieces are the same height as the front board, minus the depth of the top piece, which was .75 inches.
At this point, you can sand the edges smooth, but you don’t have to. Any rough edges will be covered with filler and fabric.
Step 4: Assemble the Cornice Box
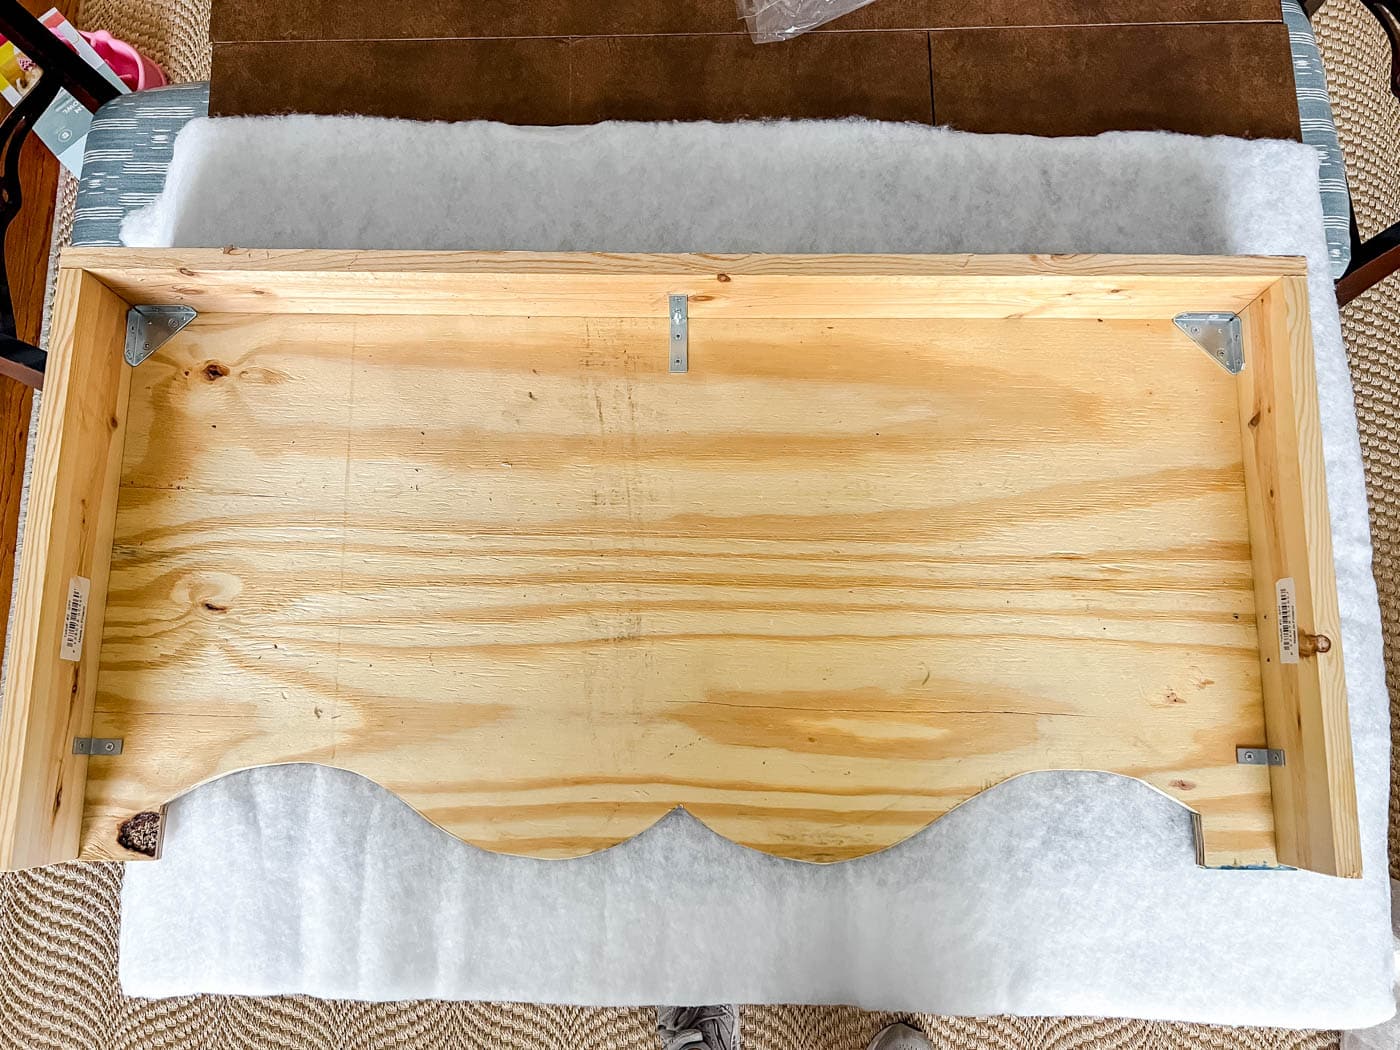
Use a corner brace in each corner to connect all the pieces, then add some “L” brackets to the sides and top for extra support.
Step 5: Add Batting or Padding
Cut the poly-fil cushion to the size of the board, leaving extra to wrap around the edges and staple to the back. This keeps the edges of the board soft so the finished result looks better.
Make sure to smooth out any wrinkles and pull the filler taut before stapling.
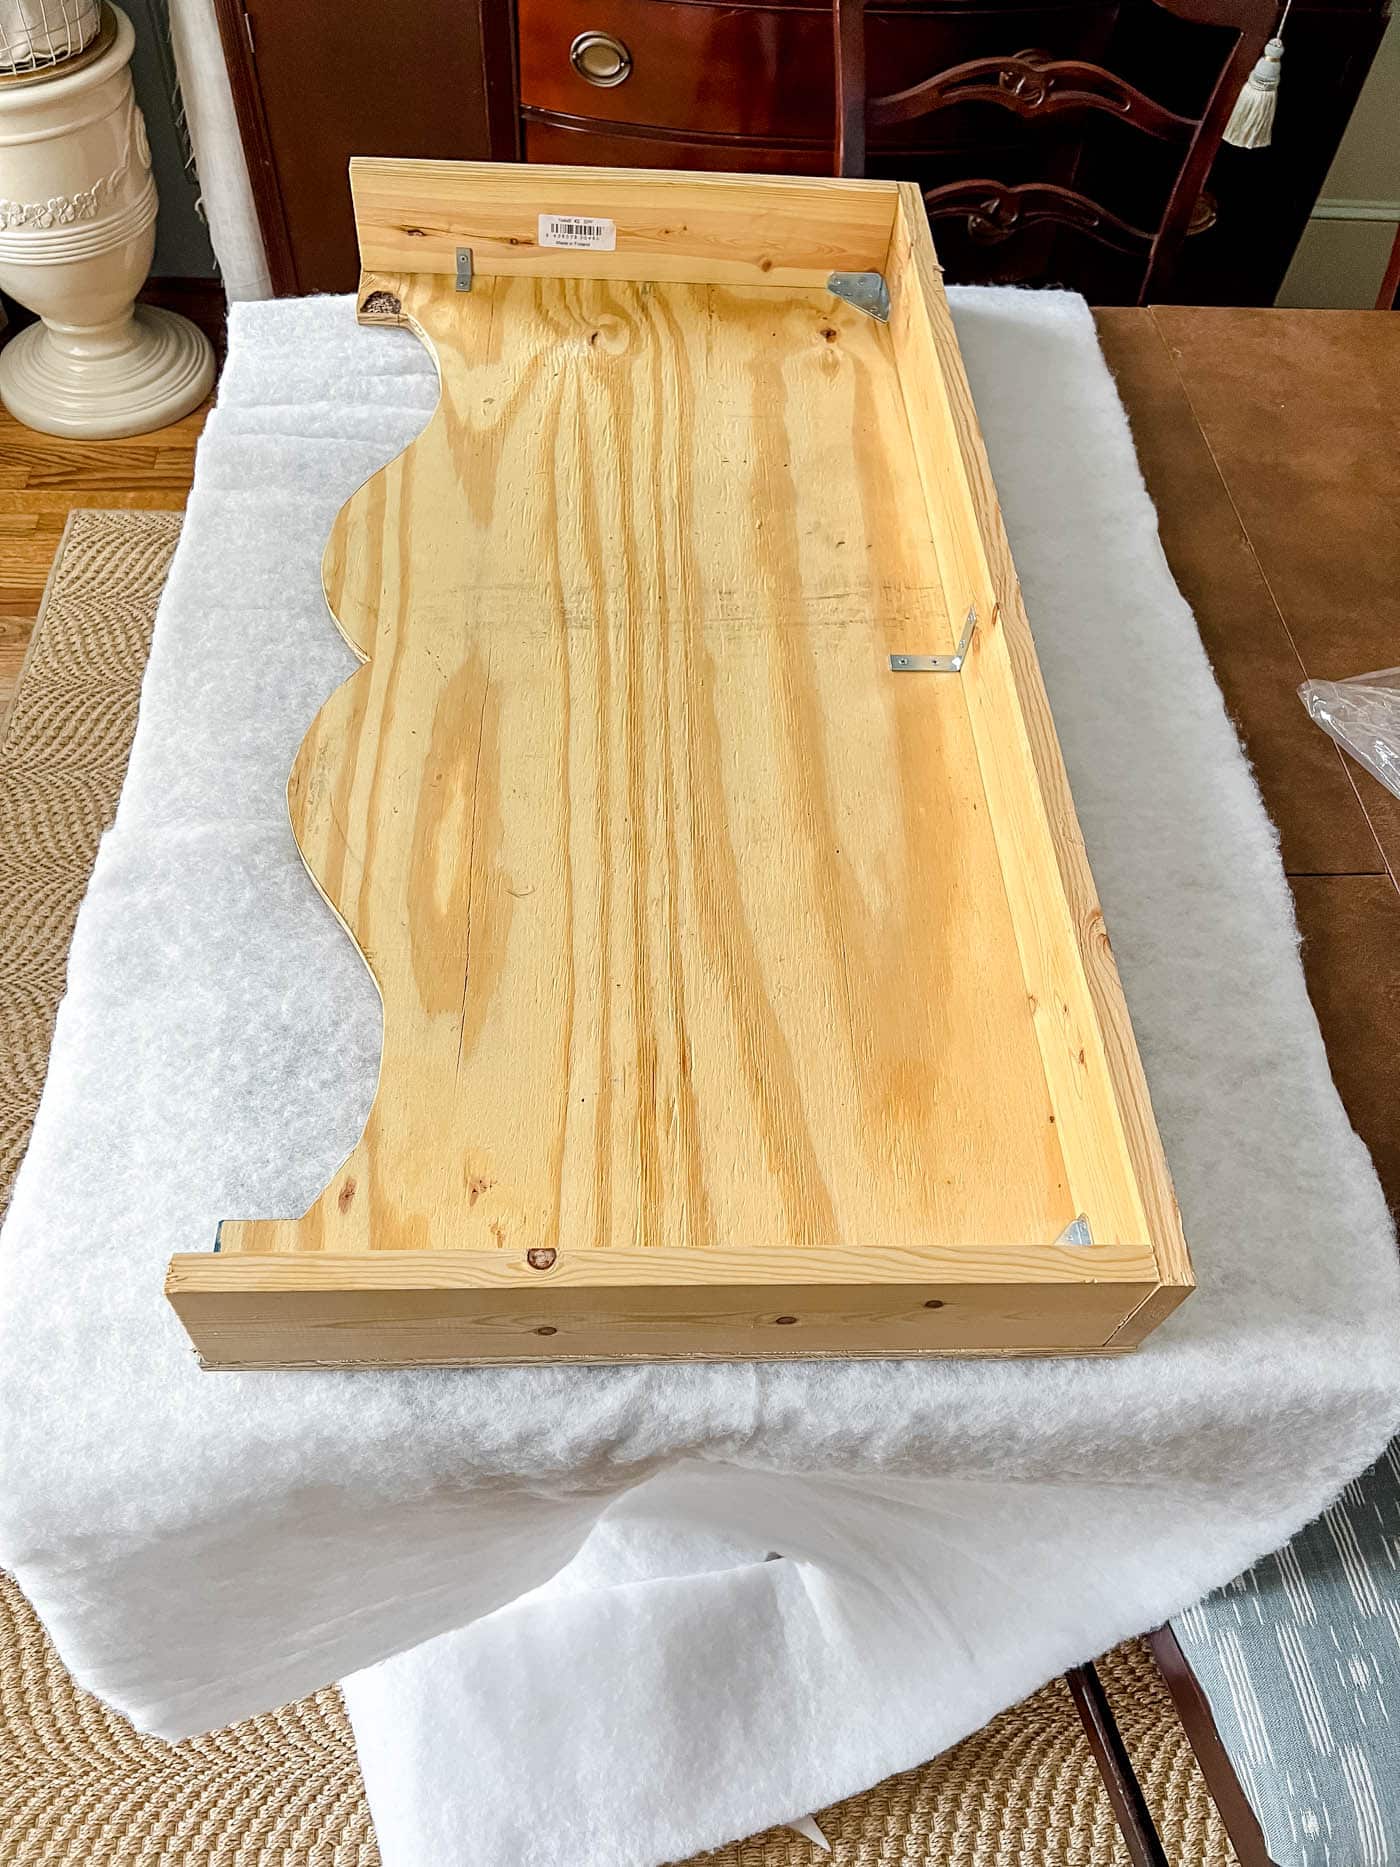
Start at the top and fold the filler over the side, then staple each section, pulling the filler snug as you go. Fold the corners neatly, like you’re wrapping a gift.
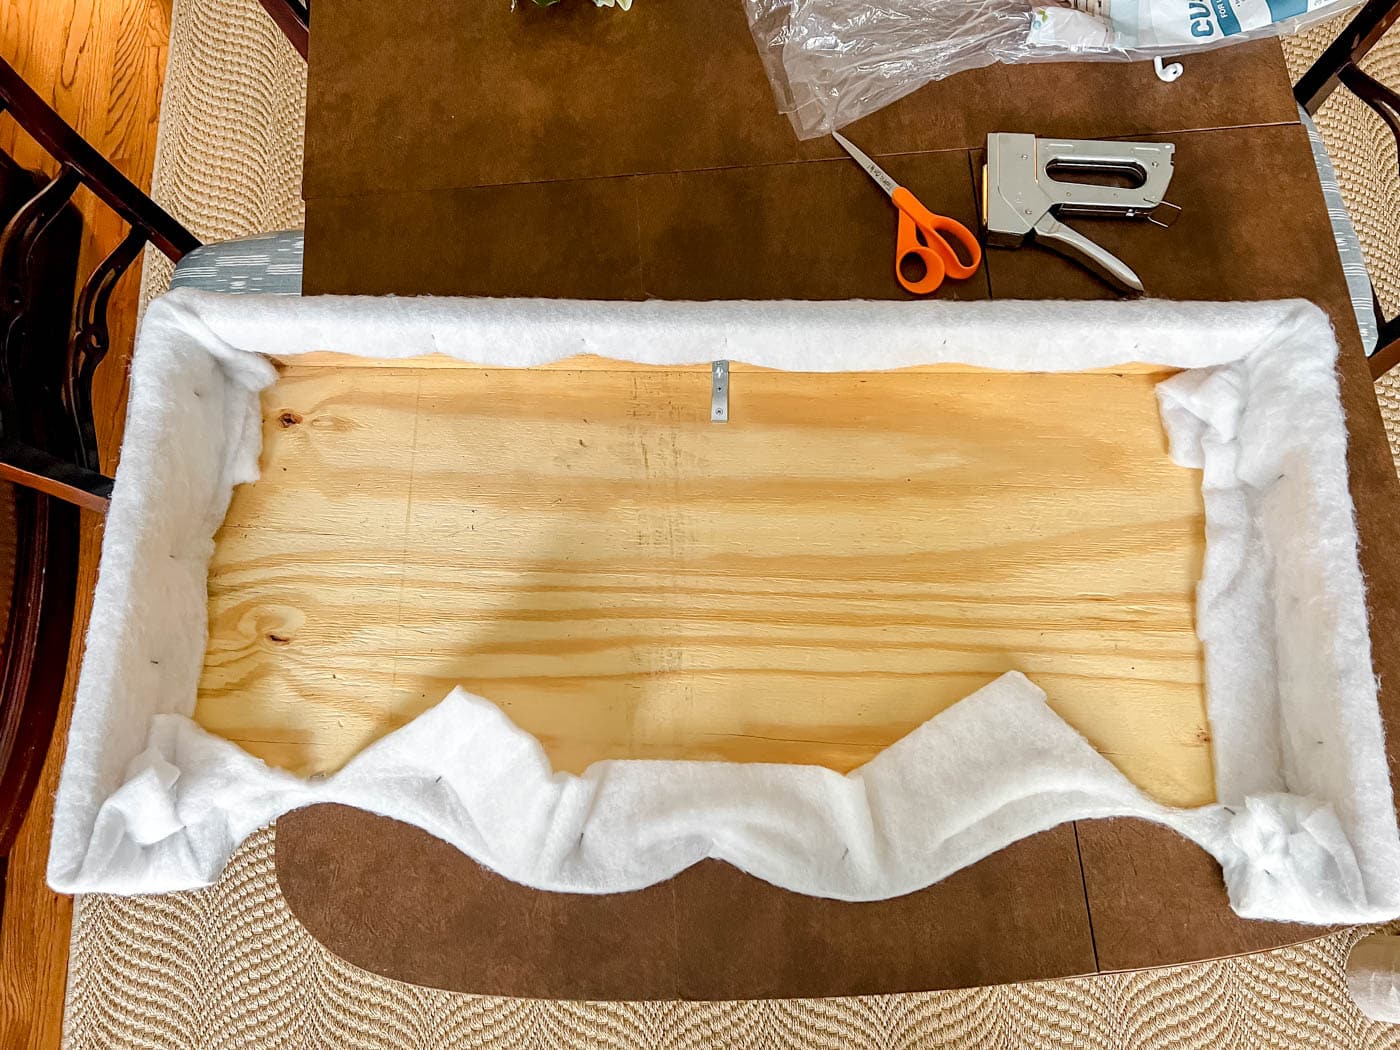
After I took the photo above, I trimmed away more of the excess filler so it wouldn’t be too bulky under the fabric.
Step 6: Center the Fabric
Flip the board over to the front and check that the fabric pattern is lined up exactly how you want it. It helped that my design made the middle of the board easy to find.
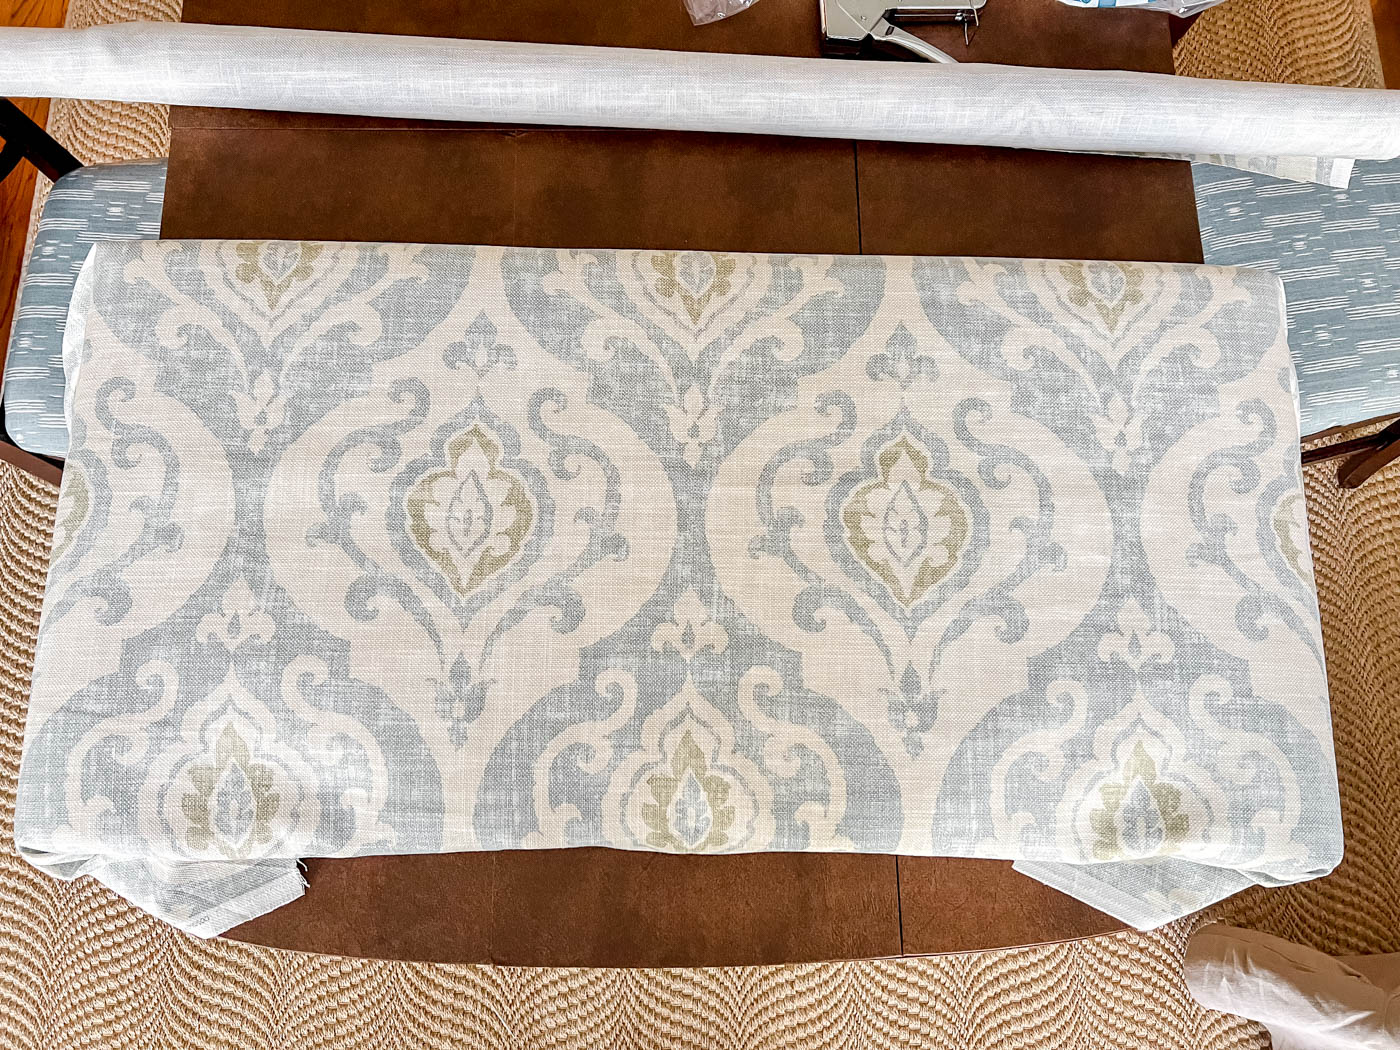
Carefully flip it back over, keeping the fabric in place.
Step 7: Cover the Cornice Board with Fabric
Starting again at the middle top, staple the fabric to the back inside of the board. Pull it snug as you go. Make relief cuts where needed when the board dips inward.
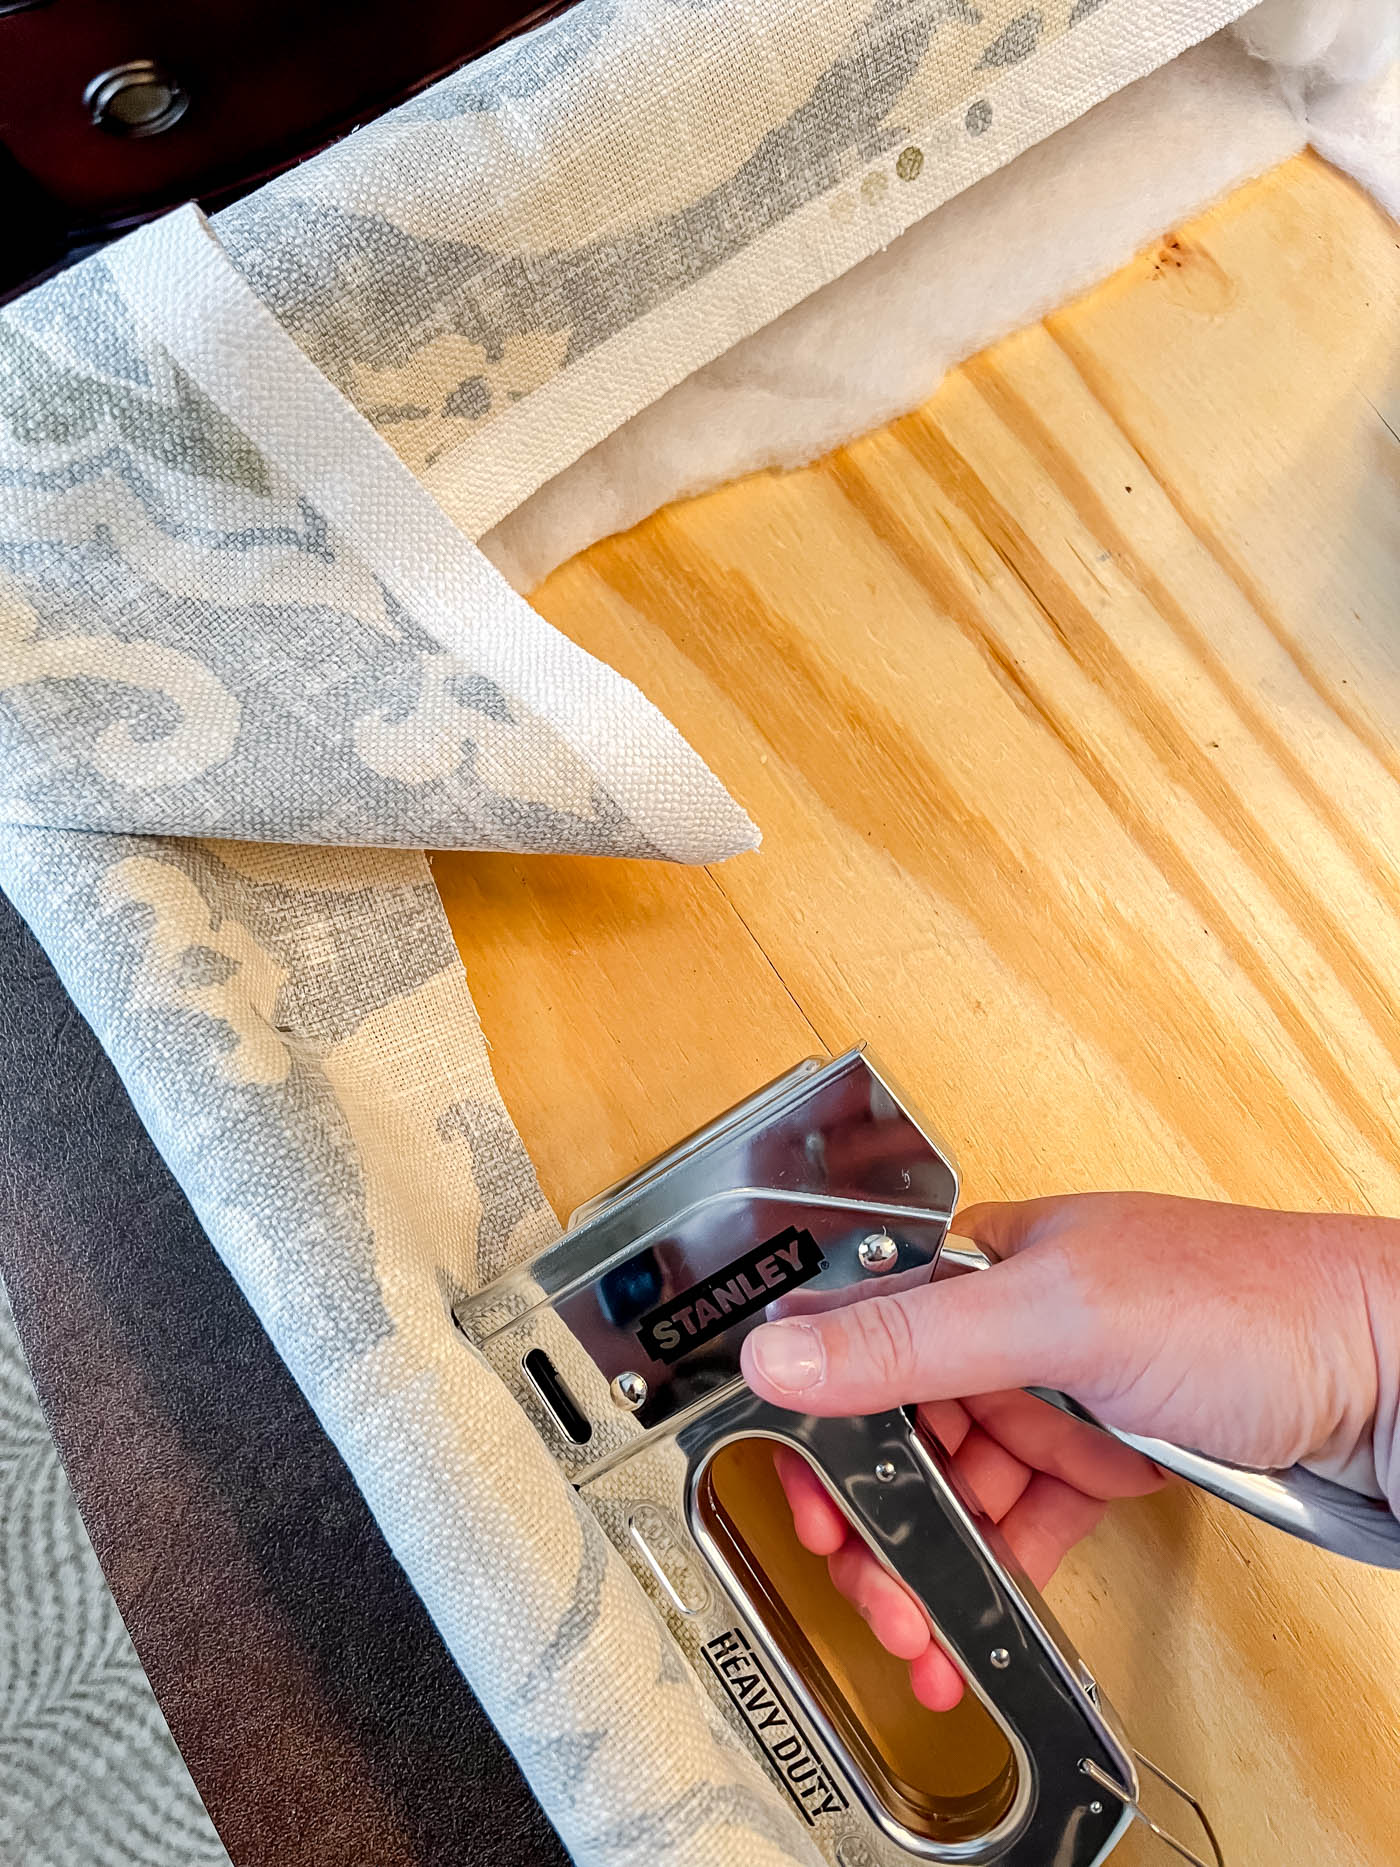
Wrap the corners neatly, like you would wrap a gift.
Step 8: Finish the Back of the Cornice
If your window faces the street and you’re worried the back of the cornice board will look rough from outside, you can make a liner. I used the poster board template I’d already made, trimmed the outside edge, wrapped it in a neutral fabric and hot glued it into the back.
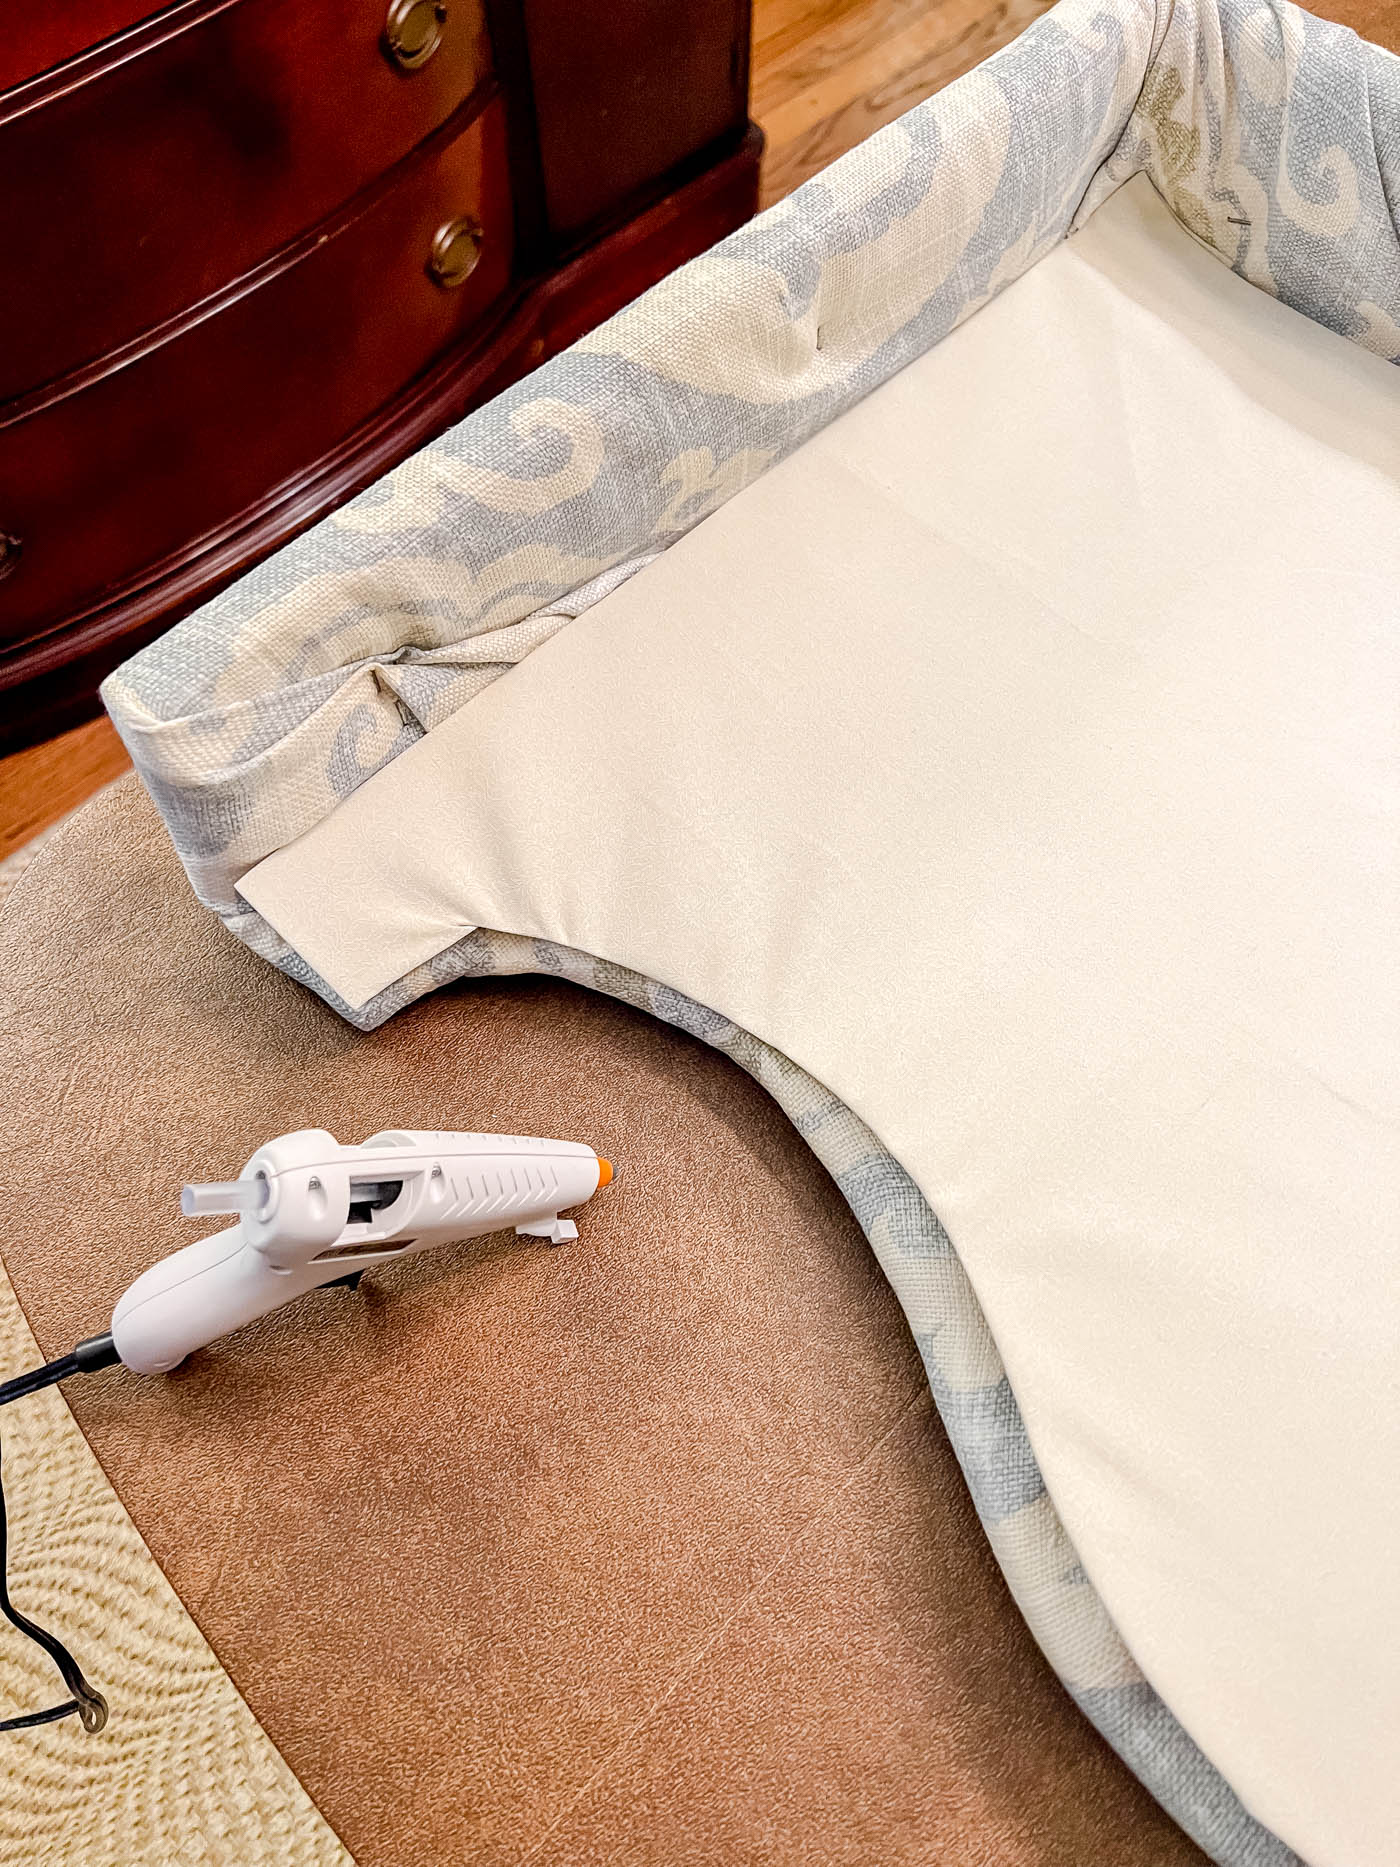
You can honestly barely see it from outside my window. But since my window faces the street, I wanted to be sure it didn’t look bad!
If you like, you can add other embellishments to the bottom, front or sides of your board. I kept mine plain and let the pattern add some extra character.
How to Hang a Cornice Board
Once your fabric-covered cornice board is finished, it’s time to hang it above the window. There are a couple of simple ways to mount one, and I’ve learned the best method depends on how much space you have between the cornice and the wall.
Step 9: Hang the Cornice Board
You have two good options for hanging a cornice board:
Option 1: Use L-Brackets
Mount two L-brackets to the wall and set the cornice board on top of them. Then drive screws up through the brackets and into the top piece of the cornice board to secure it in place.
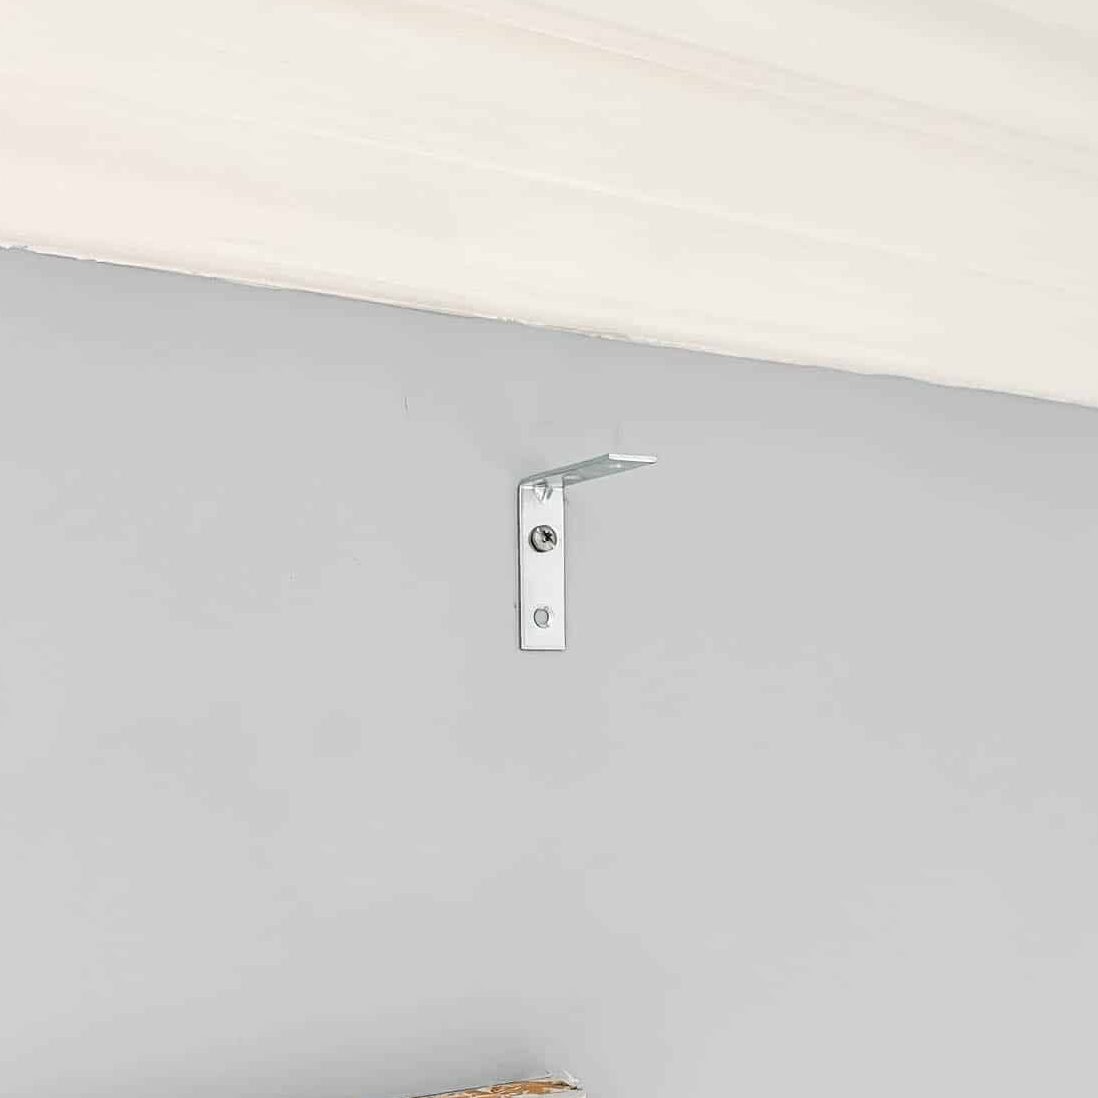
This is the method I used for my cornice board. Whenever possible, attach the brackets to wall studs or use proper wall anchors so the cornice is securely mounted.
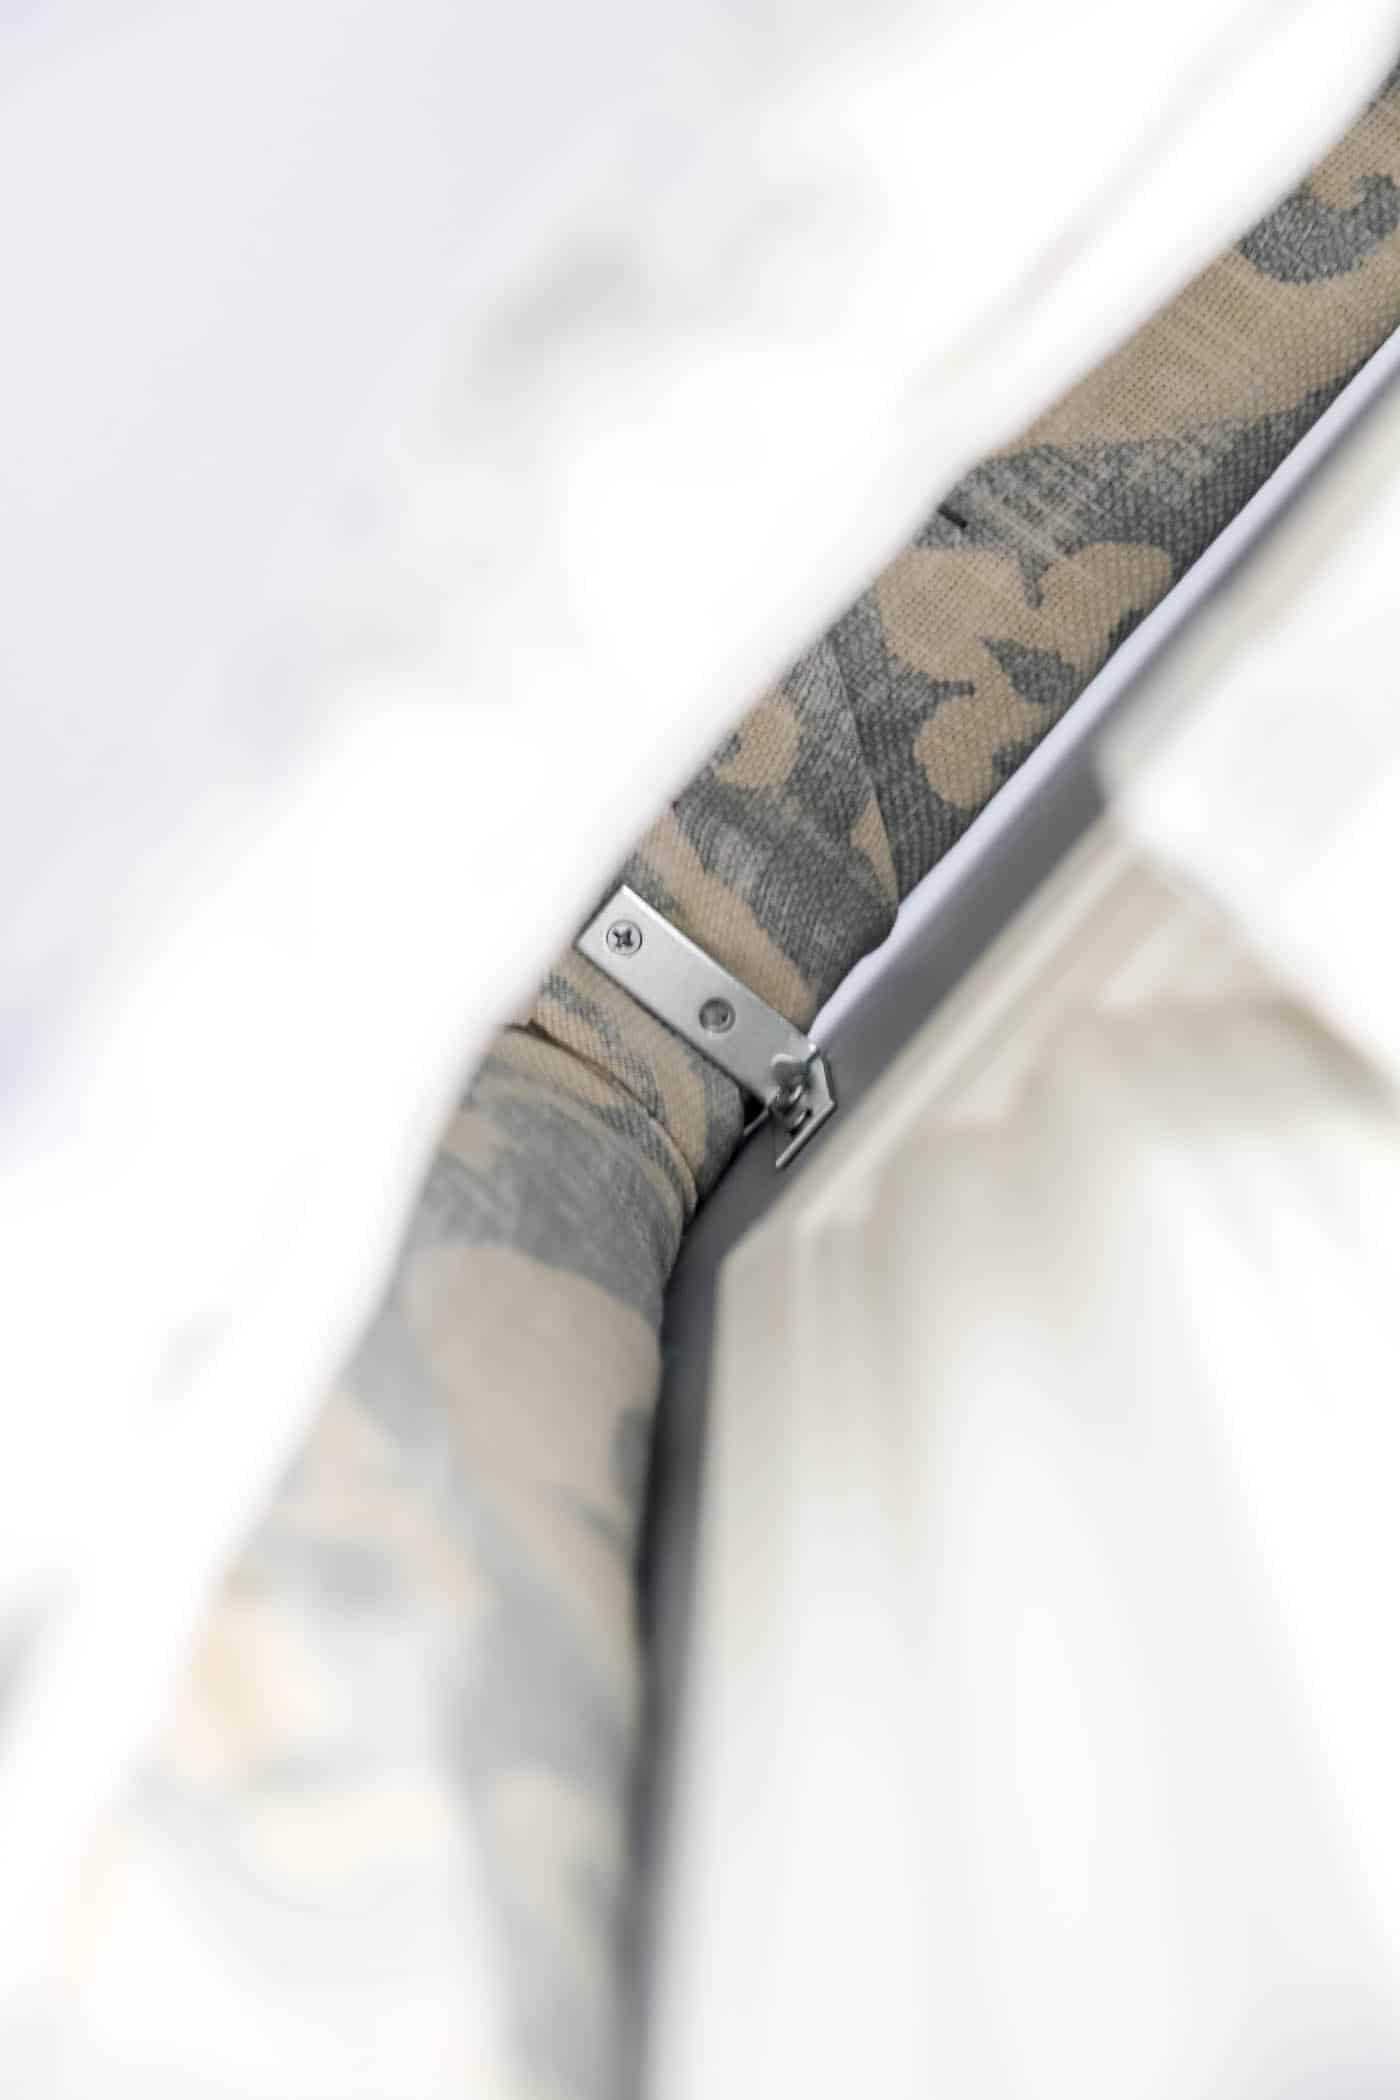
Option 2: Use D-Rings
Another option is to attach heavy-duty D-rings to the back of the cornice board, then install properly anchored screws in the wall and hang the cornice just as you would a heavy piece of art.
Looking back, this is probably the method I’d use if I made this cornice board again!
My cornice only projects about 3.5 inches from the wall, which didn’t leave much room for my hand and drill when I tried to secure the screws underneath. It worked, but it was definitely a tight squeeze.
So now I know! Next time, I’d either make the cornice a little deeper or choose a hanging method that doesn’t require getting a drill underneath it.
But isn’t she a beauty? I just love how it turned out!
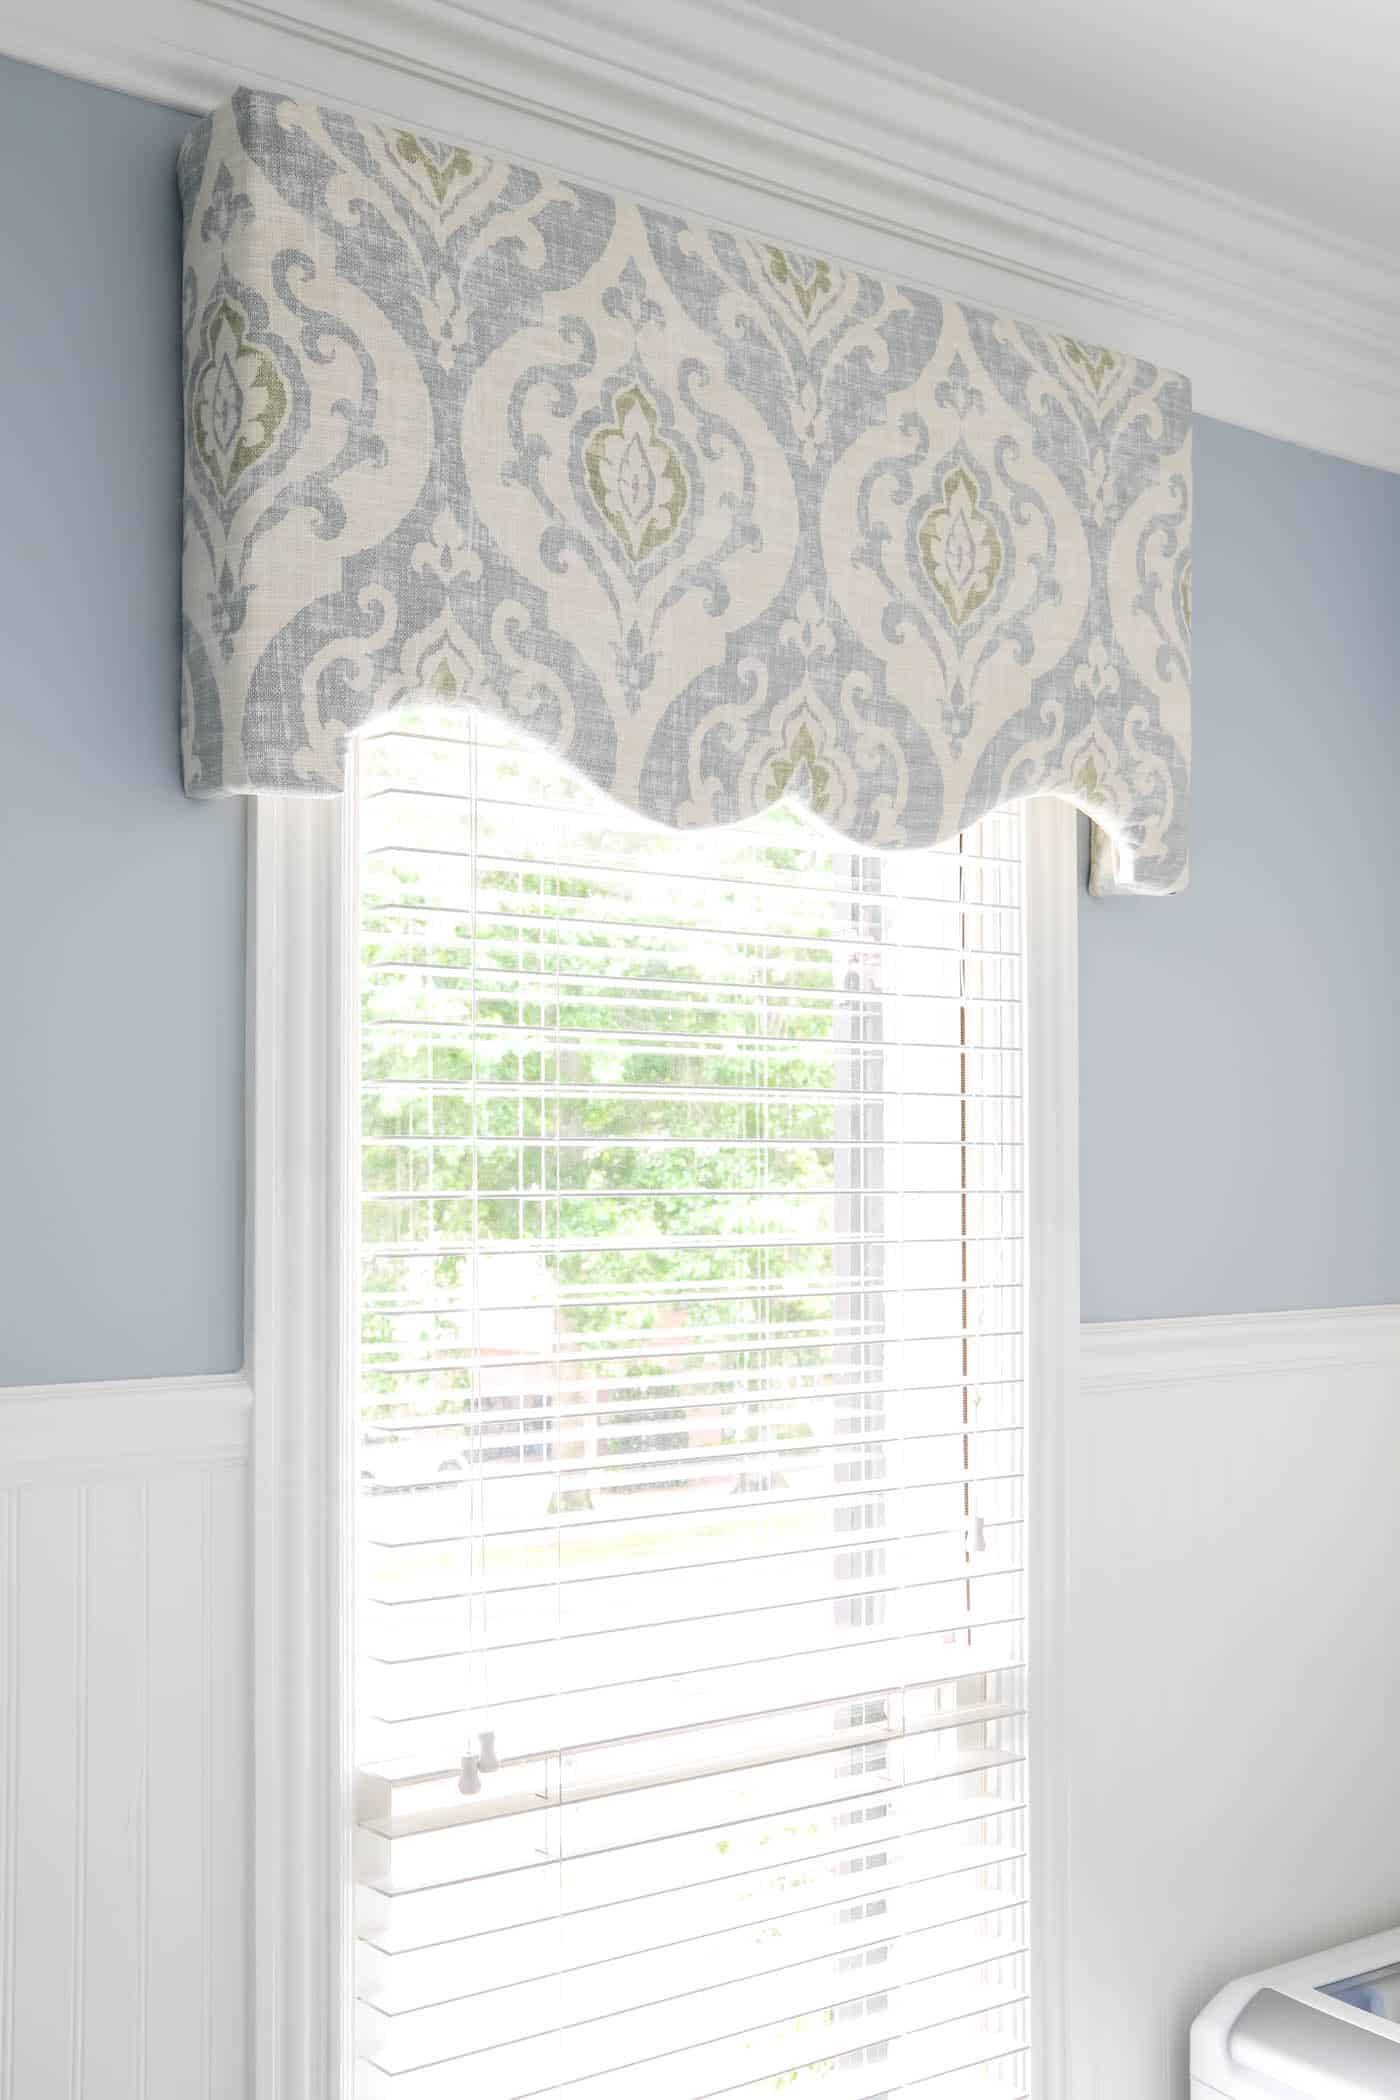
Now that your cornice board is complete, you can sit back and enjoy your work. Or walk by the room every chance you get to steal another glimpse of it, like I do!
Tips for Making Your DIY Cornice Look Professional
- Center patterned fabric before stapling. Pay attention to the center point of your design so the finished cornice looks balanced.
- Keep consistent tension. Pull the fabric snug as you staple, but not so tight that the pattern becomes distorted.
- Trim bulky batting. Removing excess padding from the back and corners makes it easier to create crisp folds.
- Make relief cuts around curves. Small cuts let the fabric wrap smoothly around inward curves without bunching.
- Take your time with corners. Fold them neatly, just as if you were wrapping a gift.
- Finish the back if it’s visible. If the window can be seen from outside, covering the back with inexpensive fabric gives the project a much more polished finish.
DIY Cornice Board FAQs
How wide should a cornice board be?
A cornice board should typically be about 4–6 inches wider than the window, including the trim. This lets it extend about 2–3 inches past each side of the window for a finished, balanced look.
How deep should a cornice board be?
Your cornice board needs to be deep enough to clear the window trim, blinds or shades underneath it. Mine projects about 3.5 inches from the wall, but I’d make it a little deeper next time to leave more room for installation. Or I’d use a different hanging method.
How tall should a cornice board be?
The height depends on the size of your window and the look you want, but it should be tall enough to hide your blinds, shades or curtain hardware without covering too much of the glass. Mine is 19 inches tall, which worked well with the proportions of my window and the crown molding above it.
I followed the same “high and wide” rules of decor that I use when hanging curtains, which means extending the cornice board high enough above the window casing that it almost reaches the crown molding, while covering the hardware for your blinds or shades. So my cornice board sits 10 inches above the window casing and covers only 9 inches of the actual window.
What kind of wood should I use for a cornice board?
I used ~3/4-inch plywood for the front of my cornice board because it’s sturdy yet still easy to cut into a decorative shape. For a simple rectangular cornice, plywood is an easy, budget-friendly choice.
What is the best fabric for a cornice board?
Look for a medium-weight upholstery or home decor fabric that’s sturdy enough to pull taut without stretching or warping. If you use a patterned fabric like I did, choose a design that’s easy to center and keep straight across the front of the cornice.
Do you need batting for a fabric-covered cornice board?
You don’t technically have to use batting, but I recommend it for an upholstered cornice board. Batting adds a little softness and padding under the fabric and gives the finished window treatment a more polished look.
How do you hang a cornice board?
You can hang a cornice board using L-brackets secured to the wall, or attach heavy-duty D-rings to the back and hang it on properly anchored screws. I used L-brackets for mine, but I’d probably use D-rings next time, since my shallow cornice left little room for a drill underneath.
Can you make a cornice board without a jigsaw?
Yes! If you’re making a simple rectangular cornice board, you don’t need a jigsaw to create a decorative shape. I used one because my Pennsylvania-style cornice has a curved design along the bottom edge.
What’s the difference between a cornice board and a valance?
A cornice board is a structured window treatment with a solid frame, while a traditional valance is usually fabric that hangs or drapes above the window. A fabric-covered cornice gives you the softness and pattern of fabric with the more tailored shape of a cornice.
Final Thoughts
I will definitely be making another DIY cornice board! It was easy and budget-friendly, makes a big statement, and I LOVE how it turned out.
I originally made this one to bring some color and pattern into our laundry room without adding curtains that would get in the way. A fabric-covered cornice turned out to be the perfect solution, and it gave this little window so much more personality!
I’d love to make cornice boards for both of my girls’ rooms next. Each has a single, smaller window that could use something fun to dress it up, and this is such an easy way to customize a window when traditional curtains don’t make sense.
If you’ve been looking for a simple way to add color, pattern or character to a window, I hope this tutorial gives you the confidence to try your own. It’s one of those DIY projects that looks much more complicated than it is… and nobody has to know you whipped it up in the garage one afternoon!