Adding curtain trim tape gives a custom look that is unique to your home! Learn how to add trim tape to curtains in 6 simple steps — with NO sewing!
A room rarely feels finished without window treatments, and curtains often complete the look. Instead of hanging plain store-bought panels as-is, you can transform them with a strip of decorative trim tape. It’s an easy, budget-friendly way to personalize ready-made curtains, roman shades, or any fabric window covering without sewing.
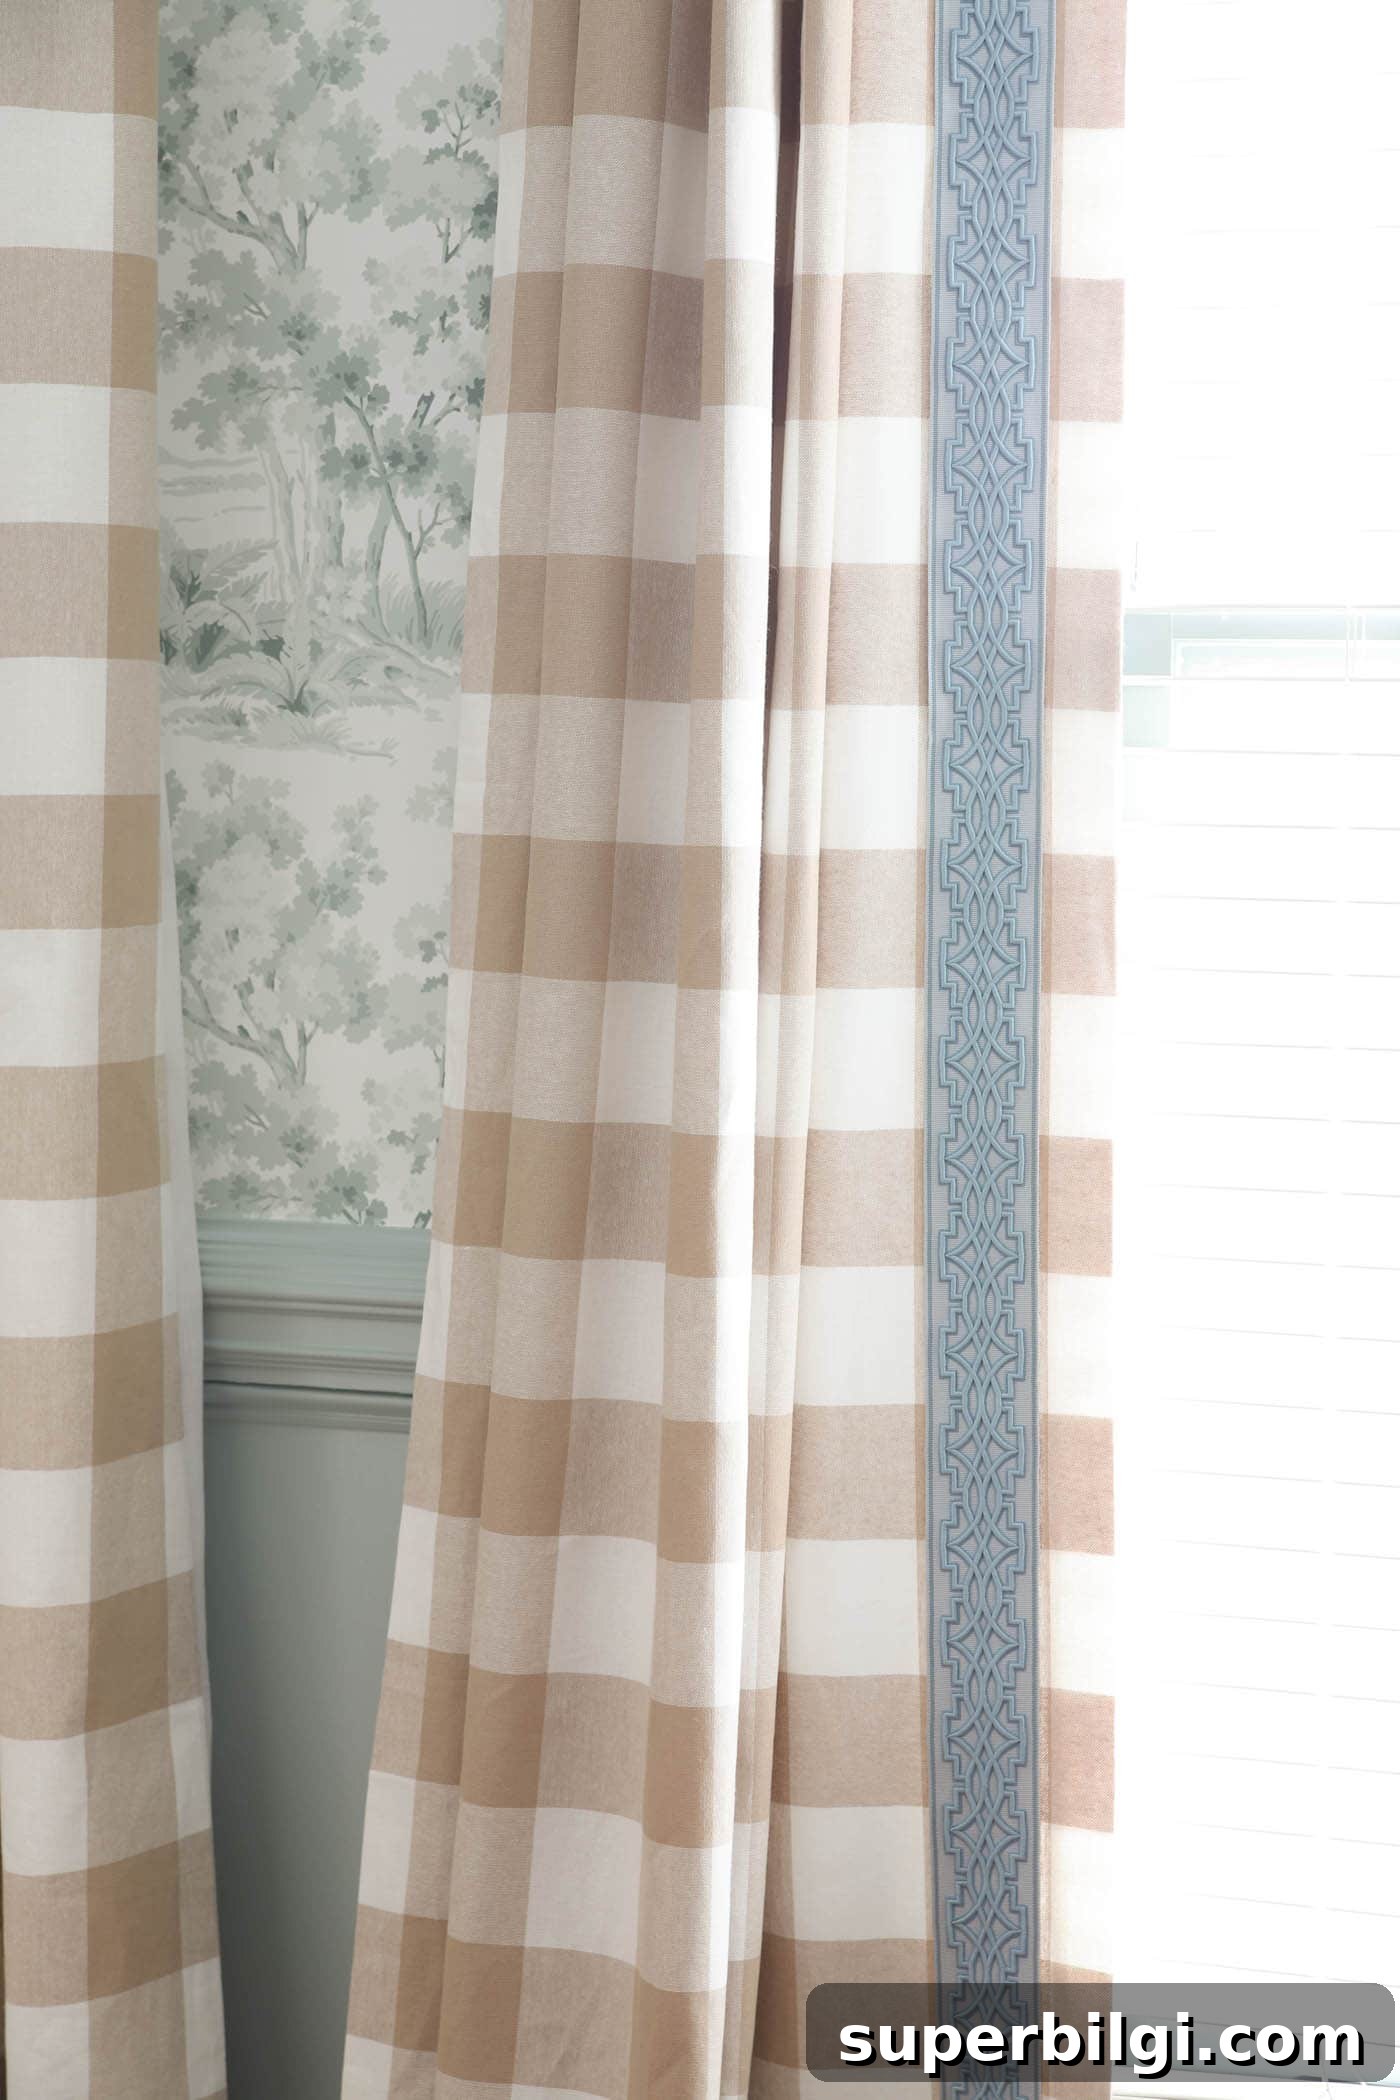
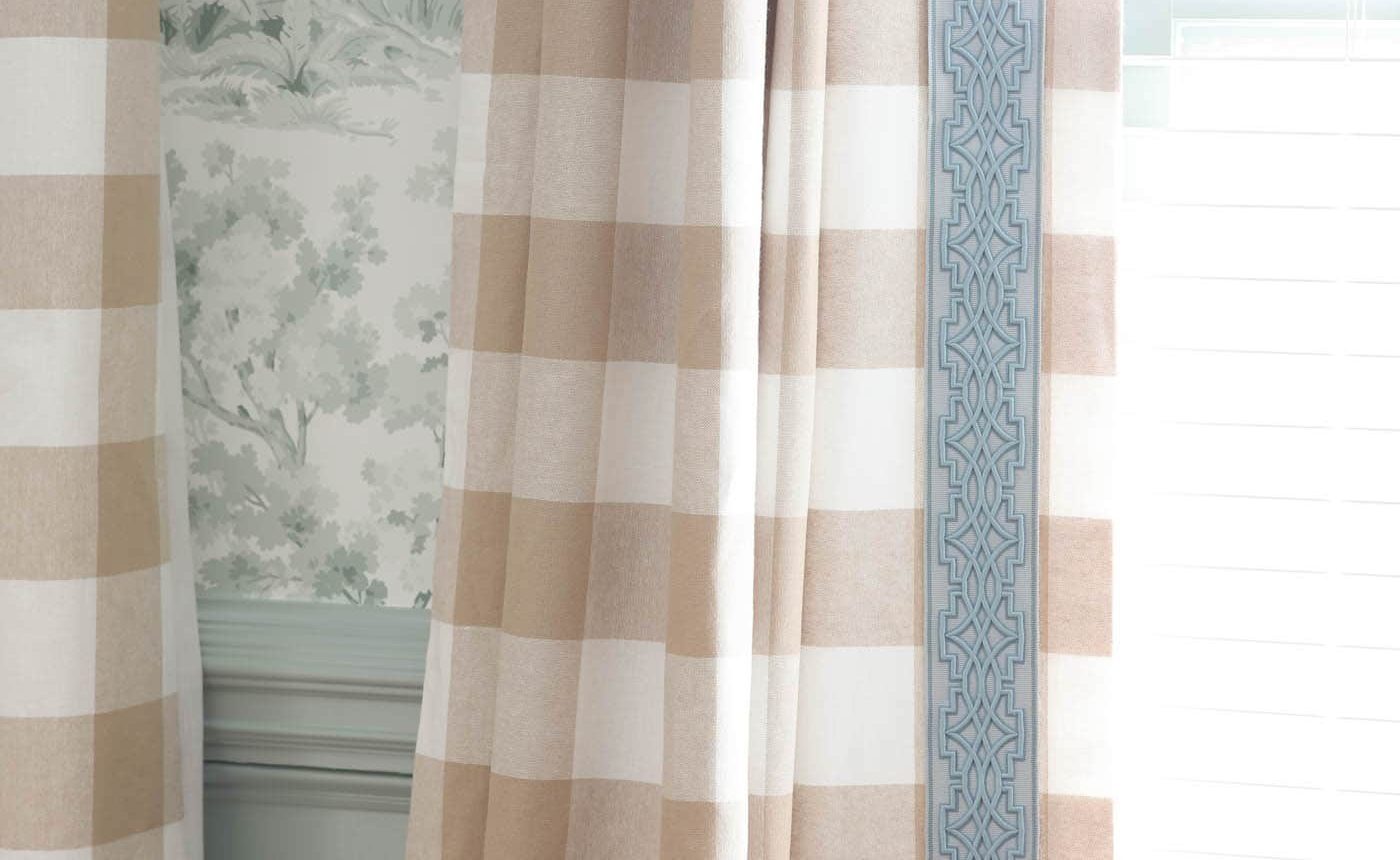
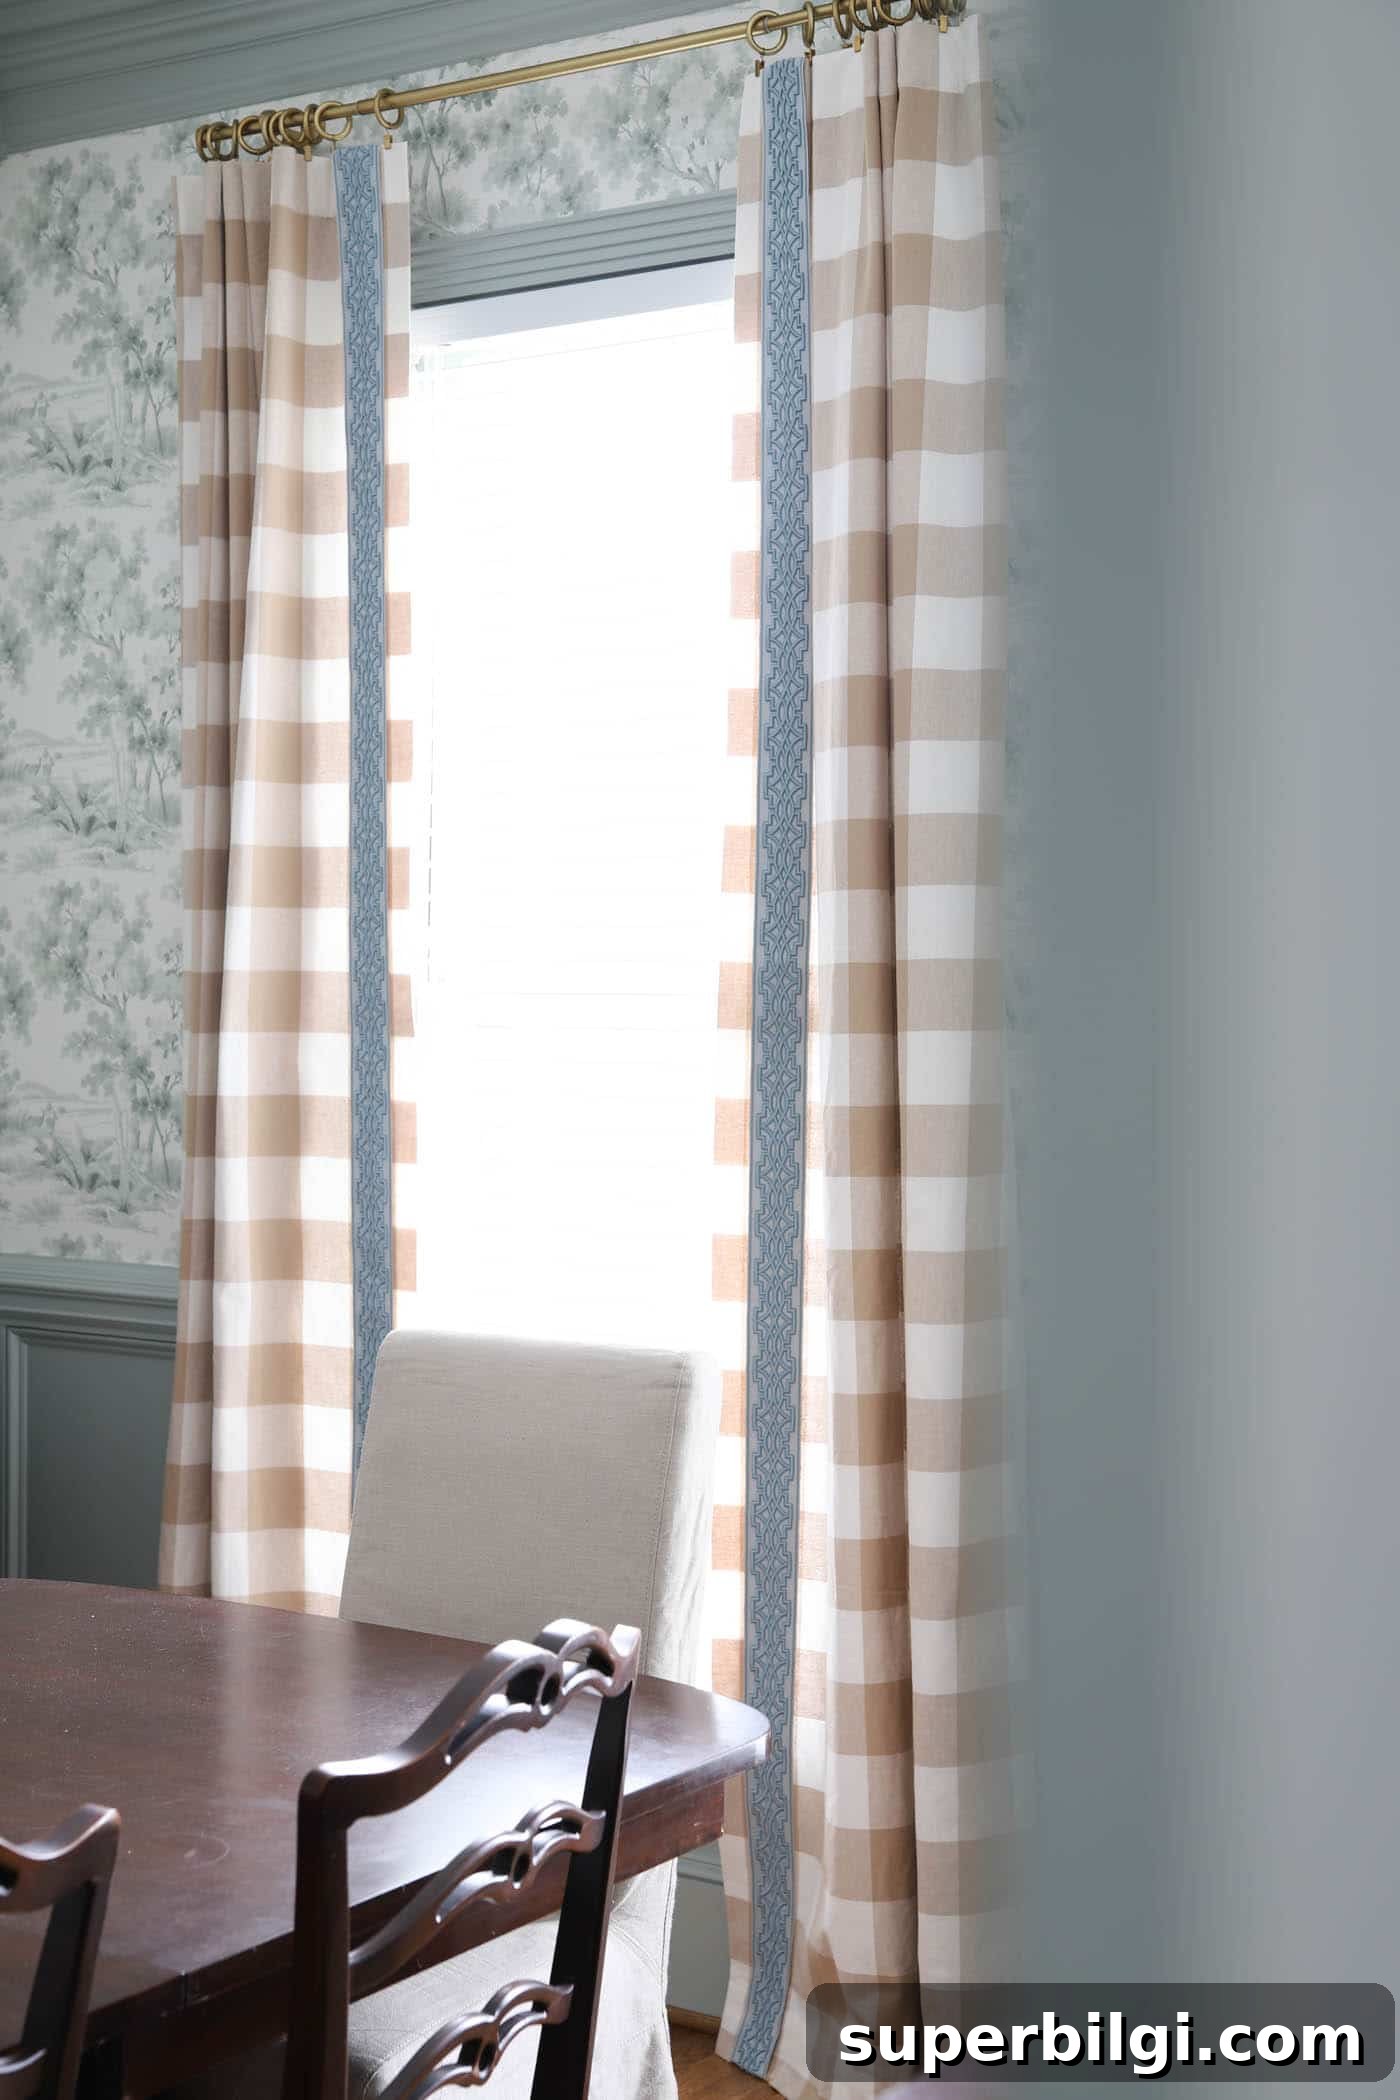
There are countless combinations of curtain fabrics and trim styles, so you can create looks from classic to modern. For my dining room refresh, I added blue trim to beige gingham panels to tie in with blue chairs and nearby cabinetry. The result felt coordinated and intentional without any complex sewing.

This post contains affiliate links for your convenience.
Below are the supplies, step-by-step instructions, and helpful tips for adding trim tape to curtains so you can achieve a clean, professional-looking finish without a needle and thread.
SOURCES: Buffalo Check Curtains | Brass Curtain Rods | Brass Curtain Rings | Brass Finials | Wallpaper | Trim color: Oyster Bay
Supplies You Need for Adding Curtain Trim
- Curtains — Hang them high for the best visual impact.
- 6–8 yards of trim tape, depending on curtain length and how many panels you’re trimming.
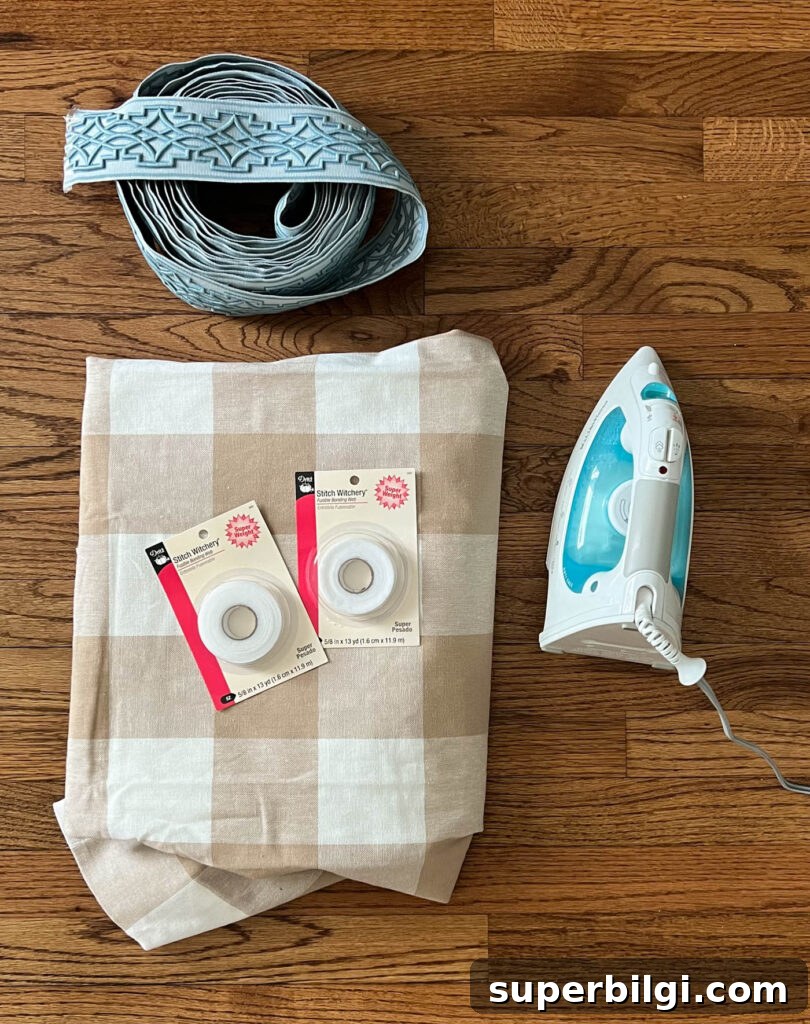
- Fusible web (Stitch Witchery or similar) — choose a weight appropriate for your trim; heavier trims need heavier fusible web.
- An iron (with steam) and an ironing surface.
- A ruler or fabric marking tool to measure placement and keep the trim straight.
How to Add Curtain Trim Tape
1. Iron the Curtains
Start with smooth, wrinkle-free fabric. Press the curtains thoroughly so the trim will lie flat and adhere securely. Proper pressing ensures a neat result and prevents lumps under the trim.
2. Measure 1–2 inches from the Edge of the Fabric
Decide how far from the edge you want the trim. If your fabric has a clear pattern repeat, you can use that as a guide; otherwise, mark a straight line about 1.5 inches from the edge. A long ruler or a cardboard guide helps keep the trim perfectly straight as you work.
3. Fold 2–3 Inches of Trim Tape over the Top Edge
Fold the trim end over the top of the curtain to create a neat finished edge at the header. Lay a few small pieces of fusible web between the trim and the curtain at the folded area to secure the starting point.
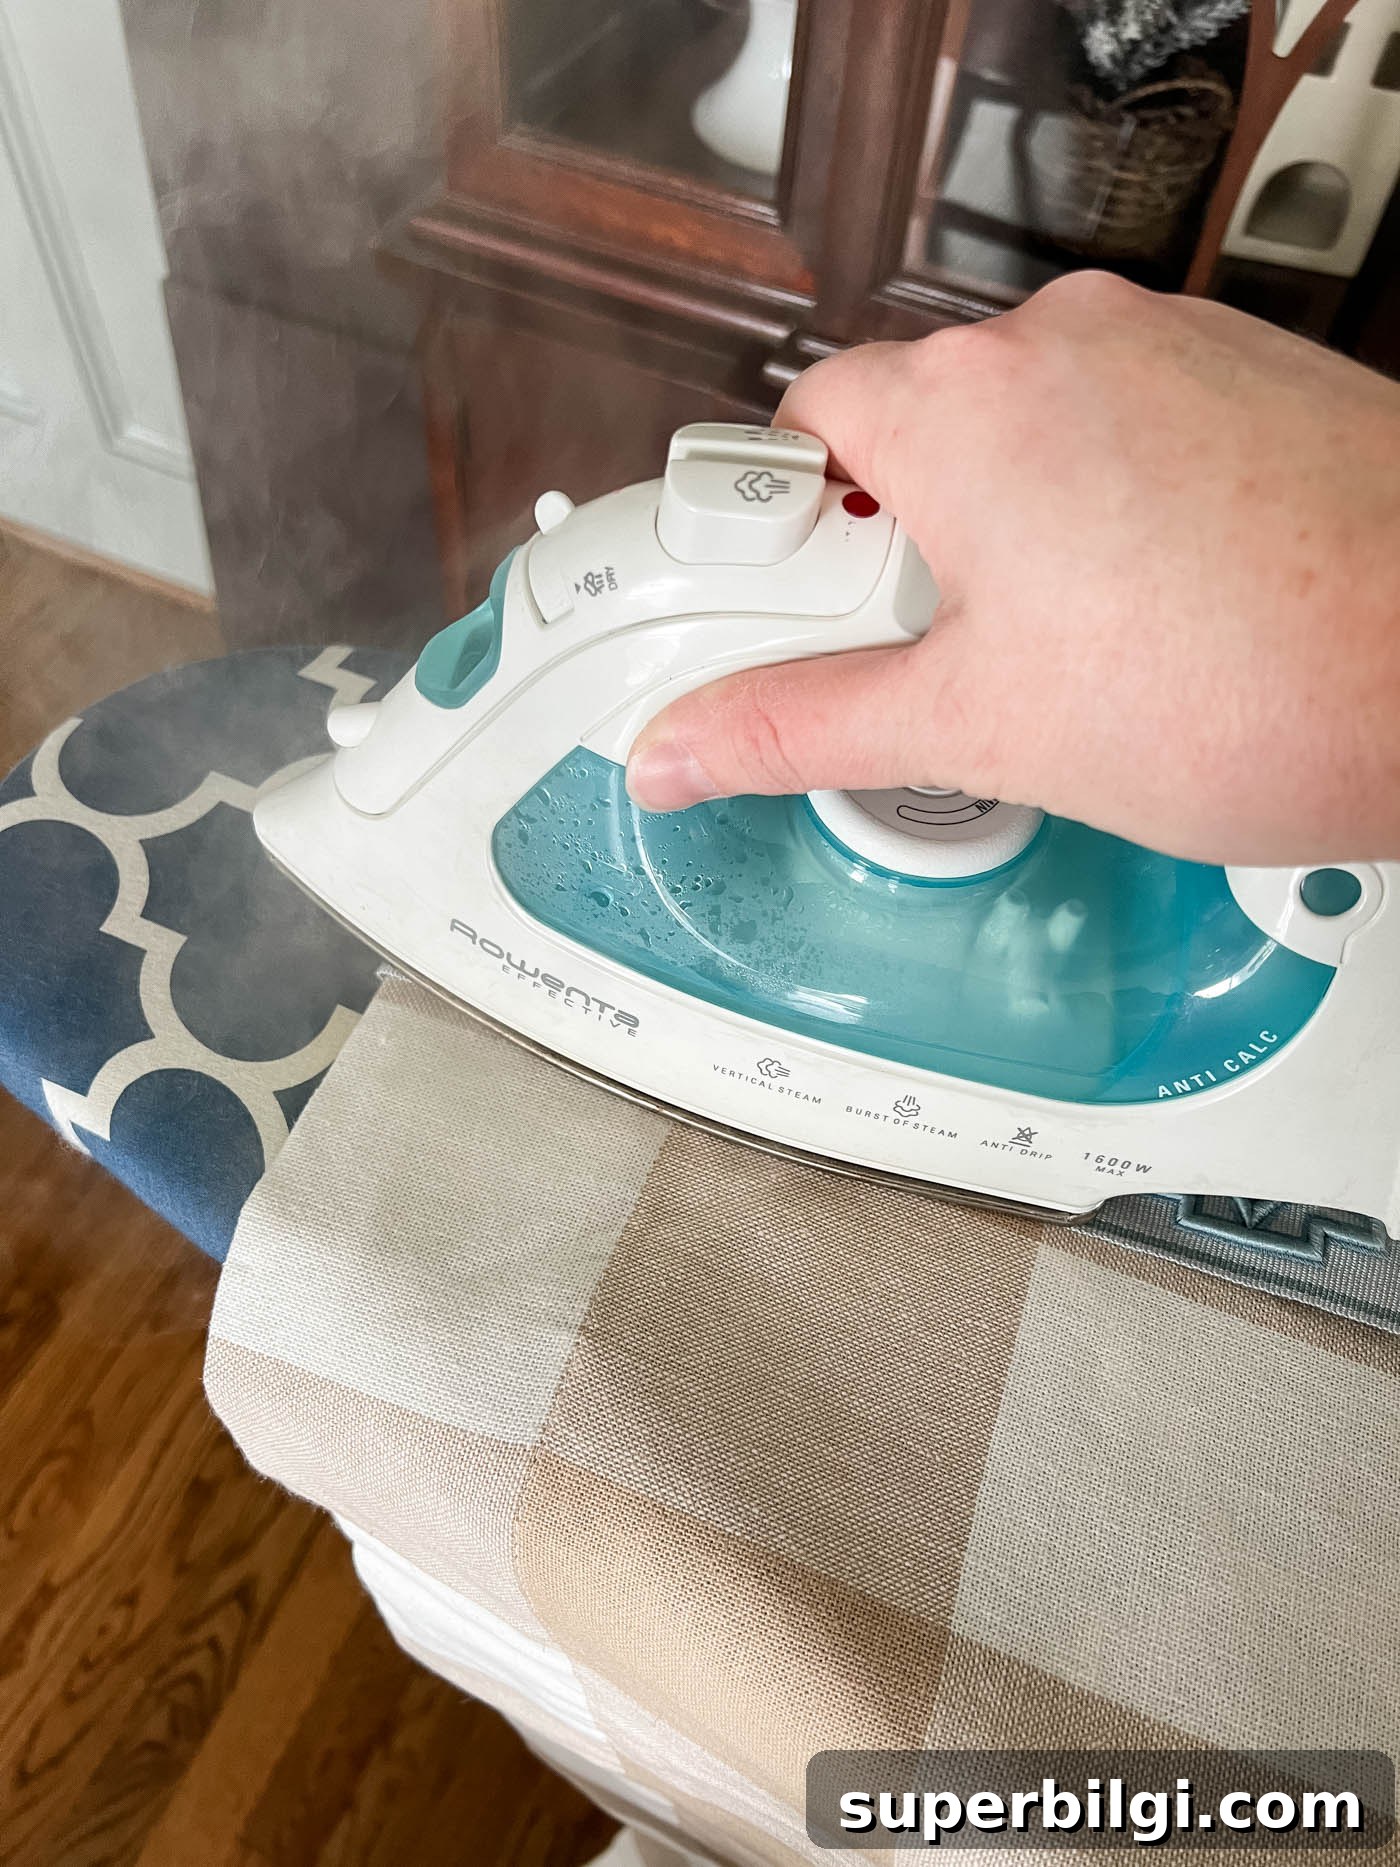
Press with a hot, steamy iron for 10–15 seconds following the fusible web manufacturer’s guidance. Let the area cool and check adhesion; press again briefly if needed.
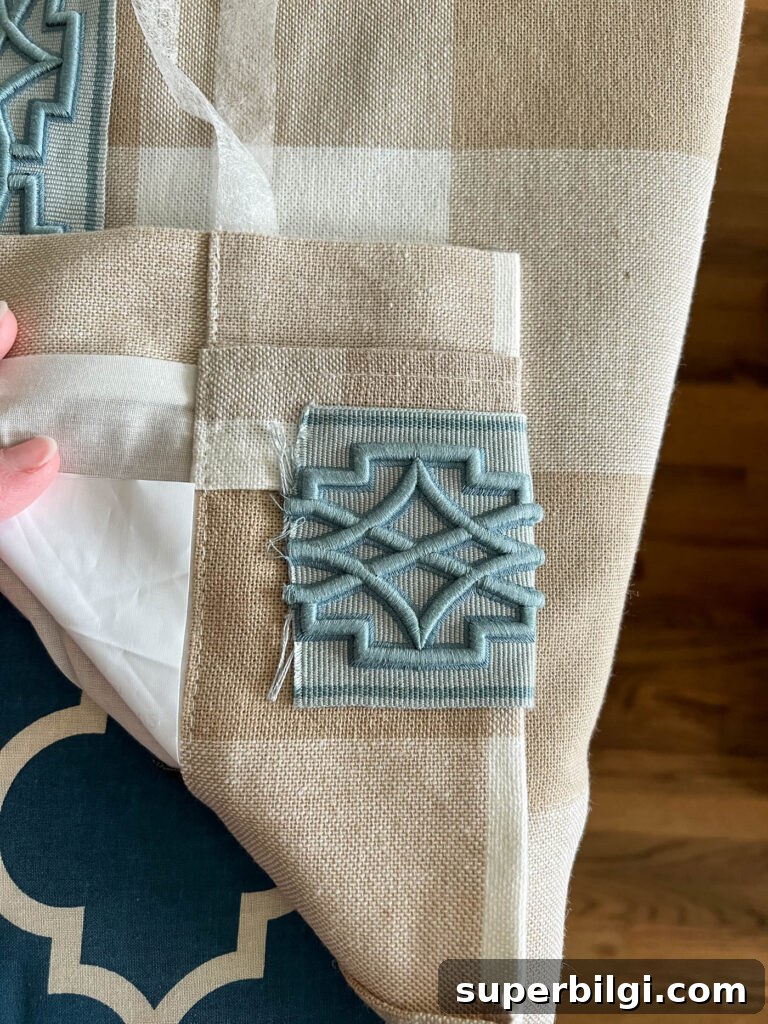
4. Place 1–2 Rows of Fusible Web where the Trim Tape will Go
Lay strips of fusible web on the curtain along your marked line. For heavier trims, use two rows to ensure a strong bond. Position the trim directly over the fusible web before pressing.
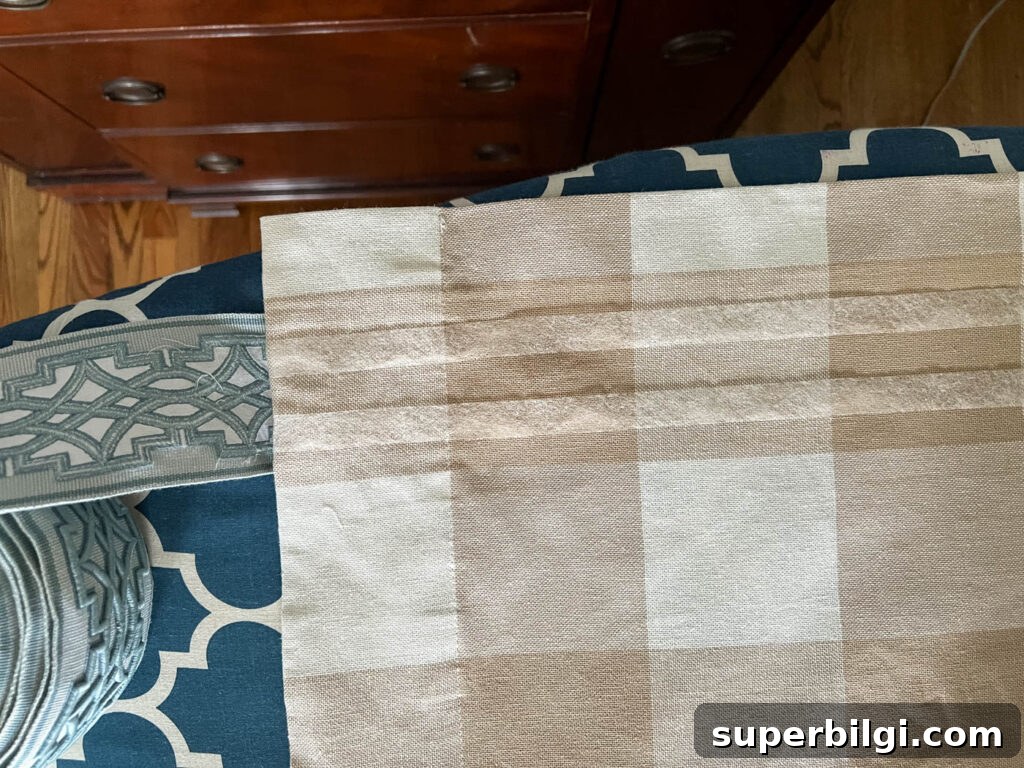
5. Iron the Trim Tape Down
Press the trim a section at a time. Hold the iron in place for 10–12 seconds over each area, then move on until you reach the bottom. For very thick trim, iron the back side of the curtain as well to improve adhesion and prevent the trim from lifting over time.
Finish the bottom edge the same way you did the top by folding the trim and securing it with fusible web, then pressing. Allow everything to cool completely before handling the panels.
Final Thoughts
This project is an easy way to achieve a tailored, designer look without special tools or sewing skills. Choosing a trim color that complements other elements in the room—paint, upholstery, or hardware—helps the curtains feel intentional and integrated. Take your time measuring and pressing; careful placement and good adhesion will give you a polished result that lasts.
I’m sharing a sneak peek of the finished curtains while I complete the rest of the dining room makeover. Once the space is complete, the trimmed curtains will be part of a cohesive, layered design.
When planning this update, remember: practice on a scrap of the curtain fabric or an inconspicuous hem first, especially if you’re using a new brand of fusible web or an unfamiliar trim weight. That test run will help you confirm the right iron setting and pressing time for a secure, clean finish.
Sources for Curtain Tapes and Trims
- Decorator’s Best
- Etsy
- Amazon
- eBay
- Calico Corners
- Online Fabric Store
- MJ Trimming
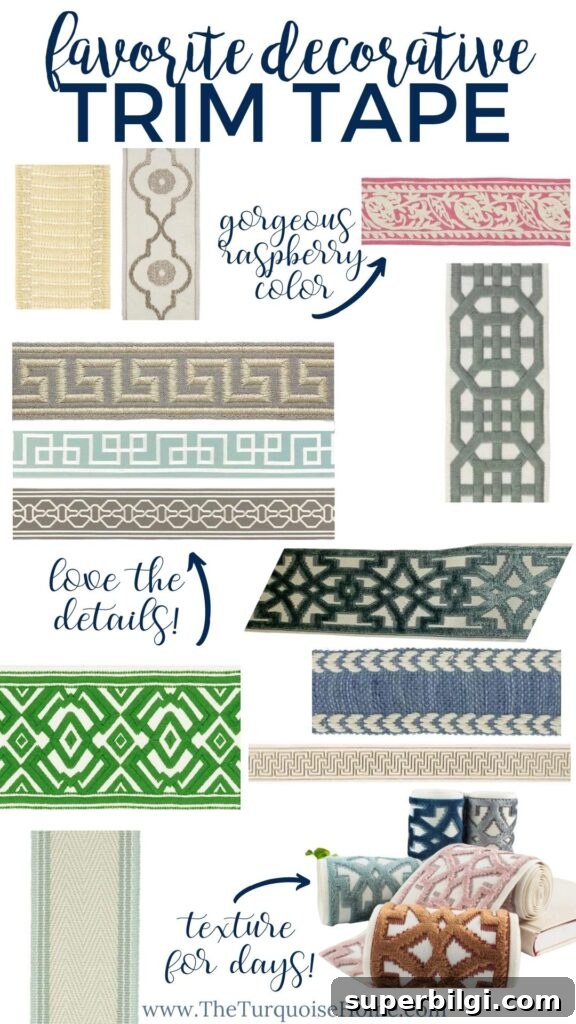
Examples of trims I like include Kravet piano band, Schumacher tape styles, and velvet or decorative beaded trims—choose a finish that complements your room’s overall aesthetic.
The Way to Hang Curtains and Make Your Room Look Larger
A simple rule for maximizing the perceived size of a room is to hang curtains high and wide. Mount the rod 4–6 inches above the window frame and extend the rod 3–6 inches past each side. This draws the eye upward and makes the window and walls feel larger.
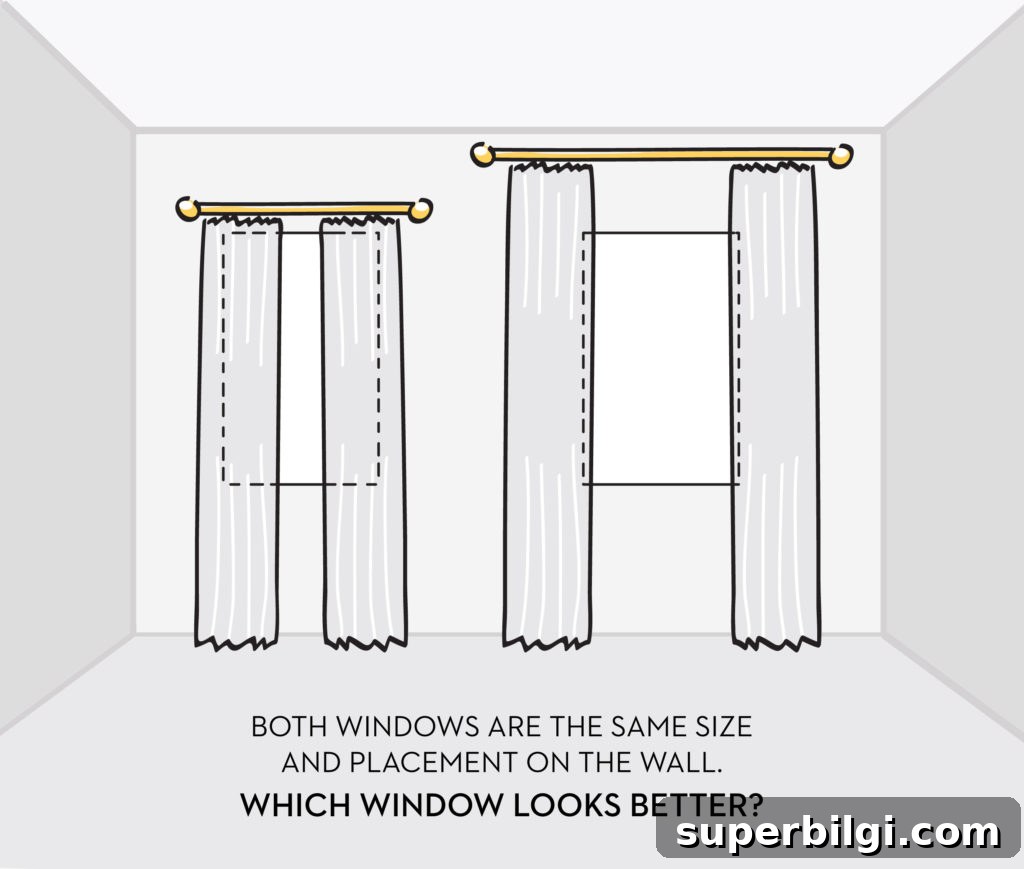
Consider curtain length based on how the curtains will be used: leave a small gap above the floor (1/4–1/2 inch) if you open and close them often, or allow a longer puddle (4–8 inches) for a more formal, luxurious look if the panels will stay in place.
More posts you will love:
- Benjamin Moore Van Deusen Blue
- How to Decorate the Dining Room for Christmas
- Traditional Dining Room Reveal
- How to Choose Living Room Curtains
- The Best Window Treatment Options for Every Room