
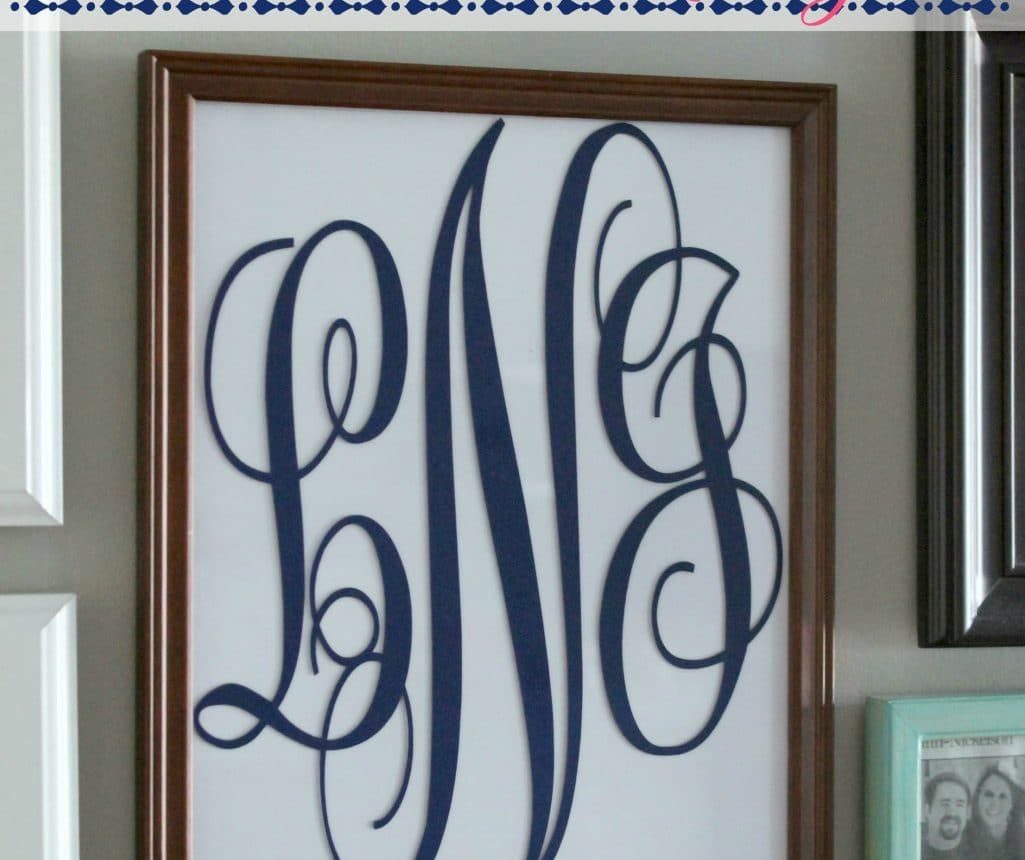
I love monograms, and this simple vinyl monogram is a perfect beginner project. This tutorial walks you through everything you need to know to create your first vinyl monogram with a Silhouette cutting machine.
I’ve used the same basic method from this tutorial to make a printable monogram and a monogrammed wreath, and it’s a great foundation for many personalized projects.
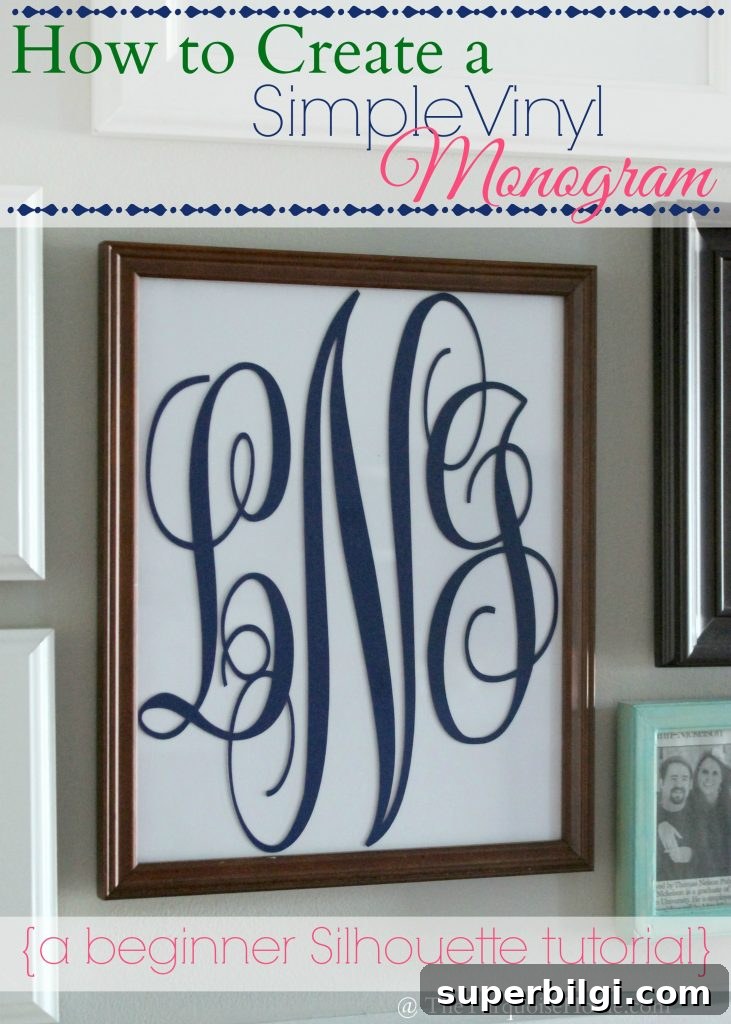
After I bought a Silhouette Cameo, I was eager to try cutting vinyl. When I picked up a vinyl starter kit during a sale, I finally had everything I needed. As a beginner, I learned a few small tricks that made the process easier, and I’m sharing them here so you can skip some of the trial-and-error.
This project isn’t complicated, and it yields a professional-looking vinyl monogram you can use on frames, glass, signs, fabric (with heat transfer vinyl), and more.
Part 1. How to Create a Monogram
Step 1. Download the Monogram KK font.
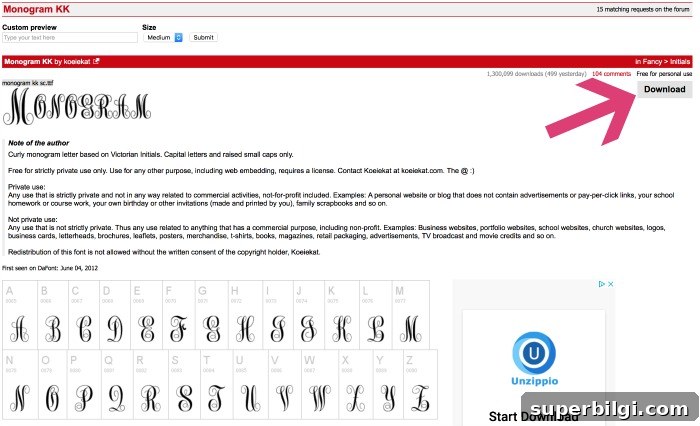
Monogram KK is designed specifically for classic three-letter monograms. It produces the correct proportions when you use the font’s recommended capitalization pattern, which makes layout much easier for beginners.
Step 2. Install the font on your computer.
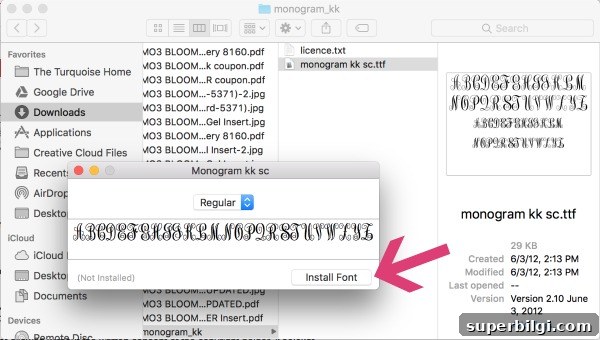
On a Mac, open your Downloads folder, find the Monogram KK files, and choose “Install Font.” On a PC, follow your normal font installation steps. Once installed, restart Silhouette Studio if it doesn’t show up immediately in the font menu.
Step 3. Design your monogram in Silhouette Studio.
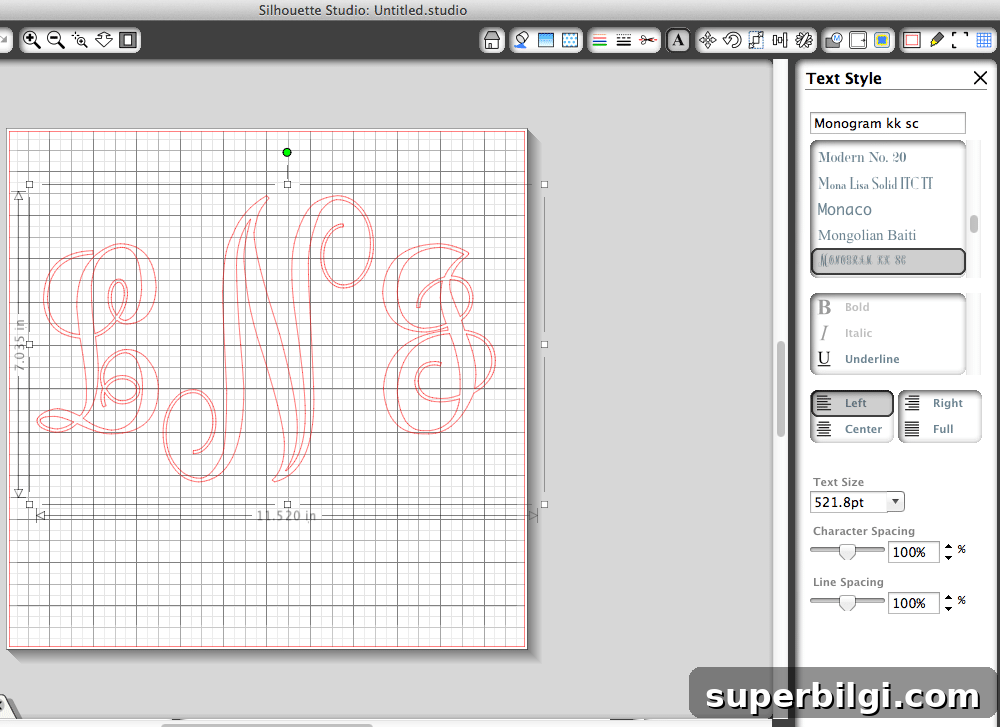
For a standard married-couple monogram, type the wife’s first initial in lowercase, the shared last-name initial in uppercase, then the husband’s first initial in lowercase (for example: lNj becomes LNJ with Monogram KK). The font is designed so the middle letter appears larger automatically.
After typing, ungroup the letters so you can move them to overlap the way you want. You can adjust spacing and size until the composition looks balanced—don’t worry if the side initials aren’t perfectly symmetrical; slight offsets often look more natural.
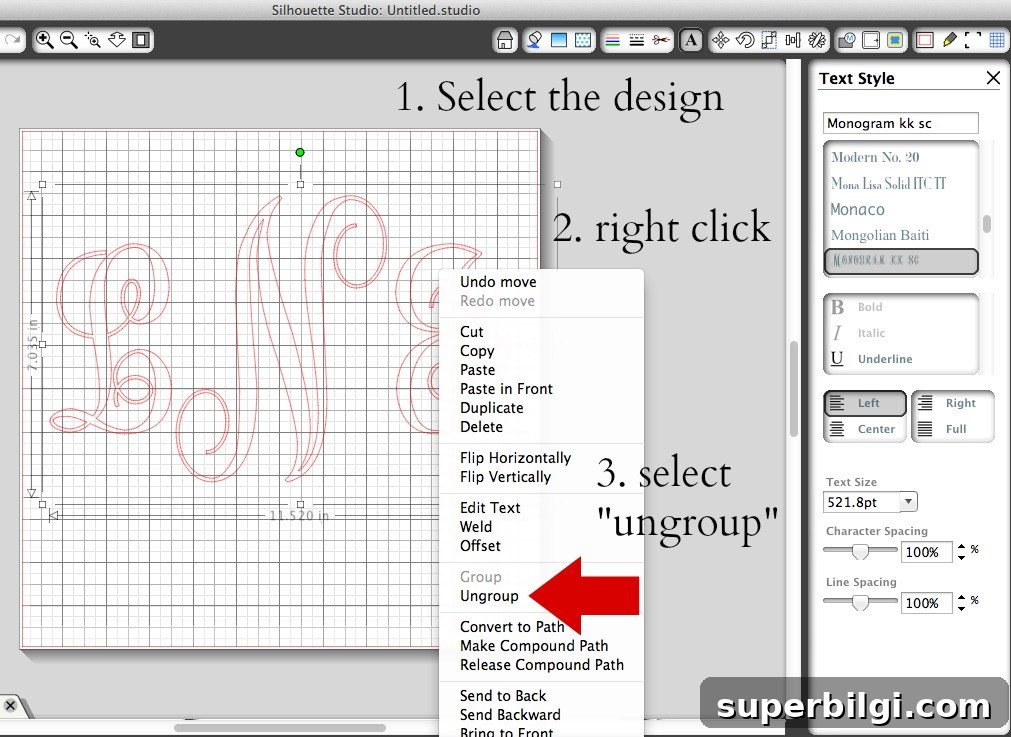
Step 4. Weld the letters together.
When the letters overlap exactly as you like, use the Weld tool in Silhouette Studio. Welding joins the letters into a single shape so the cutter treats the design as one continuous piece instead of separate letters.
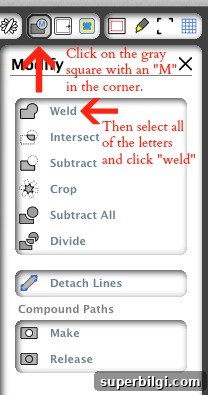
Welded, your monogram becomes a cohesive decal that’s much easier to weed and transfer.
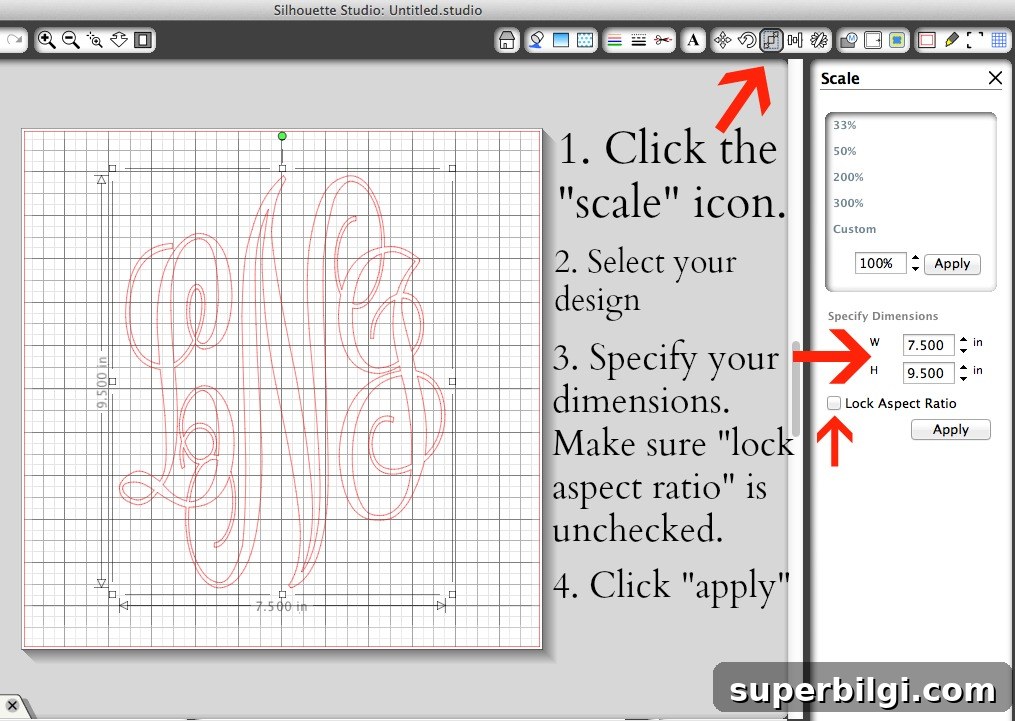
Step 5. Resize to fit your project.
Measure the exact area where the decal will go. For example, if you’re applying the vinyl to the inside of a picture frame, measure the inner dimensions of the frame mat or glass. An 8×10 frame doesn’t guarantee an 8×10 printable area; I scaled my design to about 7.5 x 9.5 inches so it would fill the opening without touching the edges.
Part 2. How to Cut Vinyl to Create a Monogram
Step 6. Cut your monogram with the Silhouette.
Cut a piece of adhesive vinyl slightly larger than your design and place it on a clean, sticky cutting mat. Load the mat into the machine (select “Load Cutting Mat” in the Silhouette software) and choose the vinyl cut settings recommended by your vinyl brand and Silhouette Studio. Press Cut and let the machine do the work.
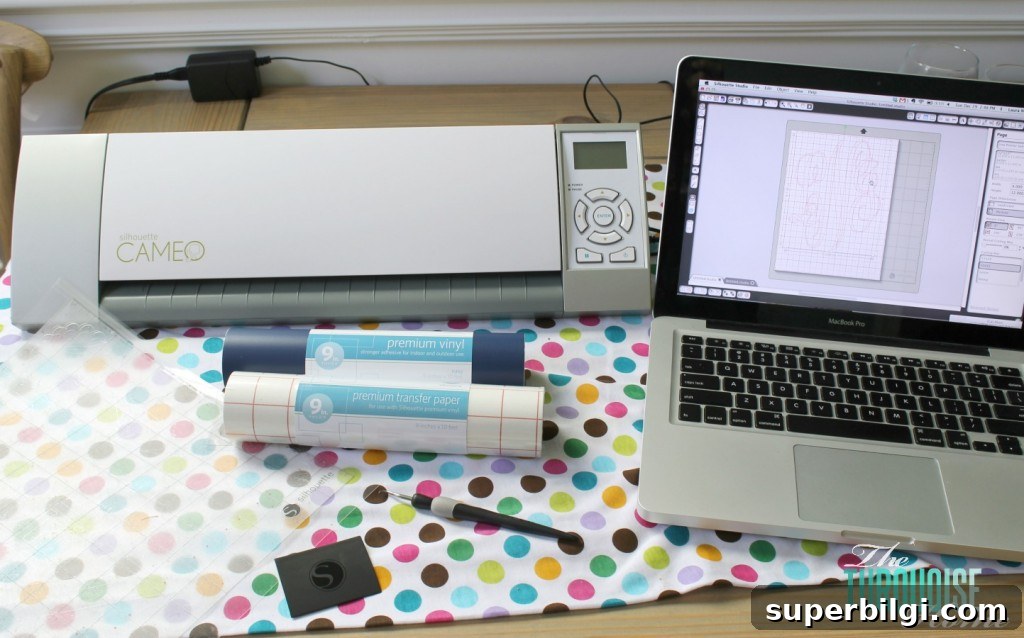
Essential supplies for this project:
- Adhesive vinyl
- Transfer paper (clear or wax-based transfer tape)
- Cutting mat
- Weeding hook or pick
- Scraper tool or squeegee
- Silhouette cutting machine
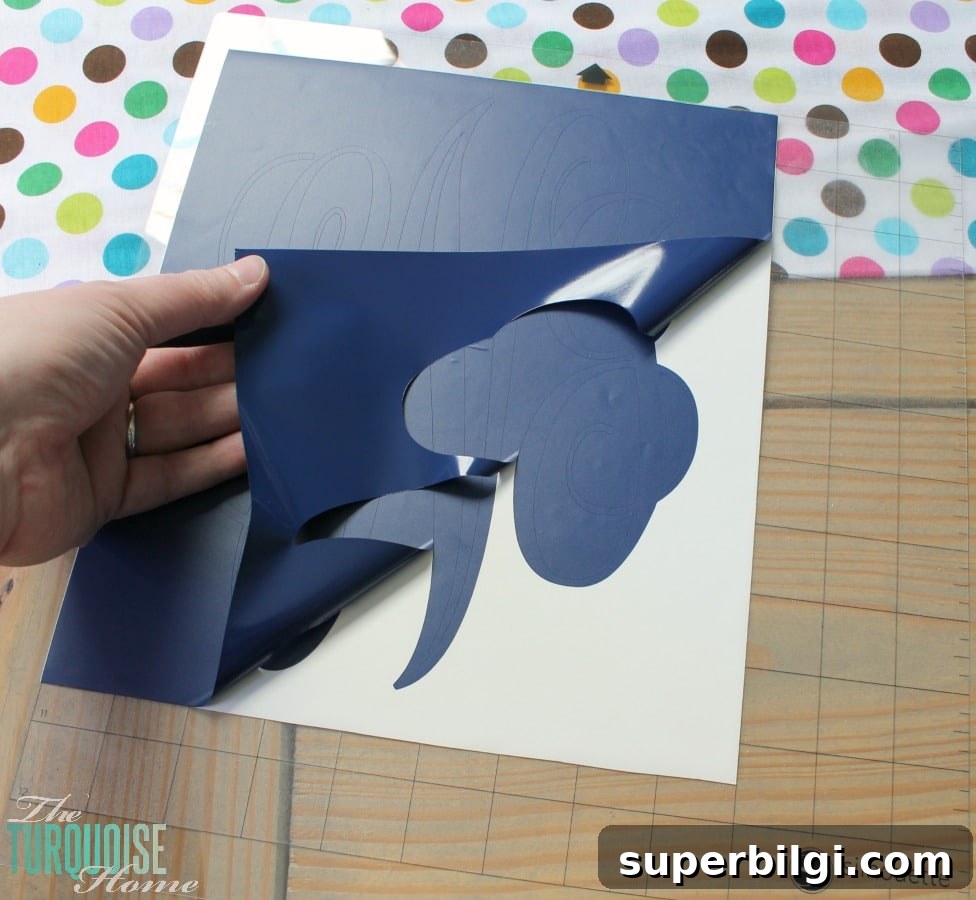
Step 7. Weed the excess vinyl.
Once cut, carefully peel away the vinyl that isn’t part of your design. Use a hook or weeding tool to remove small interior pieces and clean up any stray bits. Take your time here—clean weeding helps the final transfer look crisp.
Step 8. Transfer the vinyl with transfer paper.
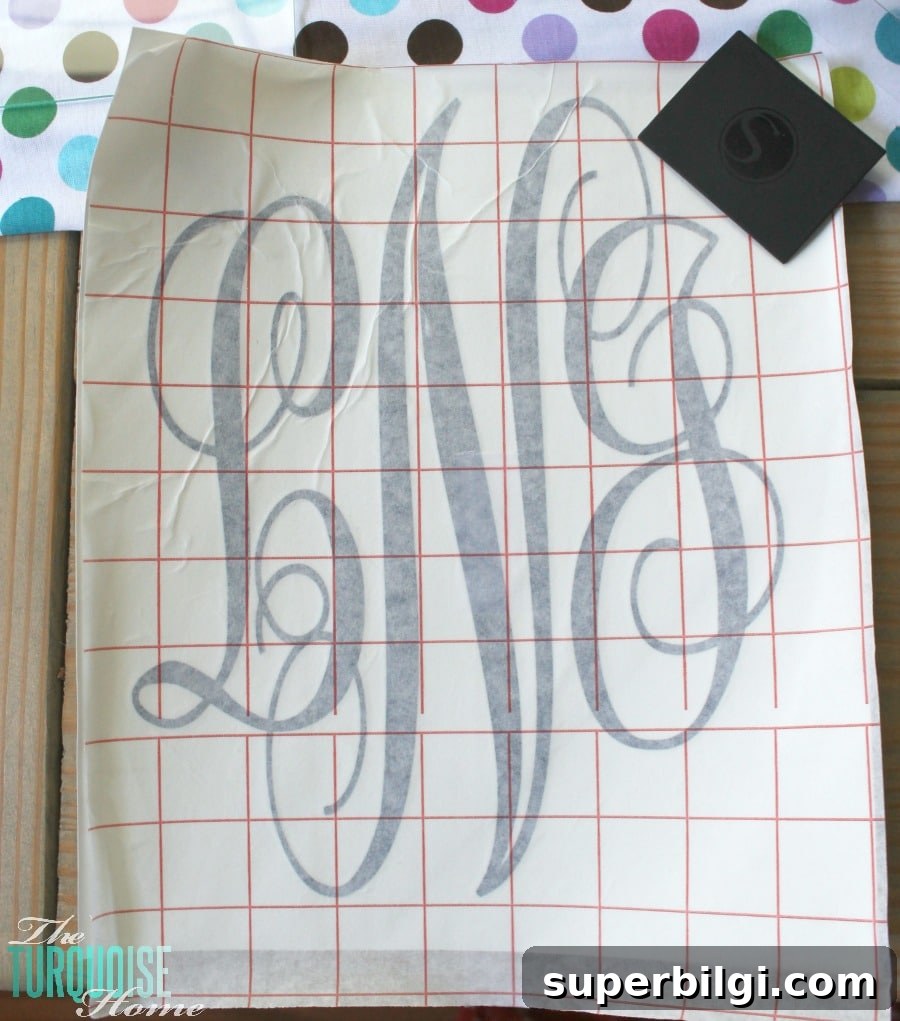
Cut transfer paper slightly larger than your design, peel the backing, and lay the sticky side down over the vinyl. Use a scraper or squeegee to press firmly across the entire surface so the vinyl adheres to the transfer paper. Remove the vinyl backing slowly; your design should lift cleanly and remain stuck to the transfer paper, ready to be applied.
If you’re applying the decal to glass, it helps to place the glass over the design on a flat surface so you can see alignment clearly. Press the decal onto the surface, go over it with the scraper to remove air bubbles, and then peel away the transfer paper slowly at a low angle.
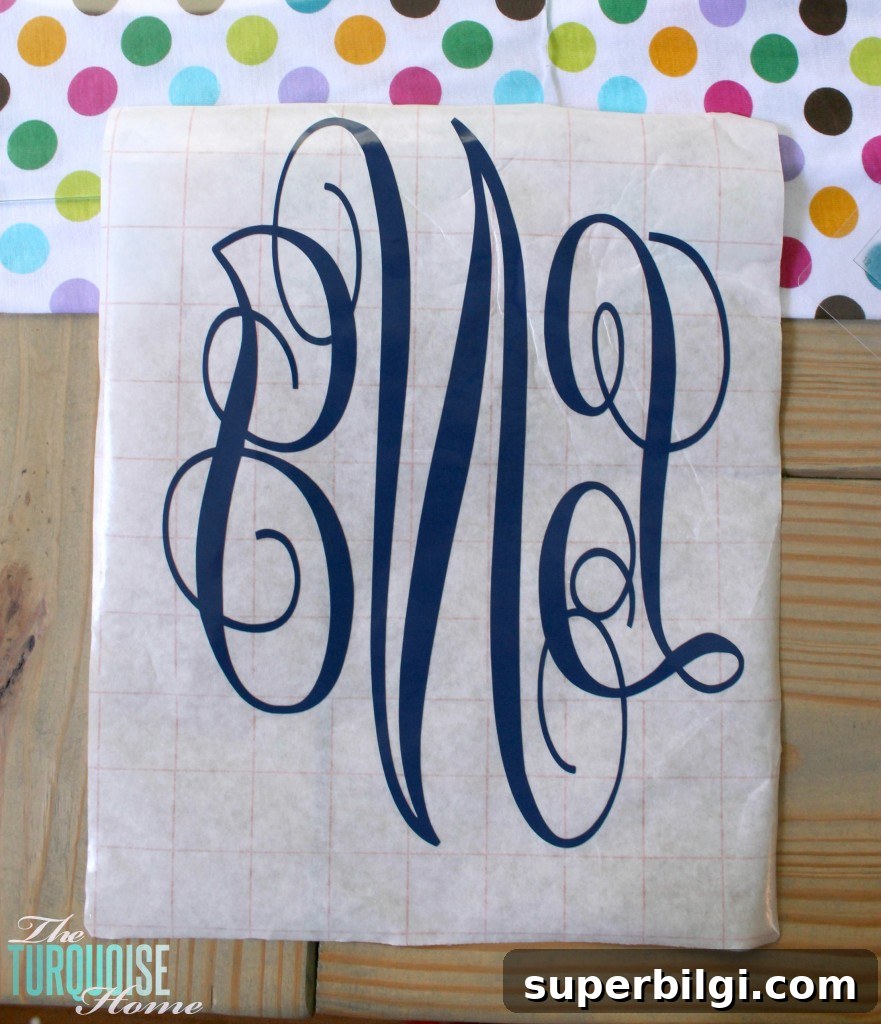
I backed my monogram with white cardstock inside a frame for a clean look, but you can also apply it to glass with the wall color showing through, or use fabric, burlap, or patterned paper behind the decal for variety.
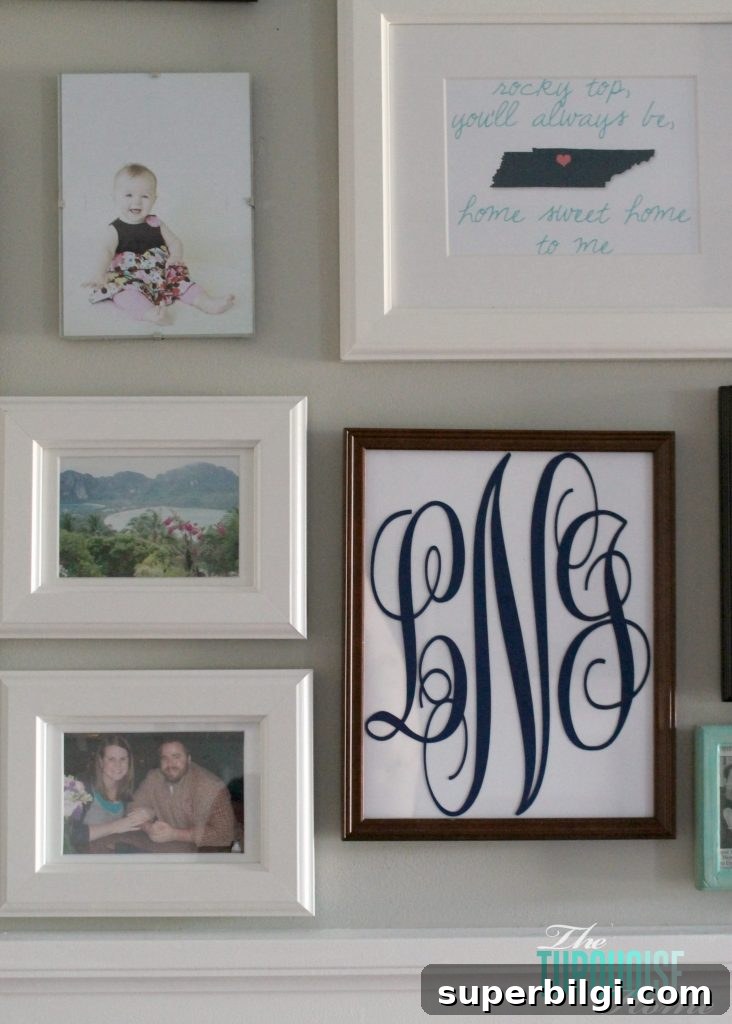
I’m delighted with how this turned out on my gallery wall. If you try this technique, you’ll find it opens up many possibilities for personalized gifts and home decor. Share your results or tips—if you have experience with vinyl, I’d love to hear what worked best for you.
Tell me in the comments which items you plan to monogram first!
More Posts You Will Love:
- DIY Monograms for Every Room in Your House
- Cotton Wreath Free Printable {with your monogram!}
- Framed Burlap Monogram











