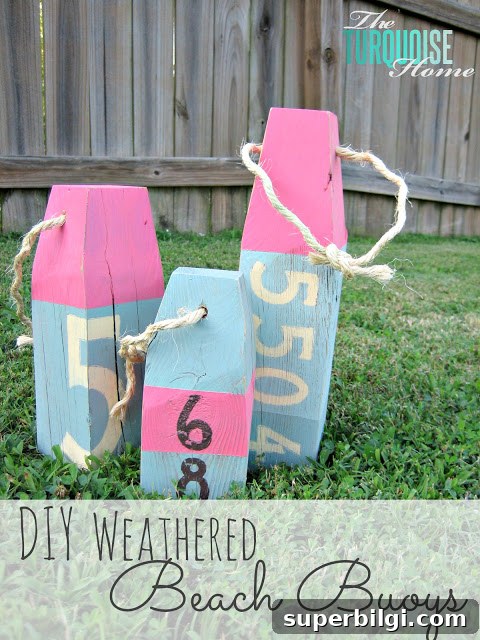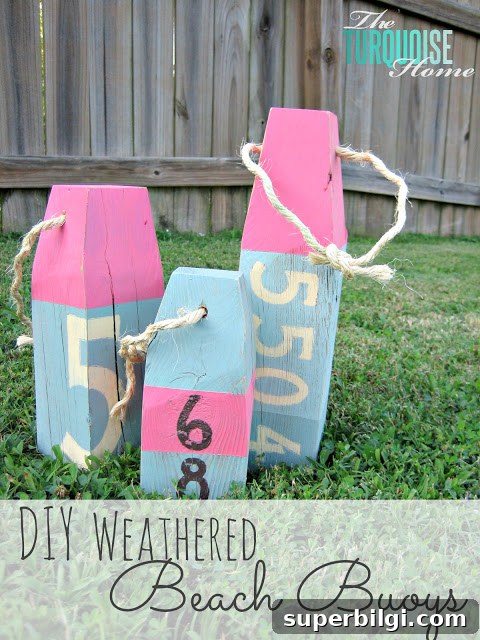
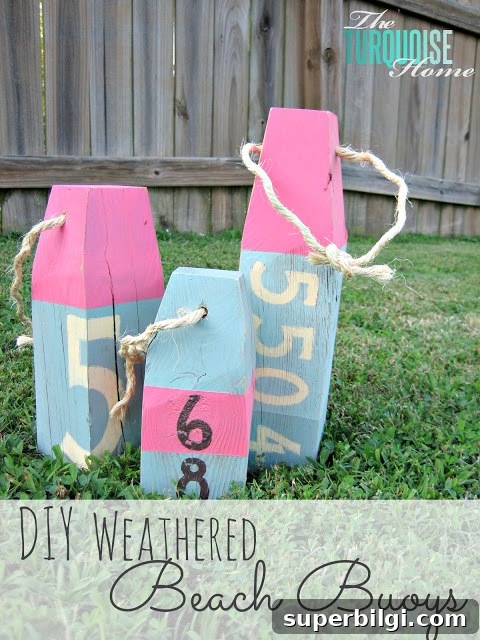
While browsing a Pottery Barn catalog recently I spotted some charming weathered beach buoys — perfect accents for a lake house or coastal cottage. Instead of buying them, I figured I could make similar pieces for very little money by repurposing scrap lumber and a few craft supplies.
In my neighborhood, people often leave usable items out by the curb the night before trash pickup. On one of those nights I noticed a few 4×4 posts that still looked solid, so I politely asked the homeowner if I could take them. With a quick trip to the driveway and a little help from my husband, the posts became the starting point for this easy DIY project.
These simple steps show how I turned rough 4x4s into weathered beach buoys that add instant coastal charm to an entryway or porch.
How to go from this … to this …
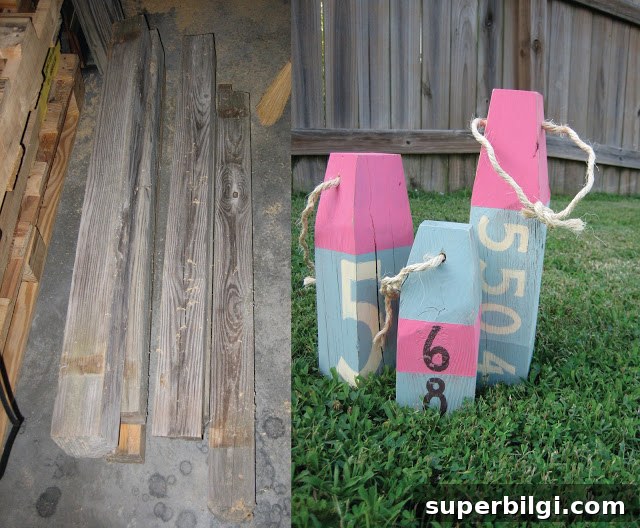
Materials and tools I used:
– Reclaimed 4×4 posts (cut into varying lengths)
– Paint (several colors for a weathered look)
– Sisal rope for hanging
– Drill with a bit sized for the rope
– Miter saw (or circular saw) to angle the tops
– Sandpaper or an electric sander
– Paintbrushes and rags
– Paper and printer for tracing numbers
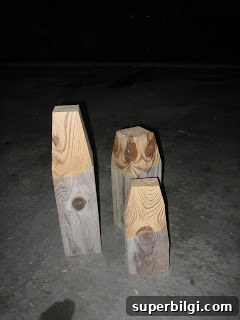
Step 1 — Cut and shape: I cut the 4×4 into several different heights to give the group visual interest. I angled the tops on a miter saw to mimic traditional buoy shapes. If you don’t have a miter saw, a circular saw or even careful hand-sawing will work; just keep the cuts consistent so the pieces sit nicely together.
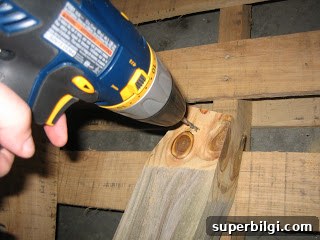
Step 2 — Drill holes: I drilled a hole through the top of each post for threading the rope. Make sure the hole is centered and large enough for the rope to slide through comfortably.
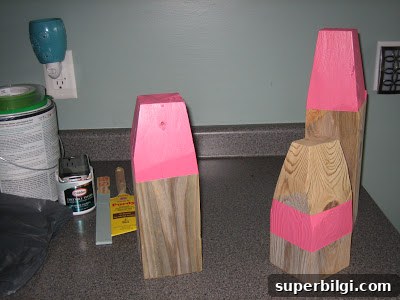
Step 3 — Paint: I painted each buoy in different coastal hues to achieve a charming, weathered look. Use exterior-grade or craft paint depending on where you plan to display them. Apply one or two coats, allowing adequate drying time between layers.
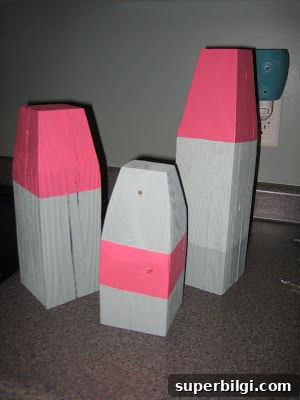
Step 4 — Add numbers and distressing: To create a nautical touch, I printed numbers on paper, traced them onto the buoys, and painted them by hand. After the numbers dried, I sanded the edges and surfaces lightly to distress the paint and reveal hints of the wood beneath—this gives the pieces an authentically weathered appearance.
Step 5 — Finish with rope: I threaded sisal rope through the drilled holes and tied secure knots. Sisal adds texture and a classic maritime feel; you can knot the rope at varying lengths to customize how the buoys hang or sit.
Cost and materials note: I spent about $11 total — most of the cost was for a small can of pink paint and a length of sisal rope. The rest of the paints were leftovers from other projects. Compared to buying similar buoys from a retailer such as Pottery Barn, this was a substantial savings and allowed for custom colors and sizes.
Paint colors I used:
Pink – Hint of Cherry (Valspar)
Light turquoise – Wythe Blue (Benjamin Moore)
Darker turquoise on the large buoy – Stratton Blue (Benjamin Moore)
Yellow – Butter (Restoration Hardware)
Brown – a brown craft paint I had on hand
Tips and variations:
– Vary heights and paint combinations to suit your decor.
– Use exterior sealer if the buoys will be exposed to weather.
– Swap sisal rope for leather or cotton for a different look.
– Distress more heavily with coarse sandpaper if you prefer an older, sun-bleached finish.
What do you think of my homemade buoys? They provide a simple, budget-friendly way to add coastal character to a porch, entry, or gallery wall while repurposing materials that might otherwise go to waste.