This DIY Farmhouse Media Console Table is both a beauty and a beast. It looks stunning with its rustic weathered wood, and it's a powerhouse of storage with two sliding barn doors to hide the clutter and four basket drawers to hold even more!
It's not hard to build at all. Just recruit someone strong to help carry it inside when you're finished. Trust me!
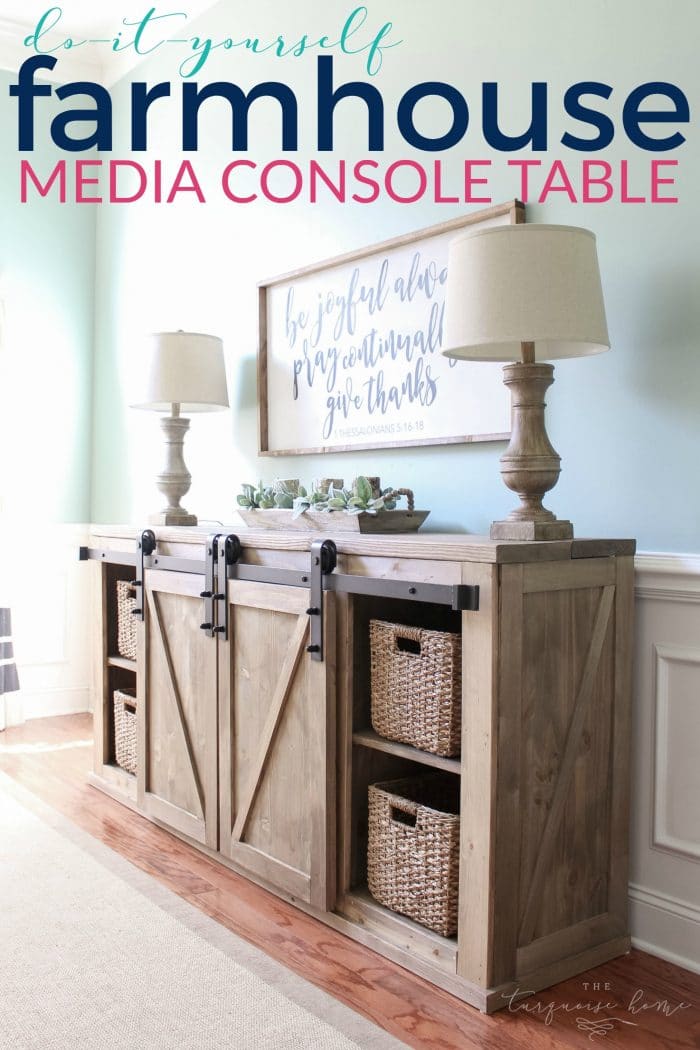
I'm thrilled to share the plans for this DIY farmhouse media console table today. Ever since I showed it before Christmas, I've gotten countless messages and emails asking when I'd post the plans. Well, today is your lucky day!!
This formal dining space in my home has worn many hats since we moved in 6 years ago. It's been a playroom, an office, a craft room, and a dining room about once a year when we host Christmas brunch. I want this square footage to suit my family's needs, which it does, but I also wanted it to look lovely since it's the first room people walk past when they come into our home.
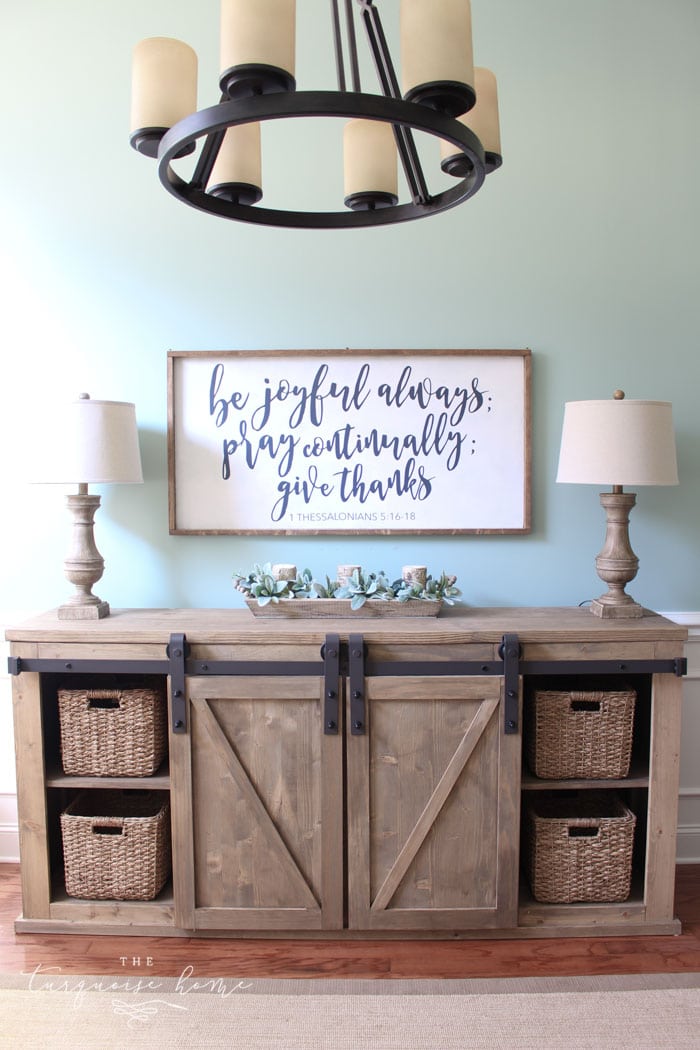
I knew a buffet-style console table would be the perfect piece to anchor the wall and hold whatever our hearts desired. It could hold toys, office supplies, craft supplies, seasonal decor or entertaining pieces. Whatever we decide to store in it, it holds a ton, which I'm so excited about!
I originally found these Grandy Console plans on Ana White’s blog. Since I suffer from analysis paralysis most of the time, it took me 4 years to settle on the exact plans I wanted to build. I also had to modify them to fit the space. I wanted to use a 6.6-foot sliding barn door hardware set, so I knew that would set the table's length. I didn't want it any longer than that, and the original plans called for something closer to 7.5 feet. Whew! That's a big boy.
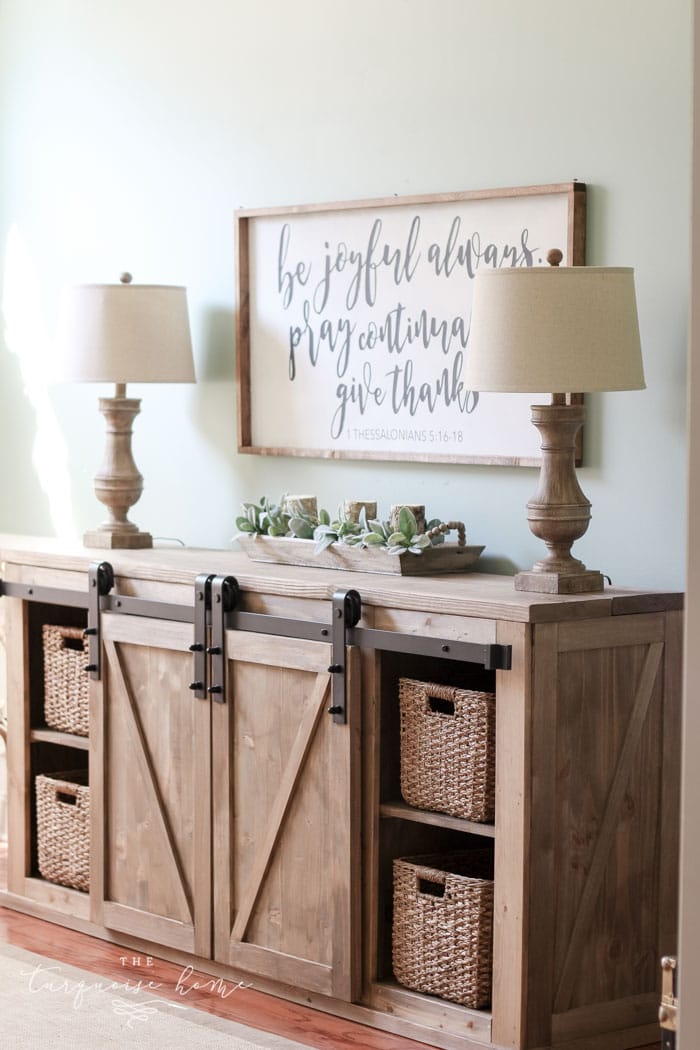
Make sure you choose your sliding barn door hardware before you start the project, because it changes everything. I shortened the specs of the project to fit the hardware, and it fit perfectly.
Okay, let's dive in and I'll share all the details! Please read through everything and let me know in the comments if you still have questions!

What You Need to Build a DIY Farmhouse Media Console Table
Tools:
- Miter Saw – (I recently bought this miter saw, but I used this beginner miter saw for the past 5 years. Either one would be great, depending on your budget.)
- Drill
- Tape Measure
- Level
- Brad Nailer
- Safety Goggles
- Carpenter’s square
- Kreg Jig
- Clamp – (this one is my favorite!)
As you can see, you don't need anything too fancy to build this buffet. The miter saw, drill, brad nailer and Kreg Jig are probably the first tools I'd recommend to anyone starting to build their own furniture. That makes this a great project for newer builders. It's probably not the best first project, but it could be a good fifth one. It may take a while to finish (it took me 2 months, for example), but it isn't hard!
Materials:
- 2 – 2 x 10 @ 8 feet
- 2 – 1 x 8 @ 8 feet
- 2 – 1 x 10 @ 8 feet
- 1 sheet of 1/4″ thick plywood for the back @ 36 inches long
- 3 – 1 x 2 @ 8 feet
- 4 – 1 x 4 @ 8 feet
- 6 – 2 x 3 @ 8 feet (The plans call for this many, but I tried to be clever with my cuts and only needed 5 – 2 x 3’s.)
- 2 project panel pieces @ 17.25″ x 36″ or 18″ x 36″ (I could only find 16″ x 36″, so I improvised to cover the gap, as you’ll see below.)
- 2 – 17-1/4″ x 36″ project panels at 1/2-3/4 inches thick – I couldn’t find this size, so I bought 36″ x 16″ boards, and they worked out with a little tweaking, as you’ll see in the steps below.
- 1 – glued edge panel at 3/4″ x 20″ x 6′ (for the 2 barn doors at 20 x 30.75)
- 2 1/2 inch screws
- 2 inch screws
- 1 1/4 inch finishing nails
- Wood filler (optional)
- 6.6 foot sliding door hardware
- 2 more sliding barn door hangers
- Spade bit
- 4 Baskets – I found these Seagrass Wicker Baskets for under $20, and they're perfect!
- Stain or paint of your choice
Cut List:
These are the measurements I made for my buffet, which ended up 82″ long, 9 inches shorter than the plans called for. I wanted it to match the 6.6 foot sliding door hardware I bought exactly, so I built it to fit that. If your hardware is different, you'll want to adjust for it. I kept the height at 37.5 inches and the depth at 18.75 inches, like the original plans, because some of my materials came in those sizes, which meant less cutting for me! )
Frames:
- 4 – 2 x 3 @ 75″
- 4 – 2 x 3 @ 17″
- 4 – 2 x 3 @ 14″
Face Frame:
- 5 – 1 x 4 @ 36″
- 8 – 1 x 4 @ 16.25
Shelves:
- 2 – 1 x 8 @ 78″
- 2 – 1 x 10 @ 78″
Middle Shelf Supports and Cleats:
- 7 – 1 x 2 @14″
- 5 – 1 x 2 @17″
Shelf Dividers (optional):
- Top Shelf Dividers:
- 2 – 36 x 16 project panels @ 16.75″ x 14.625″
- Bottom Shelf Dividers:
- 2 – 36 x 16 project panels @ 16″ x 14″
Top:
- Cut the 2 – 2 x 10 @ 82″
Doors:
- Cut large project panel into 2 pieces @ 20″ x 30.75″
Back:
- Rip the plywood into 5″ strips at 36″ long. I had the hardware store do this since I needed 16 of them!
**I didn't note the trim pieces I used on the doors and sides, because you can use whatever trim and design you prefer. I used 1/4″ thick pine project boards for all of the trim on the doors and sides.
How to Build a DIY Farmhouse Media Console Table
I'll walk you through every step I took, but the best first move is to download and print the free plans from Ana White’s blog. Then you can come back here and take notes on exactly how I put them into practice.
1. Cut the 2×3 Frame Boards and Assemble the Frame
Cut the 2 x 3 boards for the frame and put it together with screws and wood glue. If you plan to attach the top of the table with pocket holes from underneath, go ahead and add pocket holes to the top of the frame before you assemble it. See step 10 for more clarity on this.
Tip: Make sure these boards are straight when you buy them. I usually lay boards on the floor to check, but I didn't with these. It wasn't the end of the world, but it made my frame a little wonky, as you'll see in step 2.
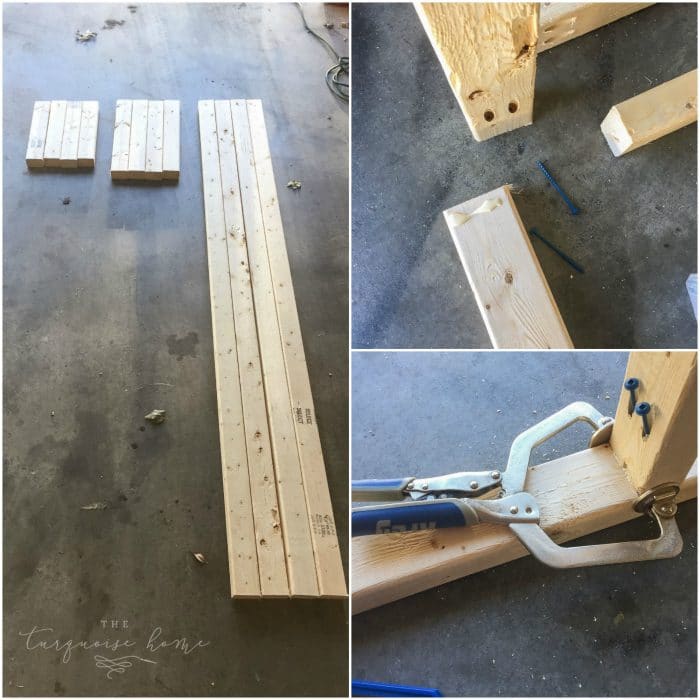
I made my joints with my Kreg Jig, which creates amazingly strong joints, and I wouldn't want to build a piece of furniture without one! I used my clamp to hold the joints down while I screwed them together, using 1-1/2″ pocket holes and 2-1/2″ pocket hole screws. The frame doesn't have to be perfect or pretty, because it will all be covered.
2. Cut the Face Frame Pieces from the 1 x 4 Boards & Assemble the Face
Cut all of the 1 x 4 boards for the face frame and assemble it. You can either lay the frame on its back and attach all of the face frame pieces directly to the front with 1.25″ screws, or assemble the face frame separately first with the Kreg Jig and then attach it to the front.
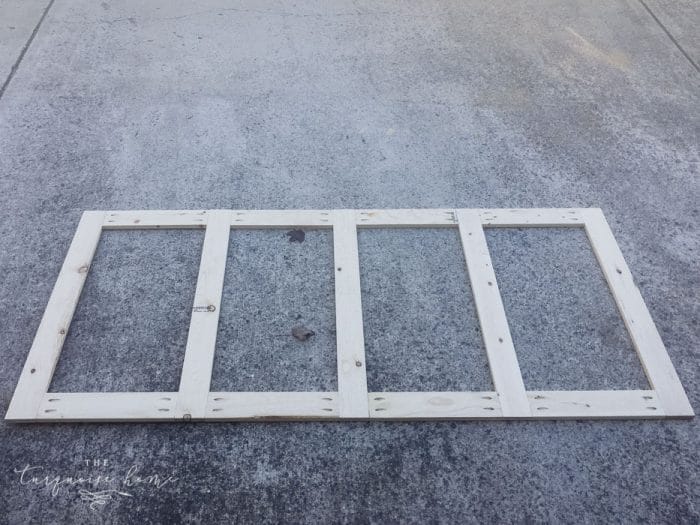
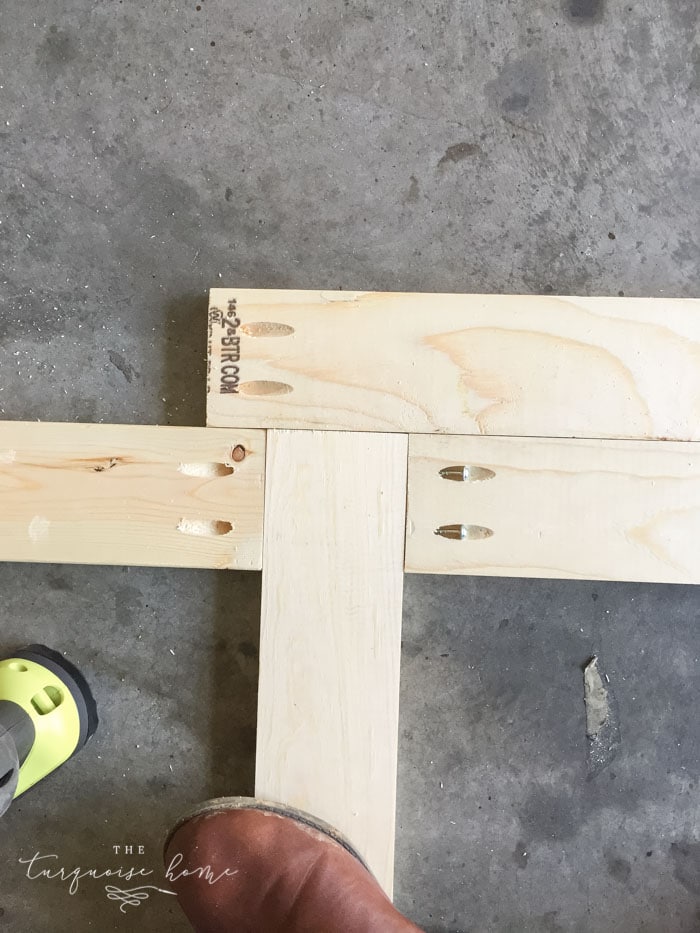
I decided to use my Kreg Jig to assemble the face frame first, then attached it to the frame with wood glue and my nail gun. You can see in the photo below how wonky my frame was. It was straight on the bottom, and this corner was the only one that wasn't, so it ended up being fine. Any more than this and I would have had to take it apart and start over. I just made sure that everything I attached to the frame was straight.
3. Attach the Side Panels to the Frame
Attach the project panels to the sides of the frame with 2″ screws from the inside, or use glue and a nail gun. I decided to use the screws.
My project panels didn't cover the full width of the sides, because the largest panel I could find was a 36″ x 16″ board, and I needed a 36″ x 17.25″ board. I could have cut down plywood, but I decided to cover the gap in the back with some decorative trim. It looks just fine!
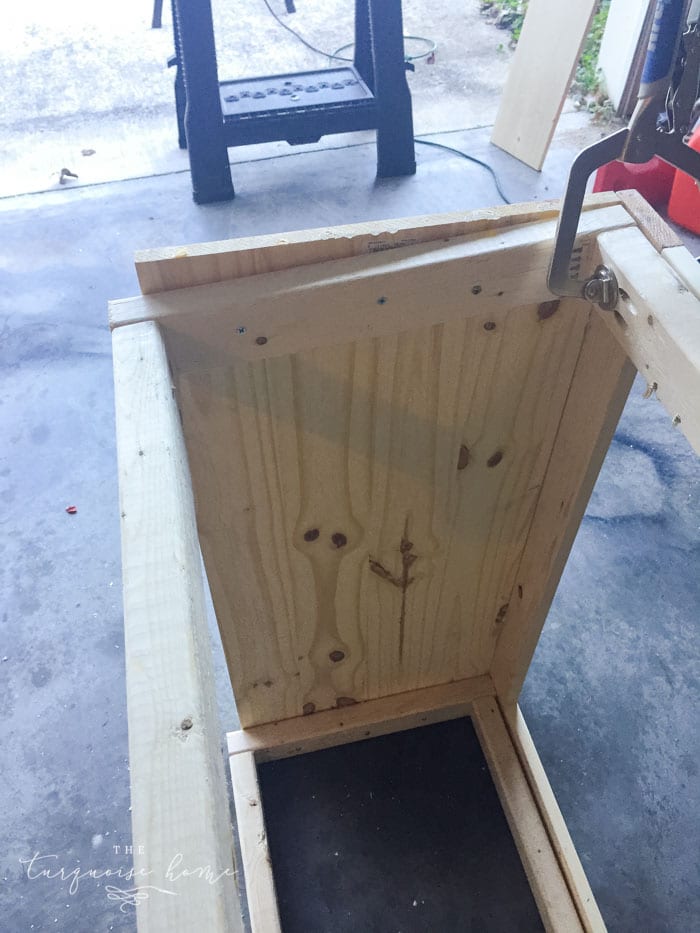
I clamped the face frame to the front after I nailed and glued it, then left it overnight so the glue could dry completely. (The photo above gives you a glimpse of the sides being just an inch or so too short.)
Tip: I used another board to make sure everything sat flush on the frame as I attached it with the Kreg Jig screws.
4. Add the Bottom Shelf
Cut the 1 x 8 and 1 x 10 to the width of the bottom shelf and fit them into the bottom. Nail them into the bottom frame with 1.25″ nails. You can leave a gap in the middle between the two boards, but make sure the back board doesn't overhang the back of the frame.
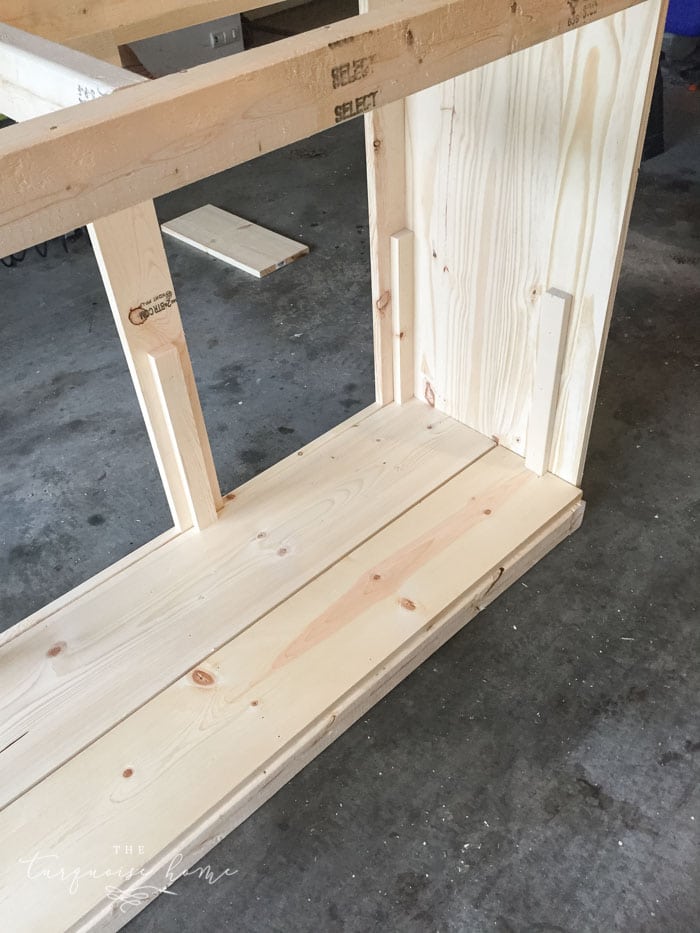
As you can see in the photo above, I left a small gap between the boards and a tiny gap at the back. I didn't want any bigger of a gap in the middle of the boards than that.
5. Attach the Shelf Supports
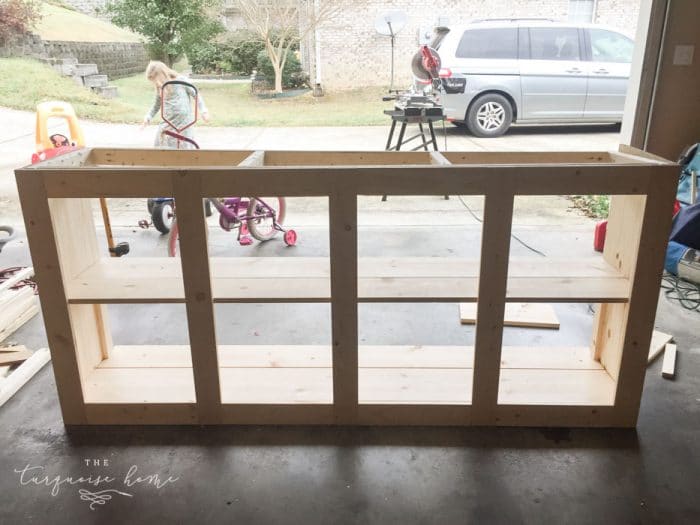
Cut your 1 x 4 Middle Shelf Supports and Cleats boards. The 7 boards at 14″ long will go around the inside of the frame, sitting on top of the bottom shelf. Attach them with 1.25″ nails and glue.
I placed the top shelf boards on top of these supports and marked where they sat, so I'd know where to put the top shelf supports. Definitely follow the instructions in the original Ana White plans for this, because I didn't take pictures of all these steps. I simply followed her steps.
6. Assemble the Top Shelf
Assemble the top shelf and add the shelf cleats (5 – 1 x 4 boards cut to 17″ long) to the underside of the shelf boards with 1.25″ nails and glue, leaving a small gap between the shelf boards if needed.
7. Attach the Top Shelf
Set the top shelf in place and nail it into position from the outside.
8. Apply Stain
At this point I stopped and stained everything that was already assembled. I stained anything I added after this before attaching it to the table. I'll talk about the stain I used at the end of the post.
9. Attach the Shelf Dividers
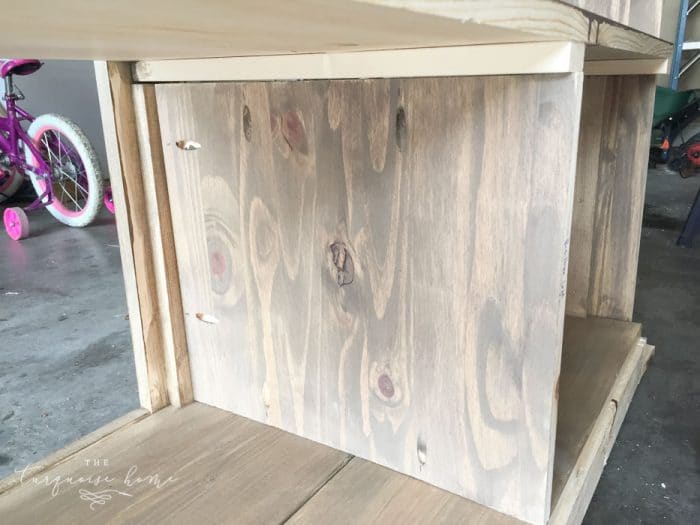
Attach the shelf dividers between the left and right sections.
This is where I added something of my own to the original plans. I have a 3-year-old who is notorious for getting into everything, so I realized there would be no way to keep her out of the part of the table behind the doors. Unless I figure out a way to lock them, she can simply slide them open.
But I am going to be able to lock them, and I didn't want her reaching her hand around through the opening next to it to get at things. I also didn't think it looked very neat to have the shelves open all the way through.
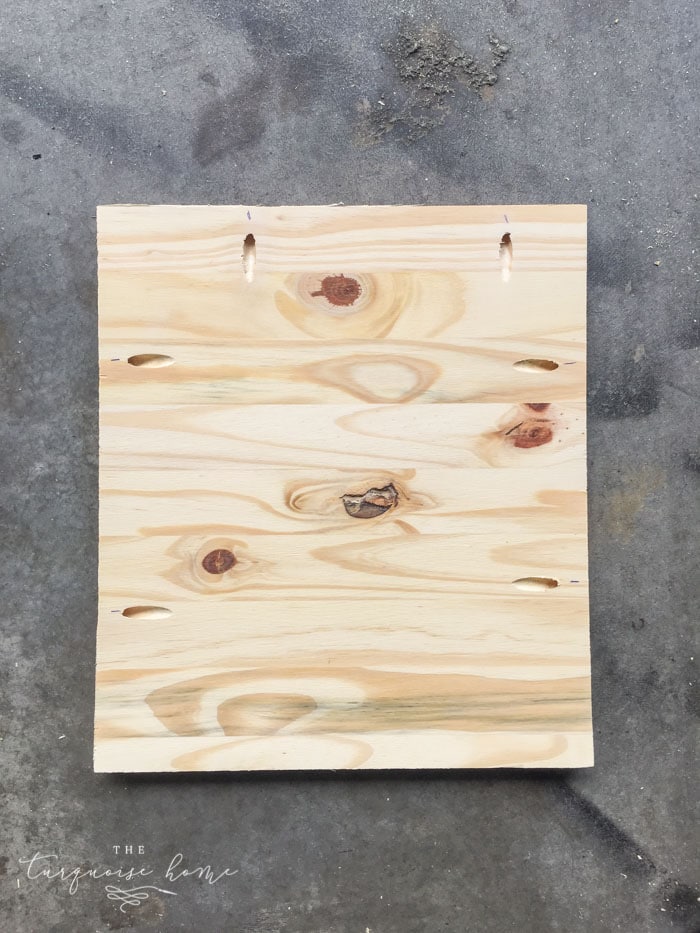
So! All that said, I added some dividers, just to the left and right sides, not in the middle. I cut down some 16″ x 36″ project panels to the specs in the cut list. I added pocket holes to the sides where they touched the shelves or the frame. I stained it before installing, just to keep things easy!
10. Attach the Back Pieces
Attach the plywood strips to the back of the table with 3/4″ – 1 1/4″ nails to get the planked look. You can use a full sheet of plywood if you'd rather skip the trouble of ripping it.
11. Add Bottom Trim Pieces
Trim the bottom of the console with 1 x 2 boards using mitered corners. Sorry I didn't take pictures of this step, but it's really just measuring your cabinet and cutting the boards to size. Attach with 1.25″ nails and glue.
12. Attach the Top of the Table to the Frame
Cut the two 2 x 10 boards at 82 inches each. Stain them first if you want the easy route! Then attach them to the top of the table frame, overlapping on the sides and front but flush with the back.
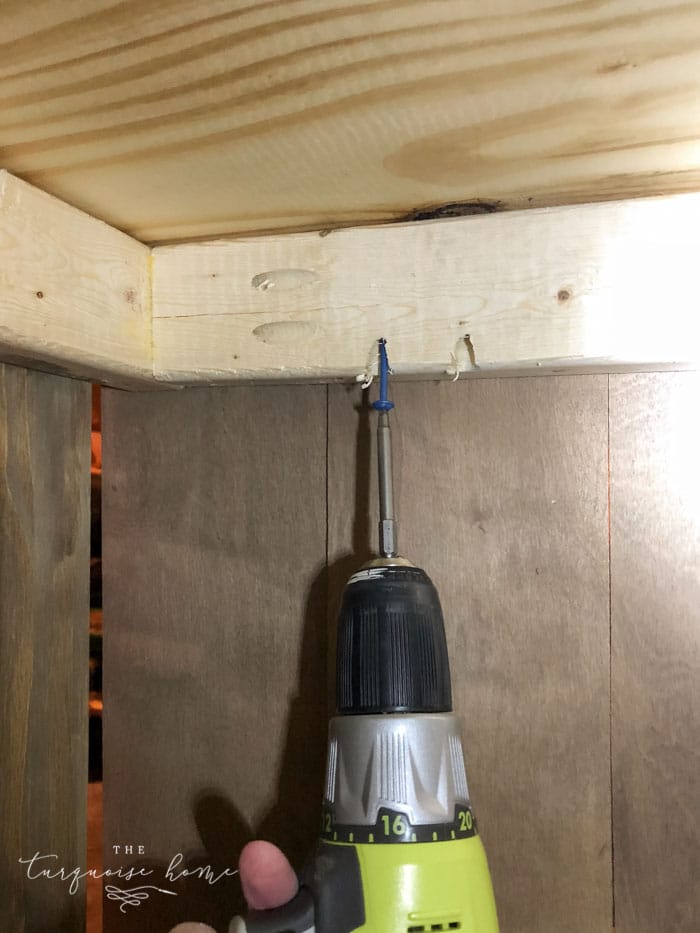
If you have a Kreg Jig, you hopefully followed my instructions in step 1 to add pocket holes to the underside of the top of the frame before assembling it all. This makes attaching the top a breeze and keeps the screw holes out of sight. Just screw them in from below with 2 1/2″ pocket screws.
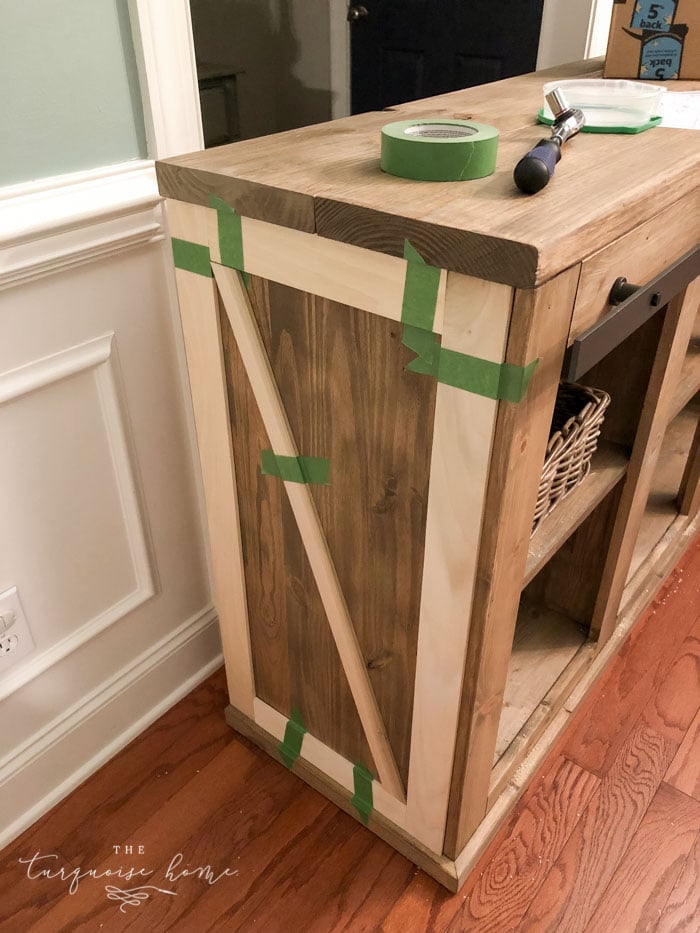
13. Add the Decorative Trim to the Sides
Adding the decorative trim to the sides is optional. For me it wasn't optional, though, because my side panels weren't wide enough, so I needed the trim to cover the gap!
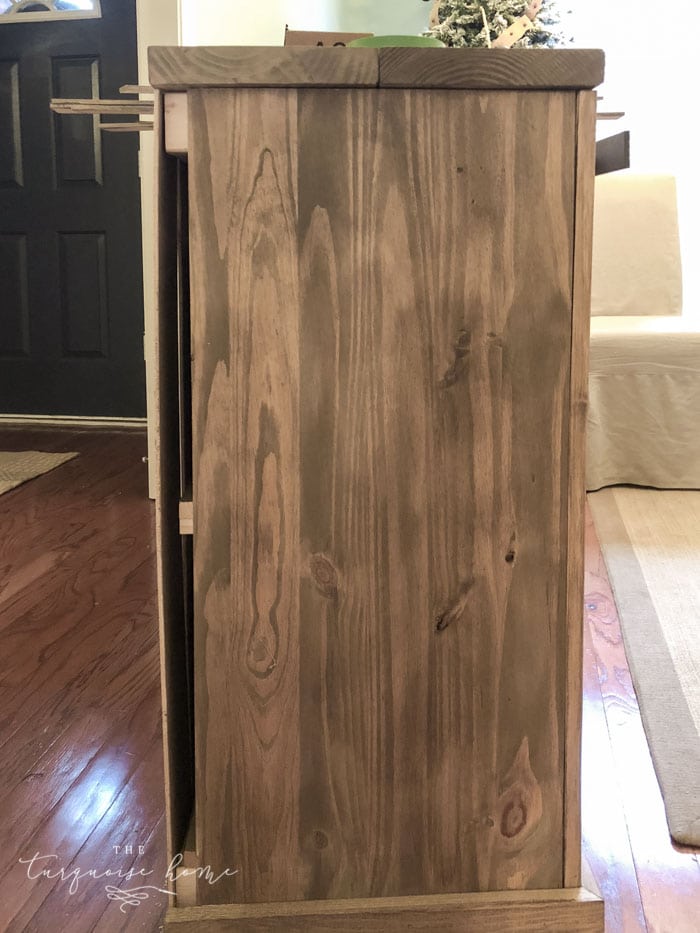
Even if you don't have a gap, I think it looks good and ties the cabinet in with the doors, if you choose the same trim style. Use wood glue and nails to attach it.
14. Build the Sliding Barn Doors
I used the glued edge panel at 20″ x 6′ and 3/4″ thick for my doors. I cut them down to 30 3/4″ long and 20″ wide, then added decorative trim with pine project boards.
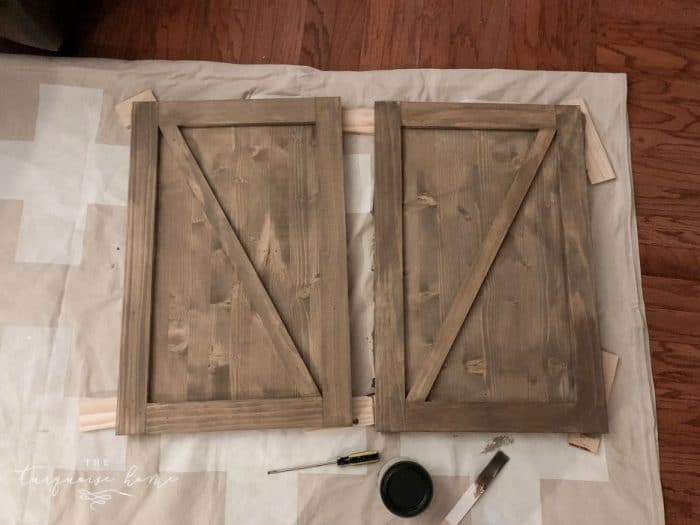
Stain them before you assemble them. (I'll talk about the stain I used, which I love, in a minute.)
15. Attach the Barn Door Rail to the Front of the Table
Follow the directions that come with the sliding barn door hardware. This particular hardware set on this console table doesn't leave much room for error. It has to go in a precise spot so the door doesn't rub the bottom of the table and the hardware doesn't sit above the top of the table.
Once you find the perfect spot for the hardware, use your level to make sure it's level. I made the mistake of measuring in the garage and not realizing the floor wasn't level. So when I brought the table into the house, the hardware wasn't level. Just make sure your cabinet is sitting on a level surface before you try to install the sliding door bar.
16. Attach the Hardware to the Doors
I used a spade bit to drill the holes in the doors for the hardware.
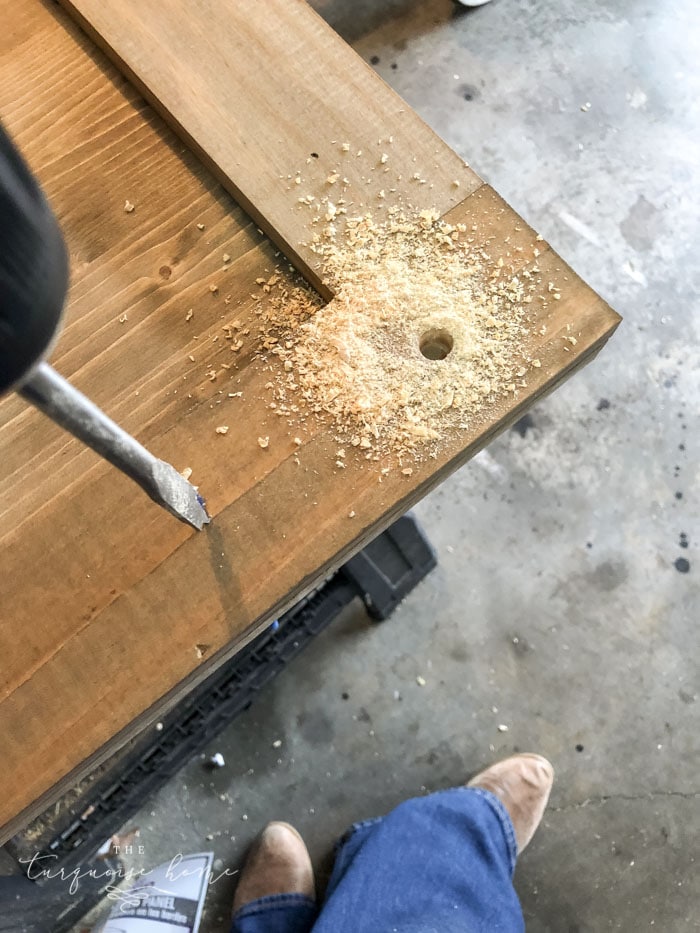
You're done! Obviously, you'll hang the doors on the hardware. Just follow the instructions that come with the hardware and you'll be fine.
Stain for the DIY Farmhouse Media Console Table
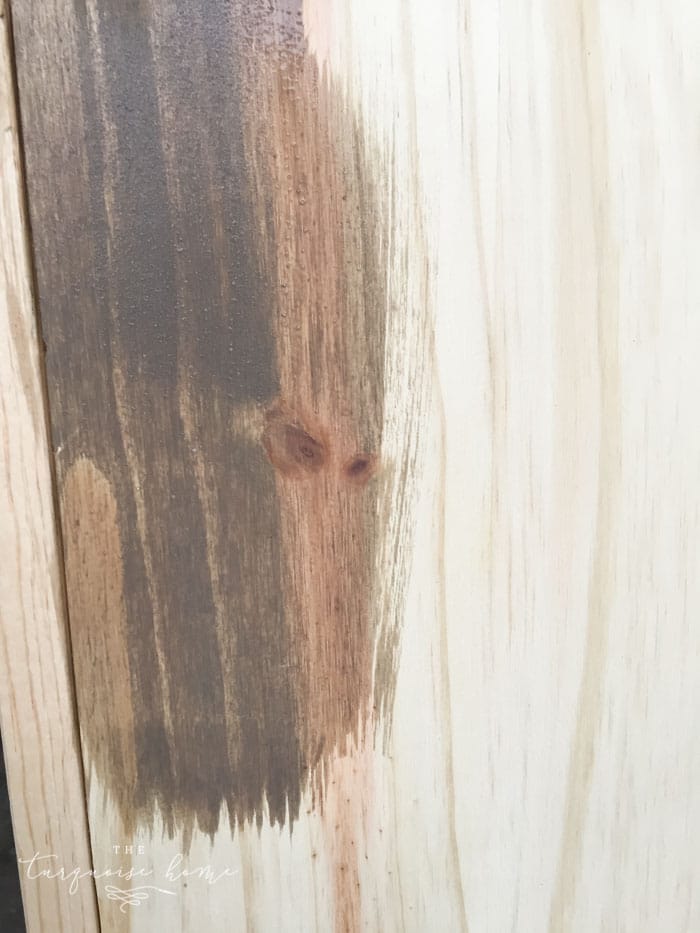
I've already gotten so many questions about the stain color I used for this project. It's actually a new-to-me product that I bought specifically for this build! It's a no-VOC stain that is water-based, and I fell in love with the color. Then, when I used it, I fell in love all over again!
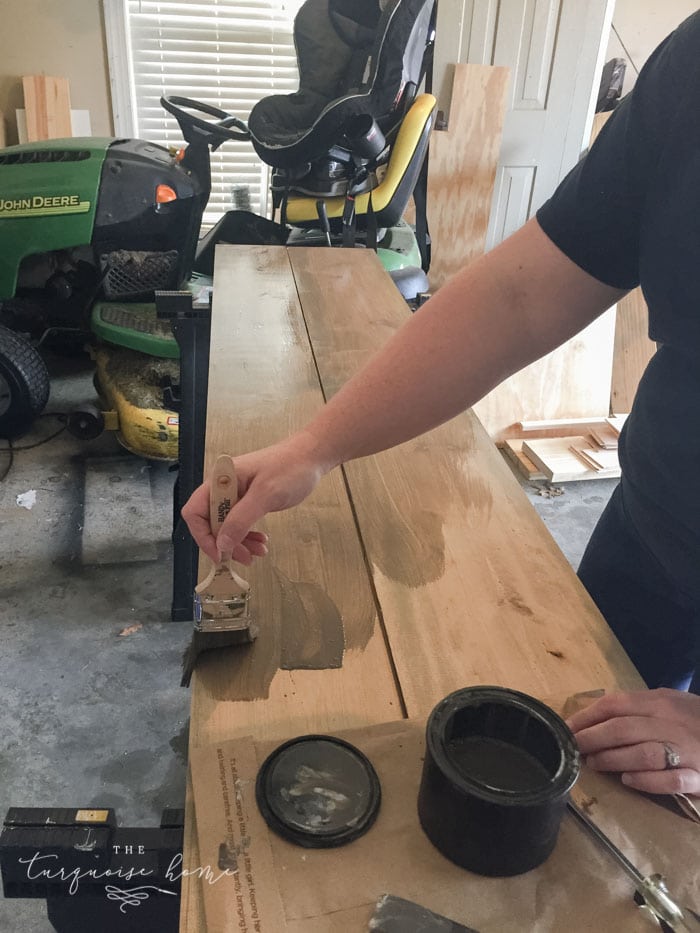
Please excuse the very dirty lawnmower and the extra car seat on top in the background. LOL
It's called Weathered Stain from Old Barn Milk Paint. I love that it's odorless, which means it doesn't give me a headache and can be used indoors. And I love that it's water-based, so it cleans up with just warm soapy water. Yay!!
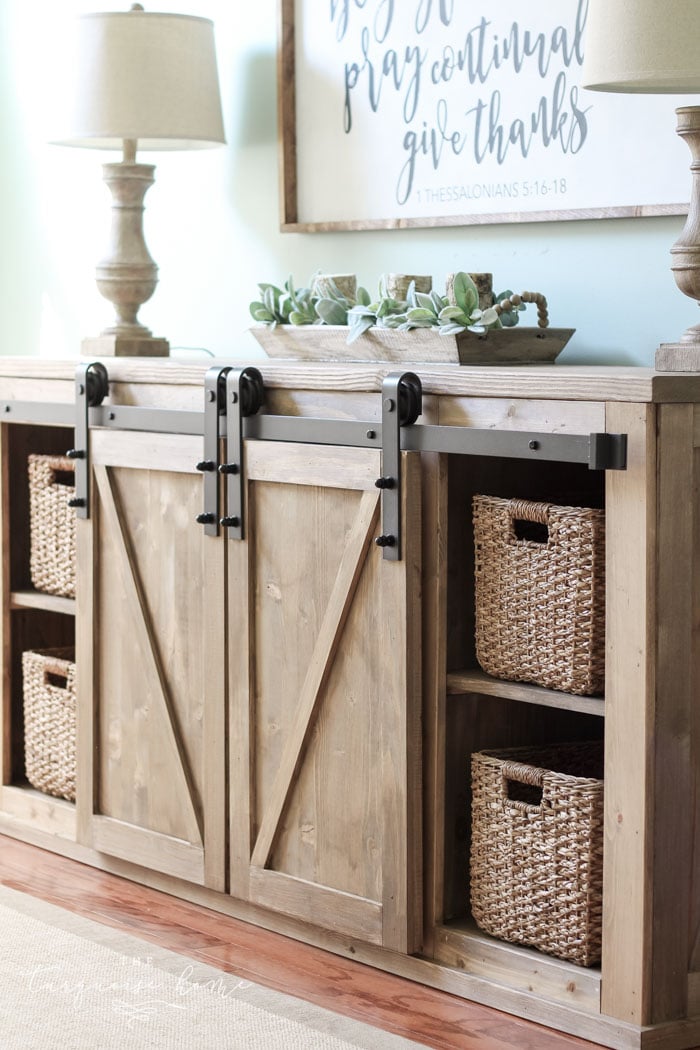
It goes on somewhere between a regular stain and a paint. Some of the boards didn't want to accept the stain as well as others, so it sat on top and I just wiped it off after a minute or so. But some boards soaked it right up and there was no need to wipe it off. Just know that it's not like regular stain, where you always wipe it off. If this stain dries at all, it looked bad when you wiped it.
It took almost 2 cans of stain.
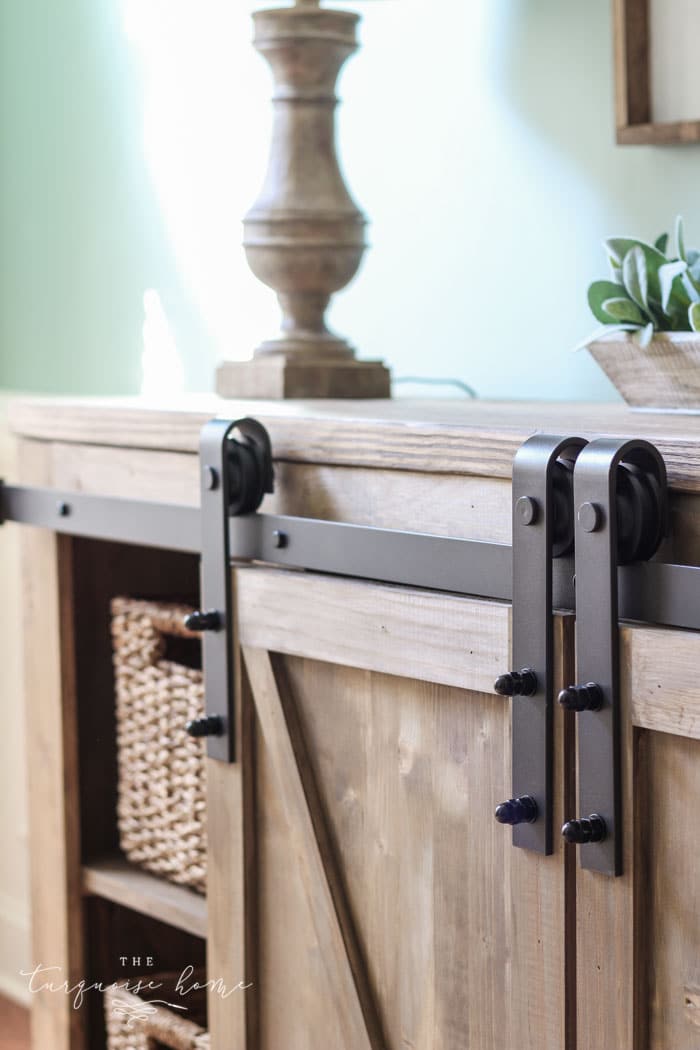
I really, really like it! I will say, though, that it's made by a small business owner, so sometimes it takes a while to ship, which means you need to plan your projects in advance if you want to use it! But I love that we're supporting a small business like ours.
The stain also says it's a top coat and stain all in one. I still plan to seal mine with clear wax, because I like the way that finish feels. It doesn't feel quite finished yet, but I haven't done that step.
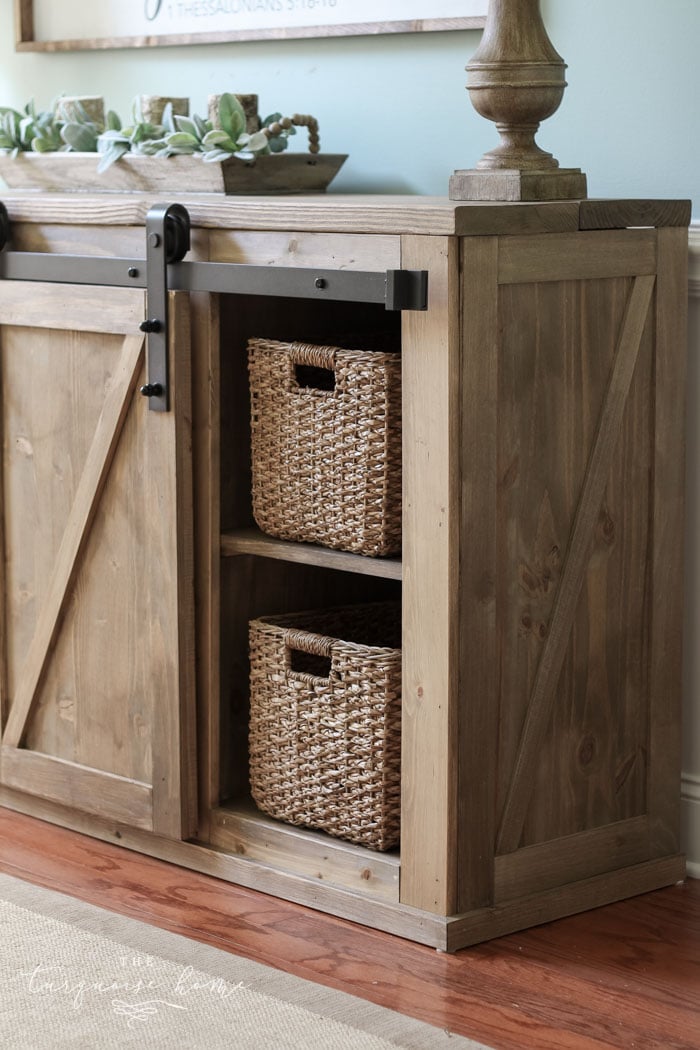
After searching high and low for baskets that would fit these cubbies, I found the Seagrass Wicker Baskets at Target for under $20! They're perfect, and I am thrilled!!
I hope this tutorial helps you create your very own DIY Farmhouse Media Console Table. If you have any questions, just let me know in the comments below!
More Posts You Will Love: