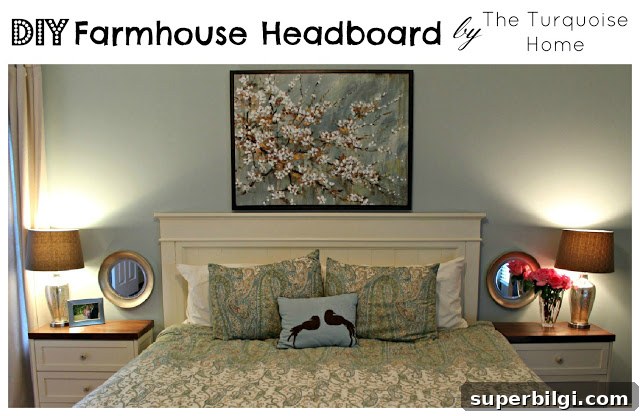
I used the Ana White farmhouse bed tutorial to build the headboard for our new king bed!
I shared my new master bed headboard on Wednesday, and I’m still so happy with how it turned out. This project may be my favorite so far — simple materials transformed into a classic farmhouse focal point for our bedroom.
The headboard follows Ana White’s “Mom’s Fancy Farmhouse Bed” design. Her plans cover the entire bed, but I only needed the headboard. Because her plans are for a queen and we have a king, I made a few straightforward adjustments — mainly widening the panel by adding extra planks and then building the frame and trim from there. The result keeps the original farmhouse feel while fitting our larger mattress perfectly.
Shopping List
Here’s everything I purchased for the build. Quantities and lengths worked for my king-size headboard; adjust as needed for other sizes.
- 4 — 1×6 boards, 8 feet long
- 2 — 1×2 boards, 8 feet long
- 2 — 2×6 boards (stud or 8-foot length)
- 1 — 2×4 board (stud or 8-foot length)
- 1 — 1×3 board, 8 feet long
- 1 — 1×3 board, ~24″ long (I bought a 36″ piece and trimmed it)
- 2 1/2″ wood screws
- 1 1/4″ finish nails for a nail gun
- 1 — 8′ stick of chair rail for the top molding
- 3 — 8′ sticks of base cap molding for the inside panel trim and the top tier on the headboard
Tools I Used
- Miter saw
- Nail gun
- Electric sander
- Electric drill
- Carpenter’s square
Cut List
My cut list for this headboard was:
- 12 — 1×6 @ 24″ (panel boards)
- 1 — 1×3 @ 24″ (middle panel board)
- 2 — 1×2 @ 21″ (side trim for panel)
- 2 — 1×2 @ 69″ (top/bottom panel trim)
- 1 — 2×6 @ 69″ (base of panel)
- 2 — 2×4 @ 48″ (legs)
- 1 — 1×3 @ 78″ (top of headboard)
- Cut molding to fit your bed exactly
I began by cutting all the panel boards and sanding the edges. Taking the time to sand the visible edges gives each board a more distinct plank look, which is key to achieving that authentic farmhouse aesthetic.
To ensure the panel stayed square while I attached the trim, I used a carpenter’s square. At one point I discovered I needed an additional 1×3 for the center panel, so I made a quick trip back to the hardware store. The middle strip ties the two sides together visually and keeps the proportions balanced now that the panel is wider for a king bed.
You can see the 1×3 center piece in the photo. I kept six wider panels on each side of that center strip, so the balance and rhythm of the planks remain pleasing to the eye. The gentle sanding on the edges really helps each board read as an individual plank — it adds depth and character.
After nailing the frame and trim in place, I filled nail and screw holes with wood putty for a smooth finish. For priming I use Zinsser Cover Stain Primer — it’s my go-to because it adheres well and hides knots and stains. Since it’s oil-based, I use inexpensive brushes and toss them afterward to avoid dealing with paint thinner and clean-up hassle. Make sure to prime in a well-ventilated space, like the garage.
Once the primer was dry, I applied two coats of Antique White from Sherwin-Williams — the same color I used on the bedside tables, so the bedroom palette feels unified. I had leftover paint from those pieces, which made the finishing step easy and economical.
There’s a real thrill in turning a pile of lumber into something beautiful and functional for your home. This headboard project was rewarding from start to finish — a practical weekend build that makes a big visual impact.
More posts you might enjoy:
- 10 More Essential Tools for a Beginner DIYer
- DIY Frame for a Frame TV
- 12 Gorgeous DIY Faux Fireplace Ideas