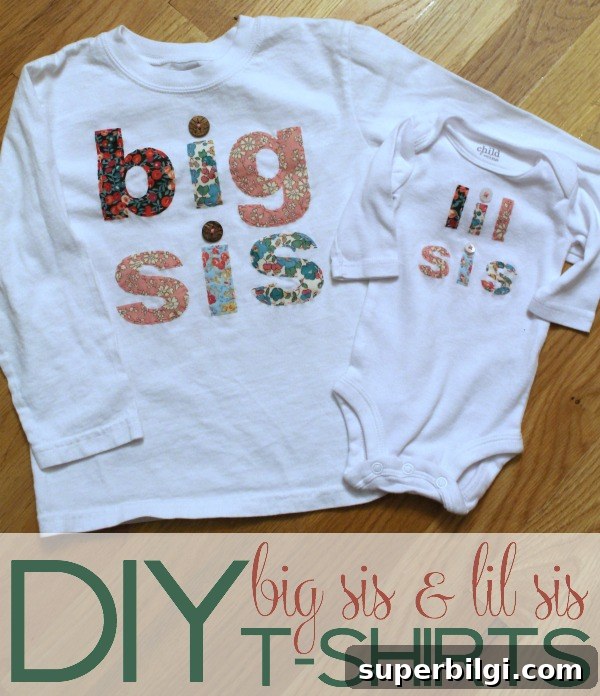
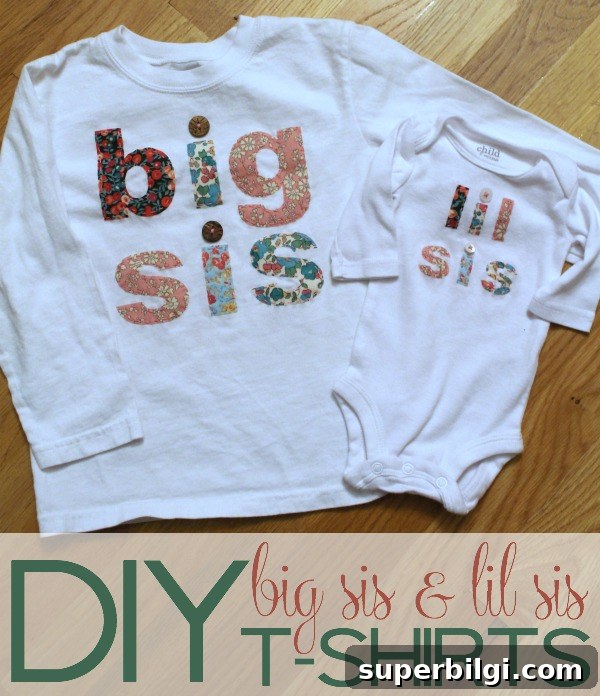
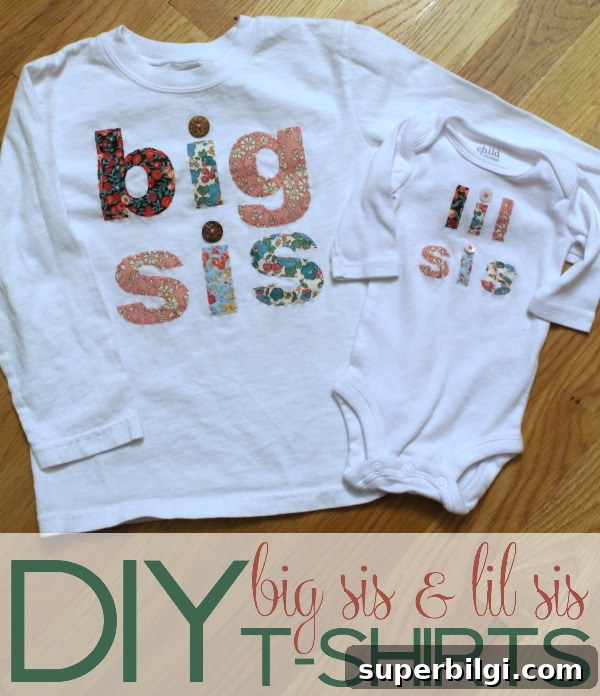
This sweet big sister and “lil” sister matching t-shirt set is a perfect gift for any child welcoming a new baby sister.
I’m a big fan of my Silhouette CAMEO—it saves time and makes crafting so much easier. It’s helped me cut dozens of shapes in minutes and lets me create polished, custom projects that look professional even when I don’t have hours to craft. For these sibling shirts, the machine was the ideal tool to cut precise fabric letters quickly.
Rather than buying a ready-made set, I decided to make matching shirts for my girls so they’d have something special to wear when they finally meet each other. The result was a sentimental, handmade set that cost far less than a purchased alternative and allowed me to reuse fabric with meaning.
DIY Big Sis and Lil Sis T-shirts Tutorial
These appliqué-style shirts use fabric letters cut on a Silhouette machine and attached with sewable fusible interfacing, then finished with a quick hand stitch around each letter. The steps below walk you through preparing materials, cutting, arranging, and finishing the letters for a charming sibling set.
Materials: plain t-shirt and onesie, coordinating quilting cottons or scrap fabric, sewable fabric interfacing, fabric blade for your cutting machine, needle and thread or sewing machine, small buttons for embellishment, ruler and iron.
Step 1: Wash and iron your fabrics
Prewash and dry the t-shirt, onesie, and all fabric scraps you plan to use. This prevents later shrinking or color transfer. Once washed, press each fabric piece so it lies flat for accurate cutting and easy application.
Step 2: Iron all fabrics for easier handling
A smooth, wrinkle-free surface makes cutting and aligning letters much simpler. Iron both the fabric pieces and the garment before you begin placing letters.
Step 3: Create your design in the Silhouette Studio software
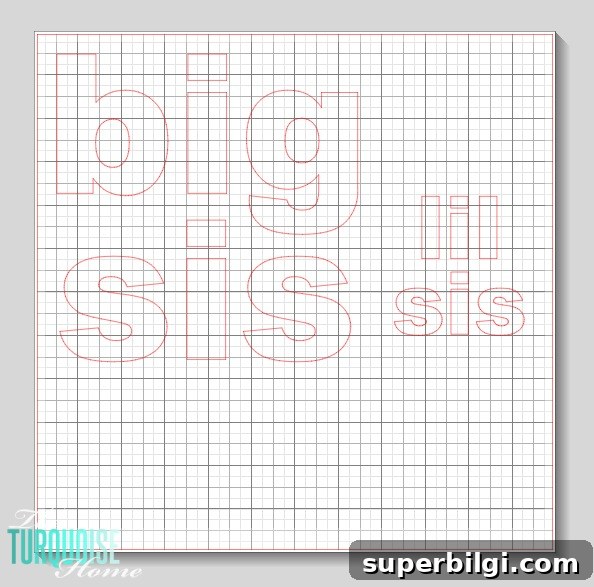
Measure the chest area of each garment so you know how large your lettering should be. I chose a bold block font (Arial Black) for clear, easy-to-cut letters. Type out the words exactly as you want them to appear—“BIG SIS” and “lil sis” or your preferred capitalization—and size them to fit the shirts.
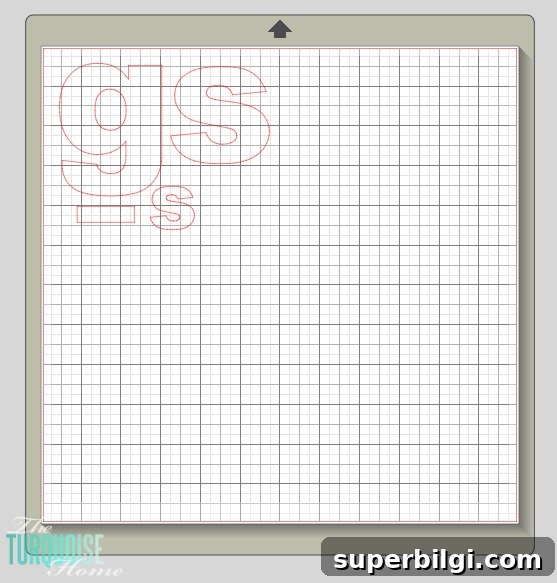
Step 4: Group letters by fabric and prepare to cut
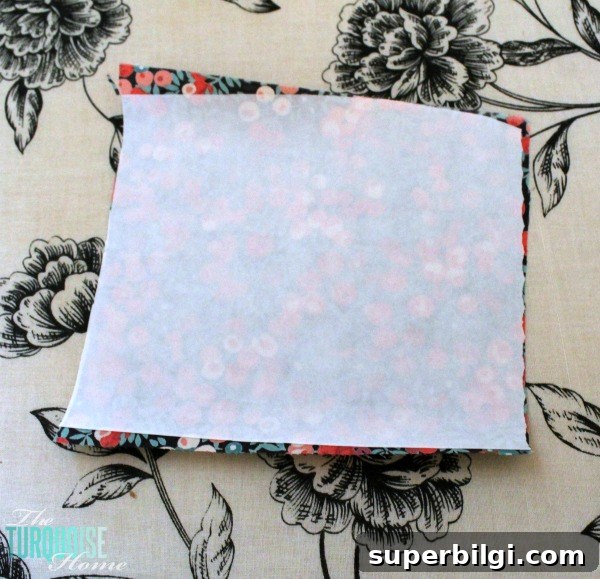
Decide which letters will use each fabric pattern and arrange them in your design file so the machine cuts only the letters that share the same fabric at one time. This saves fabric and speeds up the cutting process.
Step 5: Cut out the fabric
Cut fabric squares slightly larger than the letters you plan to cut. Iron a piece of sewable fabric interfacing to the back of each square—this stabilizes the fabric for cutting, prevents fraying, and helps the letters adhere temporarily to the garment while you sew them in place.
Use a dedicated fabric blade for your Silhouette or cutting machine to keep edges clean and the blade sharp. Replace or reserve this blade for fabric only to extend its life and maintain clean cuts.
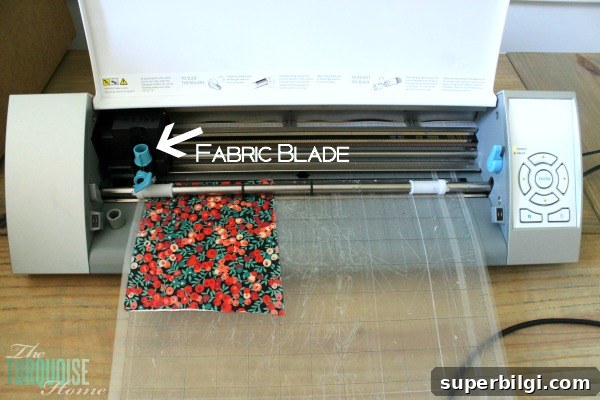
Step 6: Arrange letters on the shirt
Lay out the letters on each garment and use a ruler to align and center them. Take a moment to adjust spacing and placement so the final look is balanced. Once you’re happy with the layout, the interfacing will help keep the letters in place for the next step.
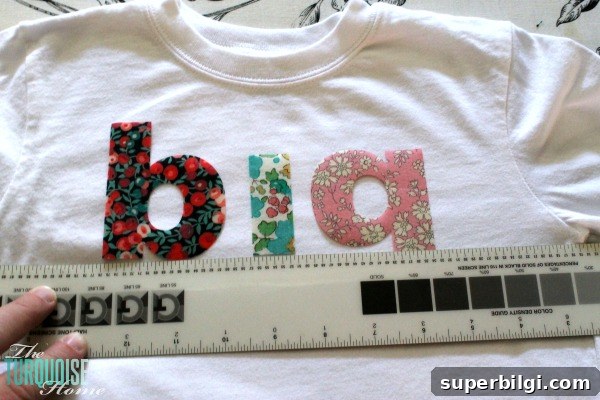
Step 7: Iron the letters down and finish
Follow the interfacing manufacturer’s instructions to fuse each letter to the garment with a hot iron. The interfacing will hold pieces securely while you stitch. I prefer a simple hand-stitched embroidery border around each letter for a homemade look, and I sewed a small button over each “i” for added texture and charm. You can also use a sewing machine for a faster, more durable finish.
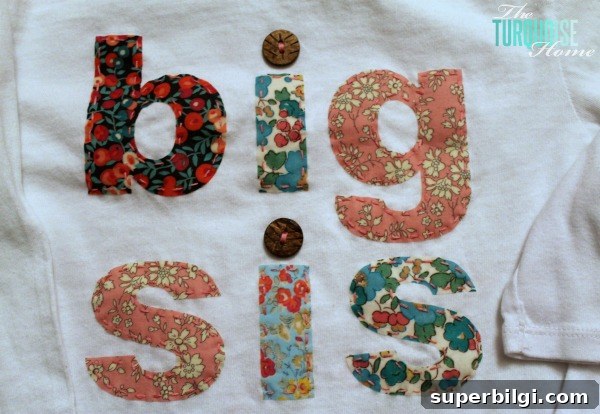
Dress your little models and enjoy the moment—matching shirts make a great photo op and a meaningful keepsake. I used fabrics I bought on a trip to New York a couple of years ago, so these shirts carry a little family history as well as sentimental value. Small buttons from my stash provided the finishing touches; heart or themed buttons would be a lovely alternative.
I’m so glad I made these instead of buying them. They were inexpensive, personal, and simple to complete—one more project checked off the list. If you enjoy using a Silhouette, try experimenting with different fonts, fabric combinations, and finishing stitches to create unique sibling shirts that celebrate your growing family.
Silhouette Inspiration
If you’re looking for more ideas, explore other Silhouette projects and tutorials for similar fabric appliqué and vinyl projects to expand your handmade wardrobe and home décor creations.